Building a Bass Boat

Shannon

New member
tauruck wrote:
Funny, a member here caught a wobbly when I quoted R22,000 to do the same to the hull he wanted changed.


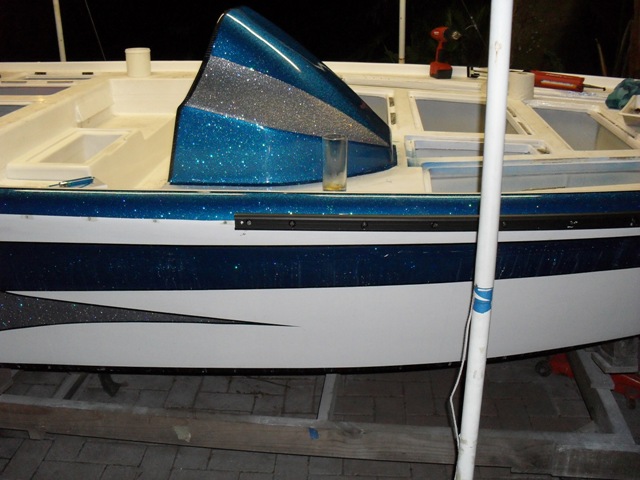
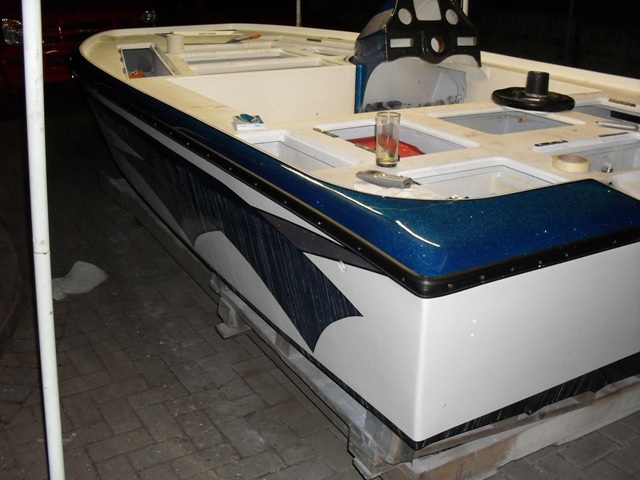
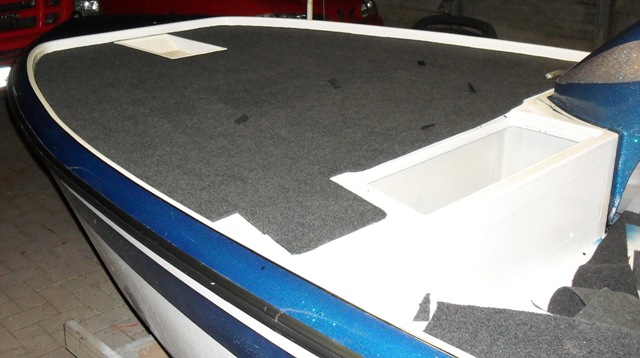
To do a proper gutting and full re-decking of a speedboat to bass boat conversion would cost that much to do it by yourself, nevermind getting someone to do it for you. It took me 3 months to build the hull, it's taken the rest of the time to do the deck.

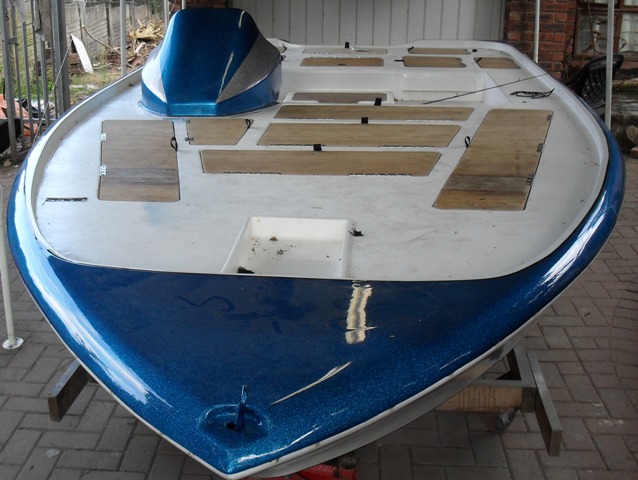
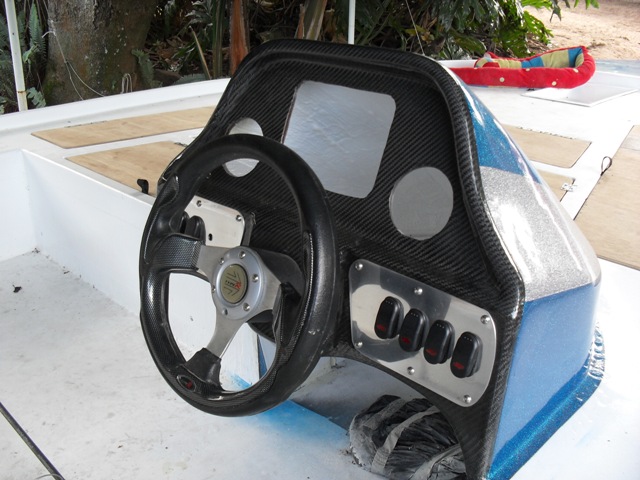
A lot of guys think it's just a case of cutting a few sheets of ply and dropping them in the hull, the problem is that a speedboats console is just way too far forward for a proper conversion, it leaves you with a funny little deck upfront that can't take rod hatches, so the whole top deck, console and all has to come out.

To be honest I would rather build a new mould for a brand new boat than to do that much work on 1 conversion.
 

Shannon

New member
OK I admit I've been a bit lazy lately, 2 months worth of sanding and painting took it out of me and the family, so I took a few days off, went away to see my folks 2 weeks ago and then this last weekend started getting back to it.

Started by getting my hatch hinges cut out, drilled and placement fitting done. I've had to do a bit more hatch shaping on my rod hatches as they didn't fit nicely. It's pretty difficult to get the fitting right because I have to take into account the thickness of the carpets that will be folding over all of the edges, we'll find out how accurate I was when they get carpets.
Also had to coat the hatches with resin as they were still raw wood. Still have to do another coating to cover up my sanded areas and then I'll paint them and then carpet them.

Test fitting hatches

PH16_4_084c.jpg


Temp fitting of the switch panels and steering to see how they look (the steering is just shoved in the hole, I still need to get the steering kit)
PH16_4_082c.jpg


Fitting rubrails 1st part
PH16_4_091c.jpg


Second part fitted
PH16_4_092c.jpg


Rubrail insert fitted
PH16_4_093c.jpg


PH16_4_095c.jpg


PH16_4_096c.jpg
 

Shannon

New member
OK update time
Spent the whole of Sunday wiring things up, I've still got to tidy things up a bit, but it all works perfectly, no shorts, no funny things happening.

Switch panel with livewell timer control installed, I've still got to figure out how to label the switches nicely without having a big fat ugly sticker under each switch. Switches from the left are, Livewell Aerator, Livewell Filler Manual, Livewell Filler Auto, Livewell Filler timer adjustment.
On the right (not shown) from the right, Bilge pump, Nav Lights, Sonar power, Spare.

PH16_4_097c.jpg


I made up a little panel to mount the fuse box and negative pole onto, mounting pads secure it to the console. 4 Stainless screws hold it onto the mounting pads (thought it might be an idea to make it easily removable incase I ever need to work on it)

PH16_4_104c.jpg


Bow light and Bow Eye installed
PH16_4_105c.jpg


Stern Light Mounting

PH16_4_107c.jpg


Stern Light fitted in mounting
PH16_4_108c.jpg


Bilge Pump outlet
PH16_4_109c.jpg


Also installed Stern Eyes and then forgot to clean off the excess silicone from around all the thru hull fittings
icon_redface.gif

So guess who's going to be spending a full day trying clean it off without damaging my paint
icon_help.gif
 

Enigma

Moderator
Absolutely awesome

Spent many sleepless night imagining a build of my own but Hey I don't have the time and patience you have.

This is a thing of beauty built with passion and vision.

I bet you're already dreaming of the Lunkers coming aboard

Absolutely inspiring Shannon
 

Shannon

New member
Hey Guys thanks for the nice comments. Building something like this has given me great satisfaction, although there are a few things I would do differently if I did it again, I'm pretty happy at how it has turned out so far. It's nice to see that others also like it. Glad it's not one of those - "Only your momma could love you kinda things"::S
 

Riaandl

Sealiner
Shannon - the only thing I can say is STUNNING!!!!
And I have to agree with Enigma you have a lot of patience.
 

Shannon

New member
Decided that I need a third seat for my small size deckhands, I only had the 2 main seats made for me when I ordered them, so I thought that I've managed to build every single thing on this boat except the seats, so I might as well have a shot at the seat too.

Cut out some Ply to shape, sealed it up with resin, cut some high density foam to size and covered it with marine grade vinyl. As much as I was tempted to start getting fancy with colors, I decided against it as my sewing would probably look like a road map for the Rockies :?
The seat back needed to fold flat so that I can access my cooler box underneath, so I made up a set of hinges using 1 1/2" Stainless angle iron, got the first set wrong but got it right the second time.

Not too shabby for a first attempt :D

PH16_4_111c.jpg


With the other seats in place to get a perspective, bear in mind nothing is fitted yet so there are still gaps where there shouldn't be.
PH16_4_116c.jpg


I made the seat pretty wide, here's the reason.
PH16_4_114c.jpg
 

Shannon

New member
Finally started getting some paint on my hatch lids, just primer for now. Some of them are only painted on 1 side as I have to wait for some epoxy to cure properly on the other side, but it's getting there. ::S

PH16_4_122c.jpg


PH16_4_118c.jpg
 

Shannon

New member
Update:
Can't believe how long it takes to carpet a boat
icon_eek.gif

After 12 hours at it I'm beat, so the finished pics will have to wait a few days, but for now here's a teazer
icon_biggrin.gif


PH16_4_128c.jpg
 
Top