
[align=left]Apologies for those that have seen this on other sites, just thought the tigerfish (and salty) fly fishermen on here could use this:
[/align][align=center]Synthetic Clouser Minnow
[/align]
On my tiger fish trip the conditions dictated that the fish were sitting deep and so the clousers that I used were quite heavily weighted in order to get the flies deep in strong currents and keep them there as long as possible. I have used Lead dumbell eyes and 20 gauge copper wire. The wire I prefer is the permanent colour wire rather than the painted wire which will not last as long in a tiger’s mouth. Here is an example of the wire that I use, which I found in a bead shop and they usually stock a bunch of different colours:
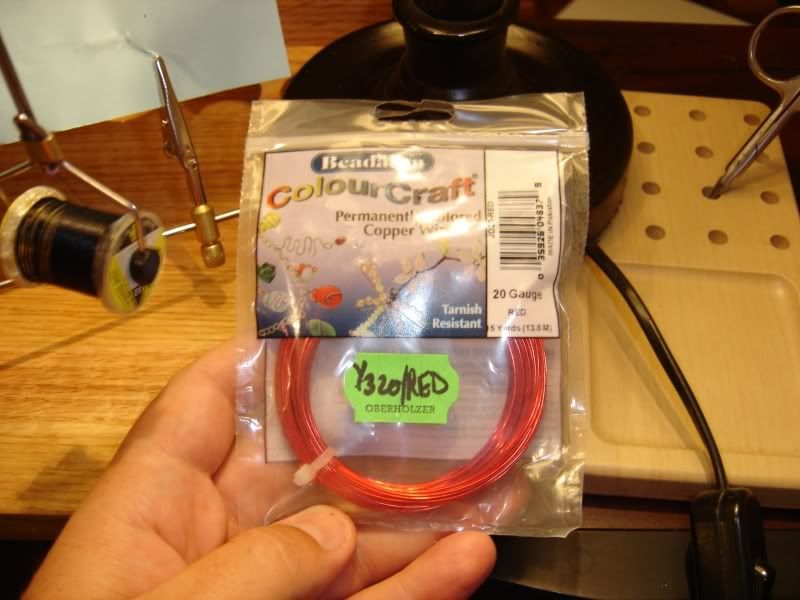
The colours I use here are just for illustration – experiment with colour combinations and take a variety with you to try.
I have tied this pattern with 3 colours in the wing but most times i only use 2. SF Flash Blend is nice for these, but I like the effect of Deadly Dazzle even more, and they can be used nicely together too.
The fire tiger is another that looks really nicely, incorporating Chartreuse, Orange and Yellow in the wing.
Materials
Hook - #4/0 Gamakatsu S12S
Thread – Black 6/0
Eye – Large Painted Lead dumbell – Pearl
Body – 20 Guage permanent coloured wire - Red
Under Wing – SF Flash Blend – Shaded Chartreuse
Mid Wing – SF Flash Blend – Wild Olive
Top Wing – SF Flash Blend – Mullet Brown
Markings – Brown ProMarker or similar permanent marker
Step 1
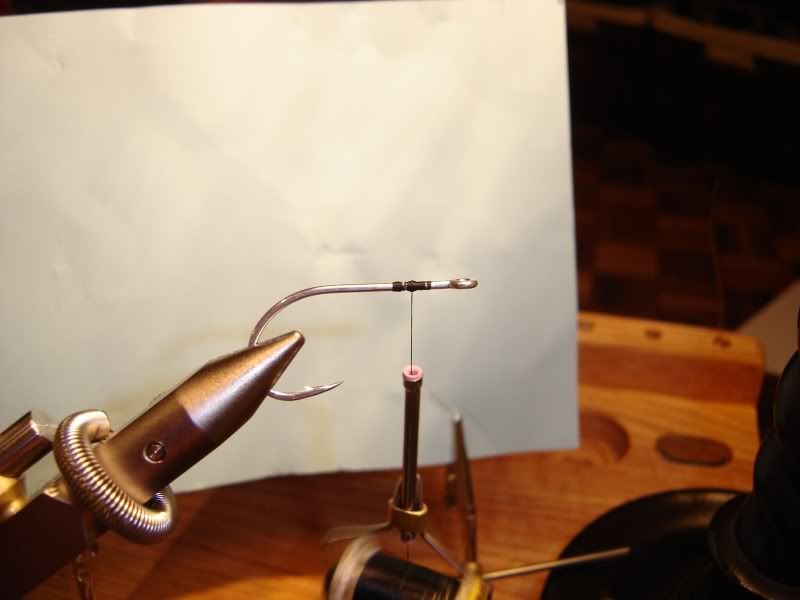
Place hook in vice and tie thread on. Make two small bumps in thread. These will be used to keep the dumbell eye in place when you tie it on.
Step 2
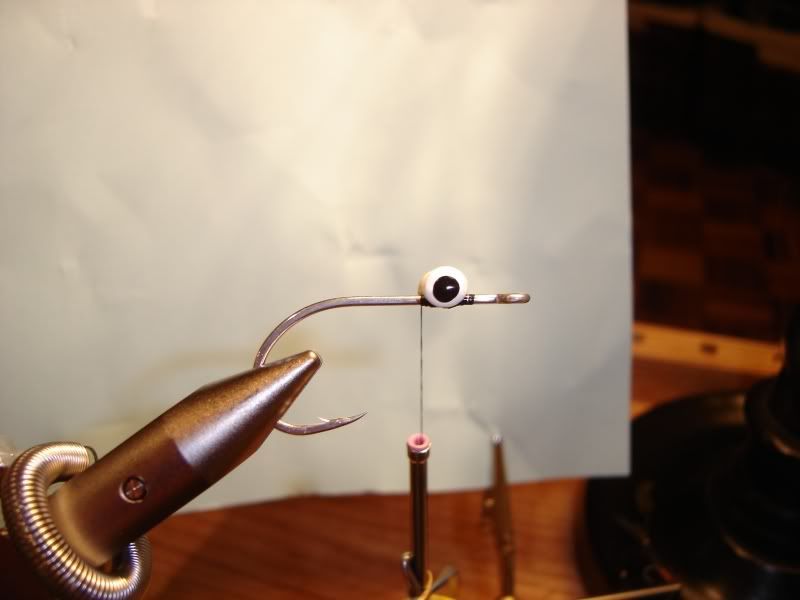
Tie in the dumbell between the two bumps of thread. Secure the dumbell with more thread wraps. I also add a bit of superglue at this point to prevent the eyes from twisting after a few fish.
Step 3
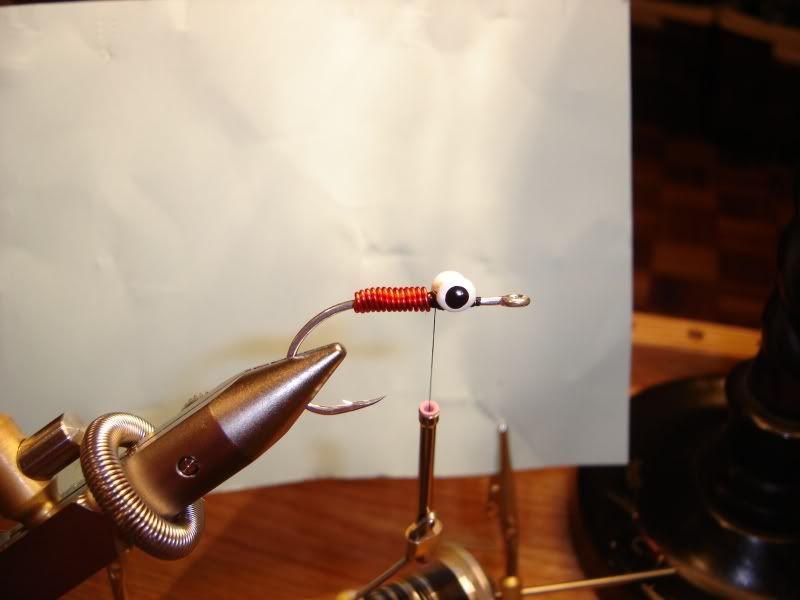
Tie in the copper wire along the body
Step 4
Get some SF Flash blend about half as thick as you would like the body to be
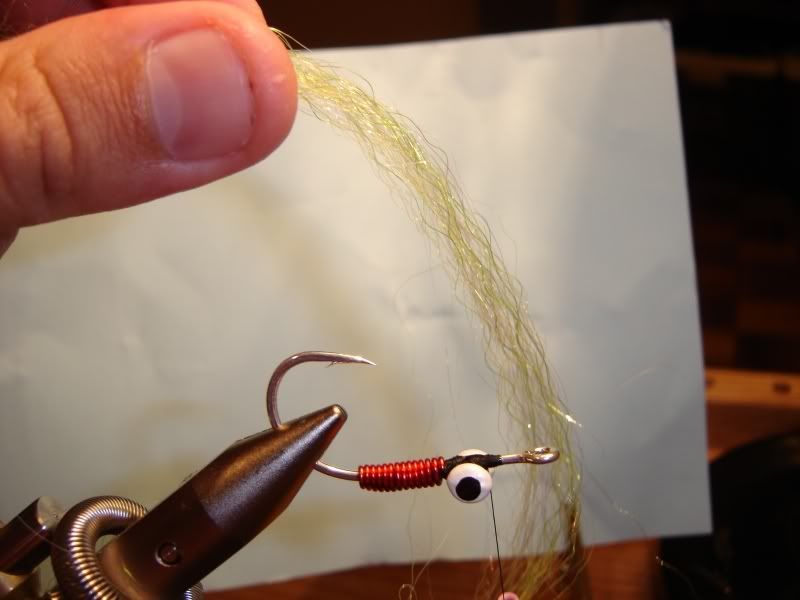
Step 5
Wrap the SF Flash Bend around the back of the thread and then catch it behind the eye of the dumbell. The thread is now caught between the doubled up strands of SF Flash blend.
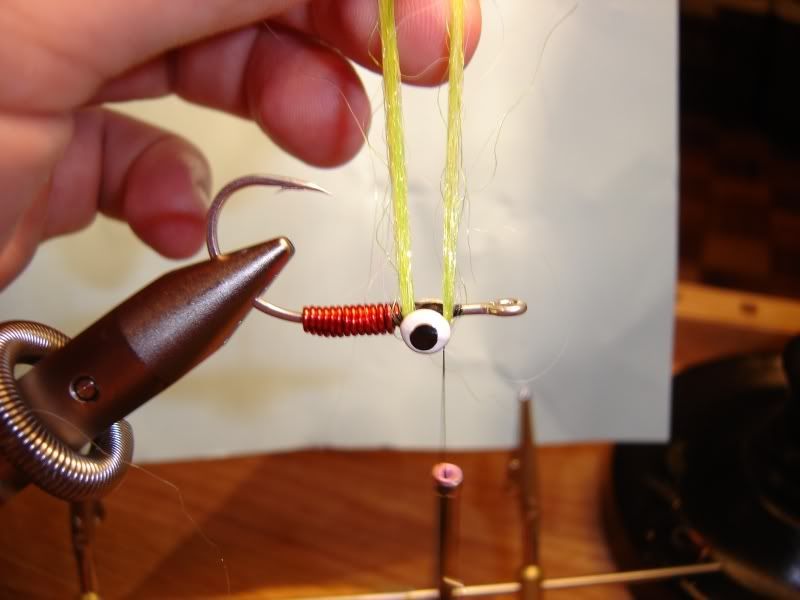
Step 6
Pull the strands of SF Flesh blend off the eye using the thread and wrap it down on top of the shank
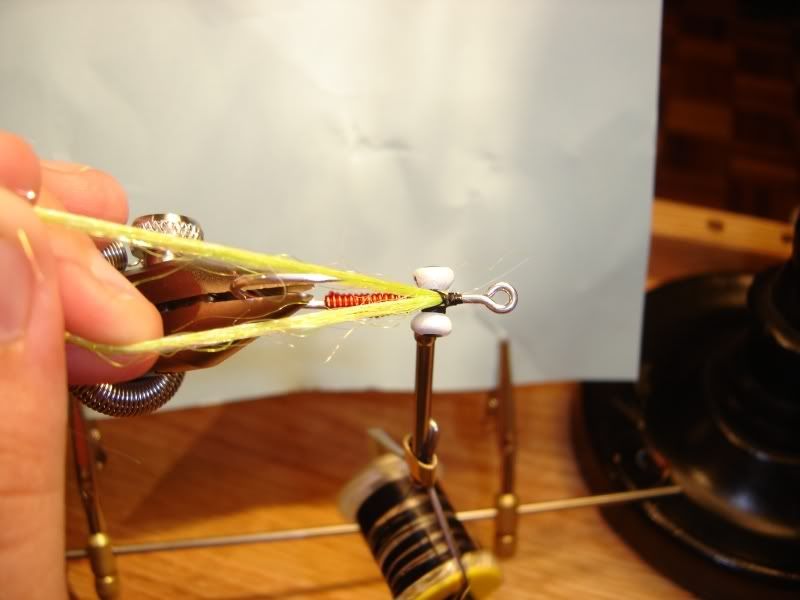
Step 7
Do the same thing with the next colour of SF Flash blend. The picture below shows the thread between the SF Flash Blend
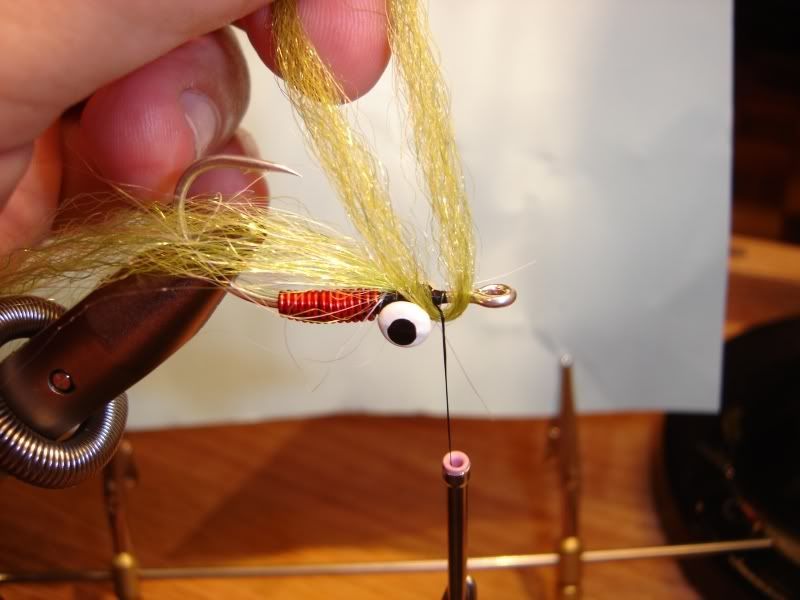
And this is it tied in:
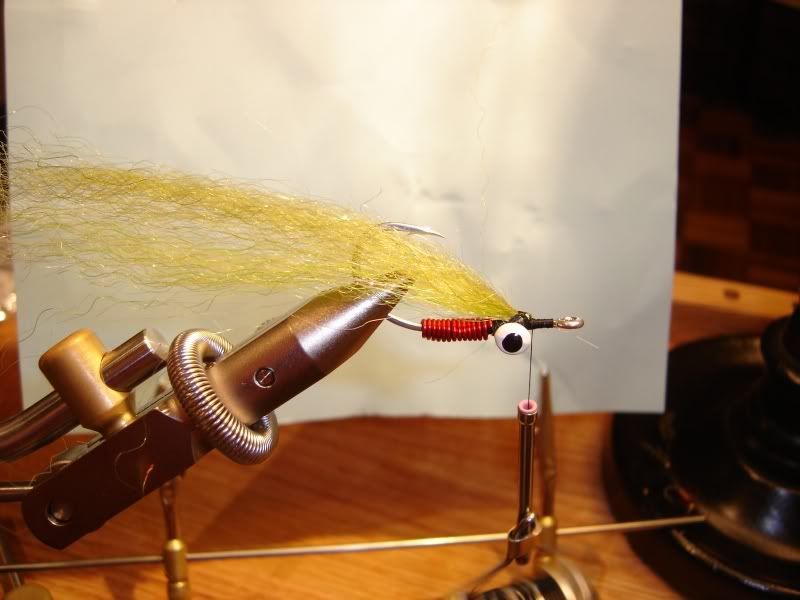
Step 8
Repeat the steps for the Overwing
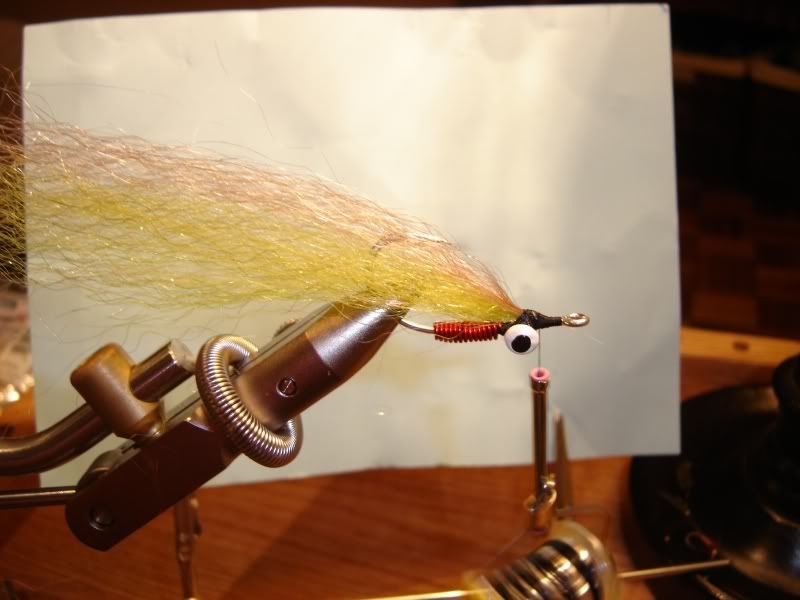
Step 9
Form a nice head, tie off and cut the thread, then varnish and allow to dry.
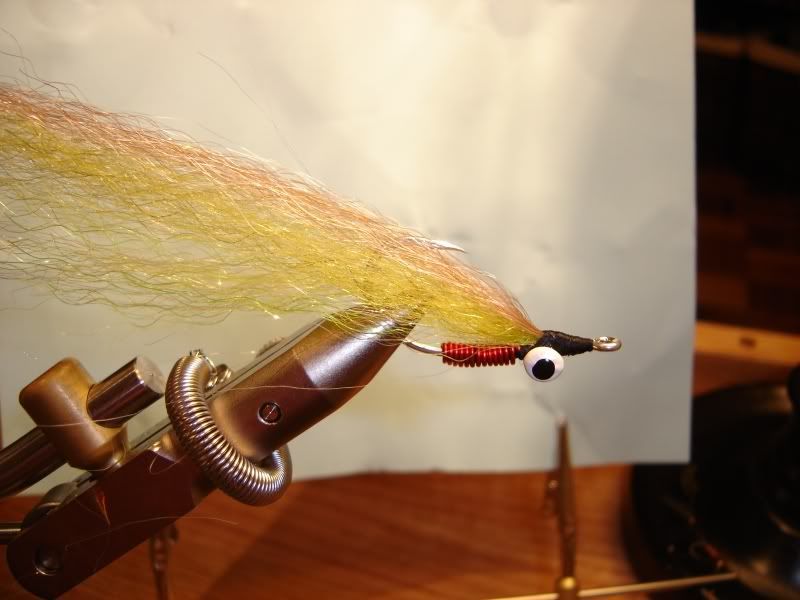
Step 10
Trim the wing to the desired length. I like my tiger clousers to be quite short.
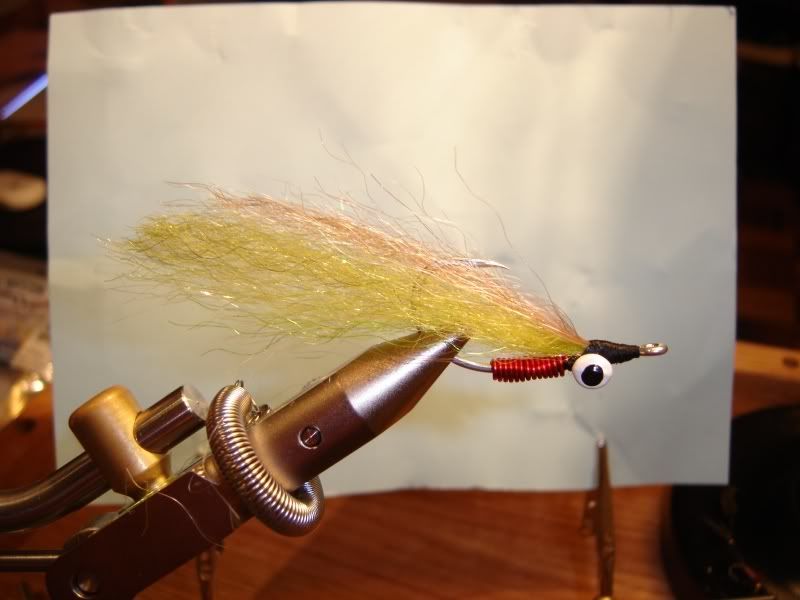
Step 11
Use a permanent marker to make some bands down each side of the SF Flash Blend
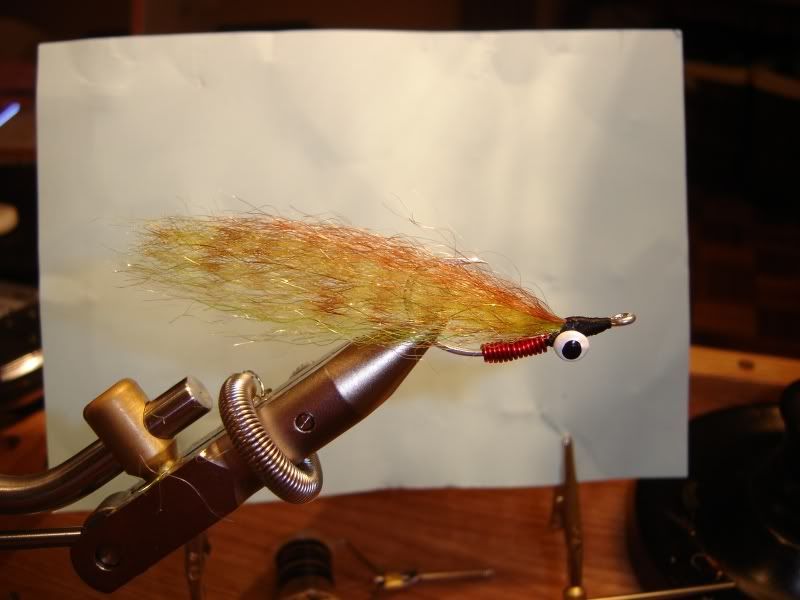
Step 12
Run the fly under hot tap water for about a minute. The hot water will bend the synthetic material permanently into a nicely tapered body.
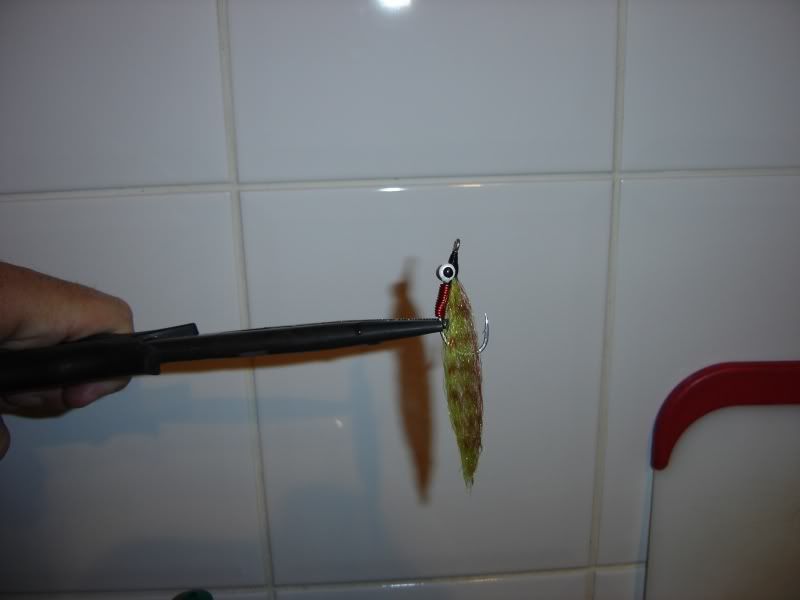
That’s It! Now go fish!
[/align][align=center]Synthetic Clouser Minnow
[/align]
On my tiger fish trip the conditions dictated that the fish were sitting deep and so the clousers that I used were quite heavily weighted in order to get the flies deep in strong currents and keep them there as long as possible. I have used Lead dumbell eyes and 20 gauge copper wire. The wire I prefer is the permanent colour wire rather than the painted wire which will not last as long in a tiger’s mouth. Here is an example of the wire that I use, which I found in a bead shop and they usually stock a bunch of different colours:
The colours I use here are just for illustration – experiment with colour combinations and take a variety with you to try.
I have tied this pattern with 3 colours in the wing but most times i only use 2. SF Flash Blend is nice for these, but I like the effect of Deadly Dazzle even more, and they can be used nicely together too.
The fire tiger is another that looks really nicely, incorporating Chartreuse, Orange and Yellow in the wing.
Materials
Hook - #4/0 Gamakatsu S12S
Thread – Black 6/0
Eye – Large Painted Lead dumbell – Pearl
Body – 20 Guage permanent coloured wire - Red
Under Wing – SF Flash Blend – Shaded Chartreuse
Mid Wing – SF Flash Blend – Wild Olive
Top Wing – SF Flash Blend – Mullet Brown
Markings – Brown ProMarker or similar permanent marker
Step 1
Place hook in vice and tie thread on. Make two small bumps in thread. These will be used to keep the dumbell eye in place when you tie it on.
Step 2
Tie in the dumbell between the two bumps of thread. Secure the dumbell with more thread wraps. I also add a bit of superglue at this point to prevent the eyes from twisting after a few fish.
Step 3
Tie in the copper wire along the body
Step 4
Get some SF Flash blend about half as thick as you would like the body to be
Step 5
Wrap the SF Flash Bend around the back of the thread and then catch it behind the eye of the dumbell. The thread is now caught between the doubled up strands of SF Flash blend.
Step 6
Pull the strands of SF Flesh blend off the eye using the thread and wrap it down on top of the shank
Step 7
Do the same thing with the next colour of SF Flash blend. The picture below shows the thread between the SF Flash Blend
And this is it tied in:
Step 8
Repeat the steps for the Overwing
Step 9
Form a nice head, tie off and cut the thread, then varnish and allow to dry.
Step 10
Trim the wing to the desired length. I like my tiger clousers to be quite short.
Step 11
Use a permanent marker to make some bands down each side of the SF Flash Blend
Step 12
Run the fly under hot tap water for about a minute. The hot water will bend the synthetic material permanently into a nicely tapered body.
That’s It! Now go fish!
 Trick question: Any preference in brand for the permanent marker? Personally I battle to keep the ink on a fly after a couple of casts.