
okuma convector CV 30L rebuild - 2/28/10
this will be the fist time that i've ever done a rebuild post on this style of fishing reel. it is a variation on the theme of the older mitchell, ocean city, penn, and newell reels, in which the bridge plate bolts to the side plate. these reels are found in large numbers in asia and to a lesser degree in the united states. it's like the m-16 vs ak-47 situation in this country. m-16's are more common, but there are plenty of ak's here and even more throughout the rest of the world. first, pull up the schematics.
http://www.mikesreelrepair.com/schematics/albums/okuma/Okuma_CV30L.pdf
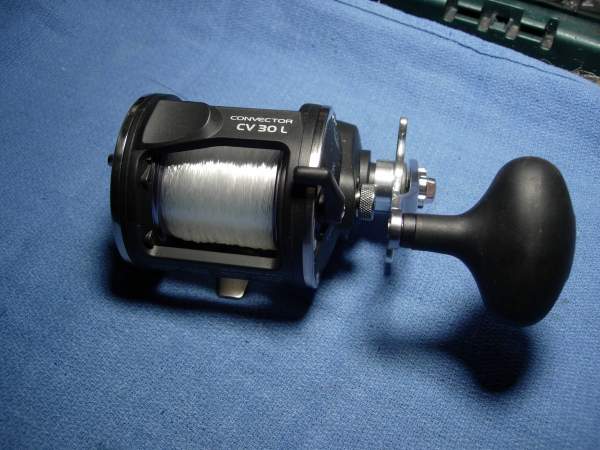
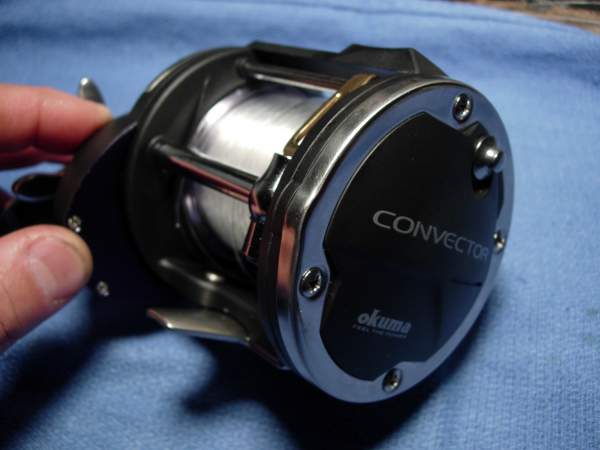
here's our reel. it's last year's model of the okuma convector 30L. i had to do a few calculations, but it looks like this reel will hold a shade under 300 yards of 30# mono. that compares to the penn 330 gt2 holding 330 yards of 30# mono.
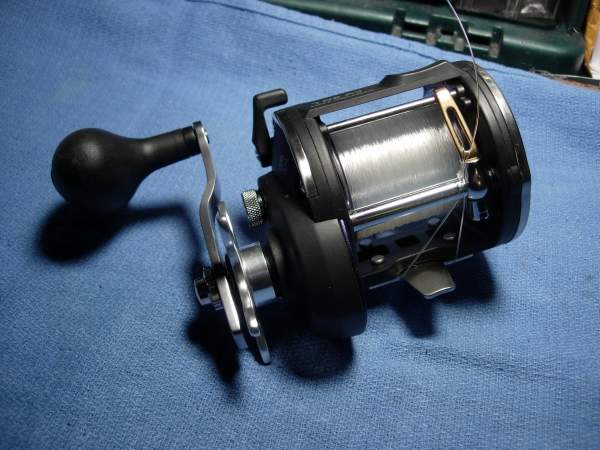
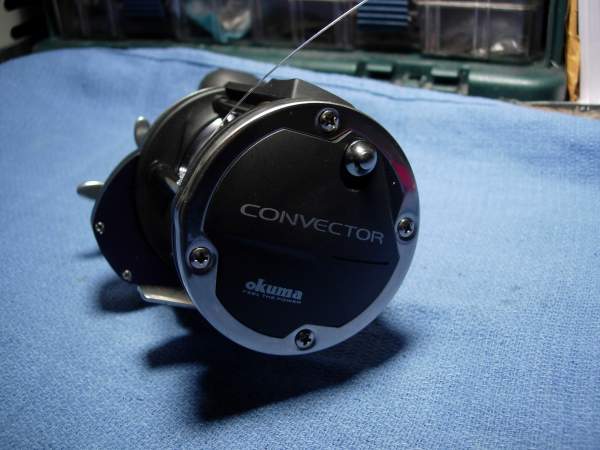
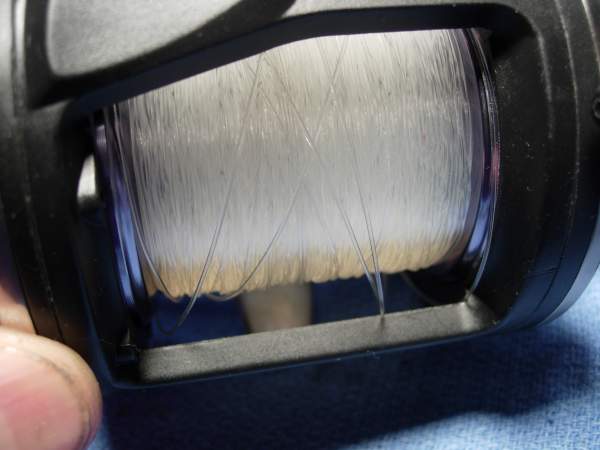
it's very important to keep the line and the leveler in sync. an easy way to do that is to pull out the line until the leveler moves to a far side, then cut the line. when the reel is back together, crank until the leveler moves back to that side, find the tag end of the line, poke it through the leveler, pull, tie it off and you're back in sync.
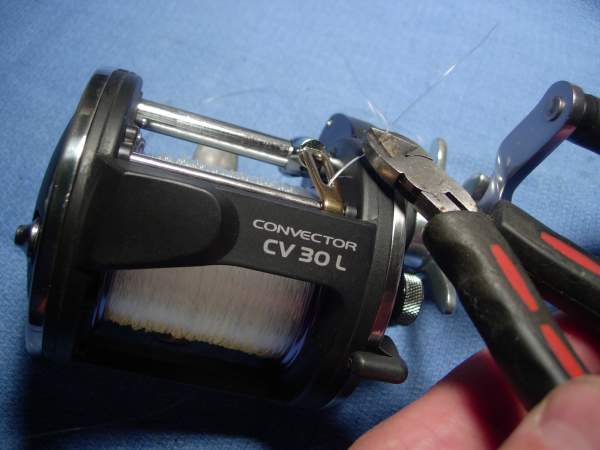
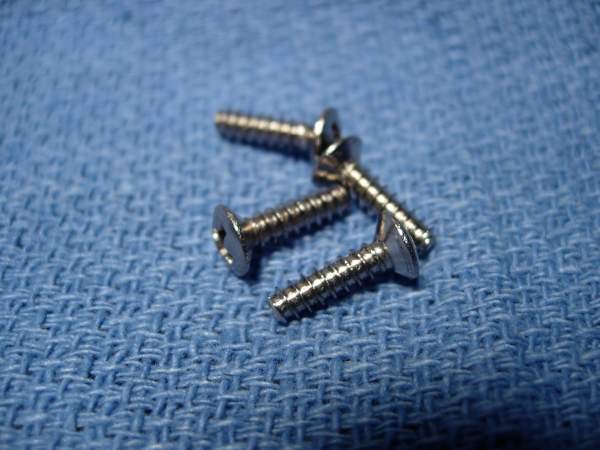
let's start by removing the four left side plate screws (key #9311).
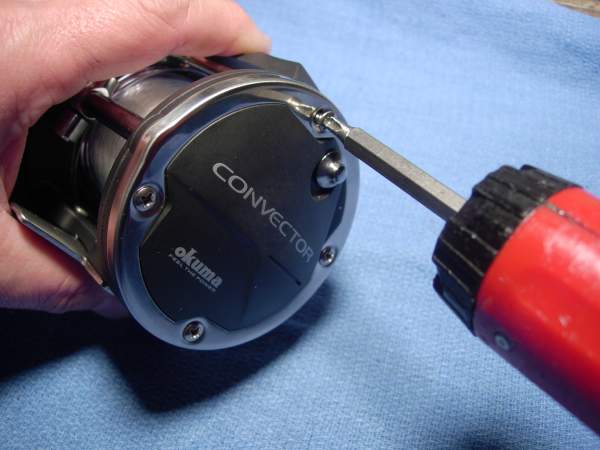
stainless steel. very nice!
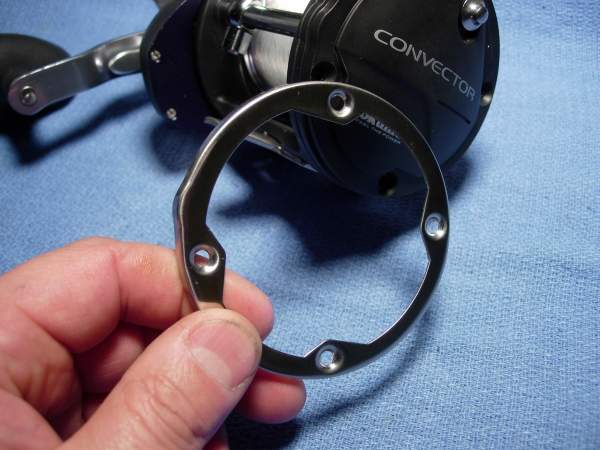
remove the left side plate cover (key #311), also stainless steel.
remove the left side plate cover (key #300) assembly.
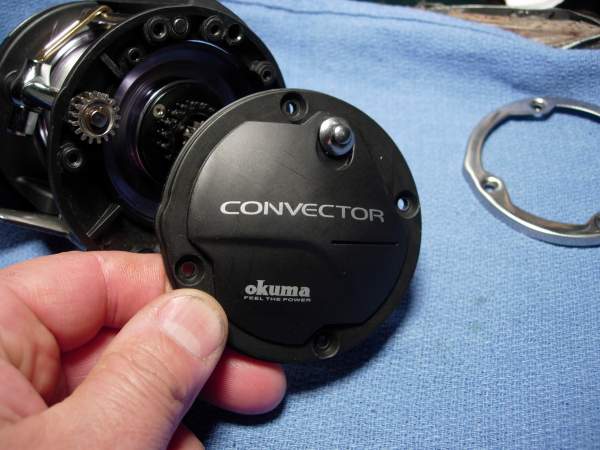
here's a view of the inside. all stainless steel!
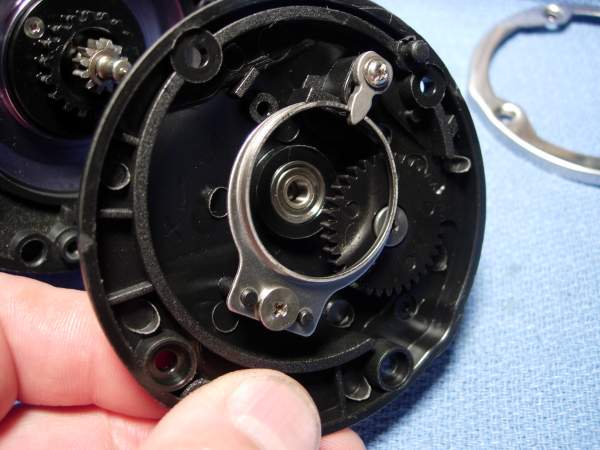
you can go cheap and easy here and just lube the right side plate bearing (key #9106) without pulling it out. this bearing measures 4x11x4mm.
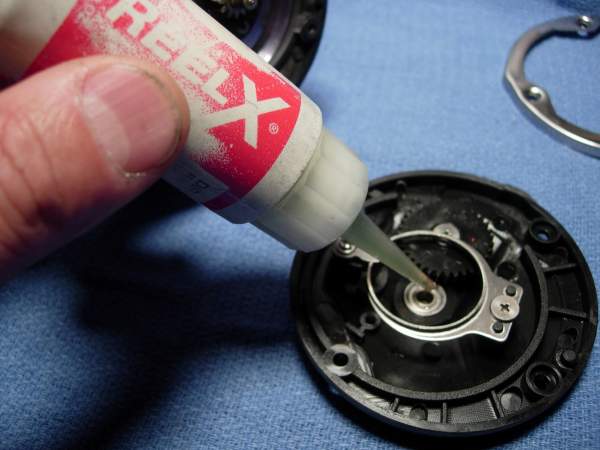
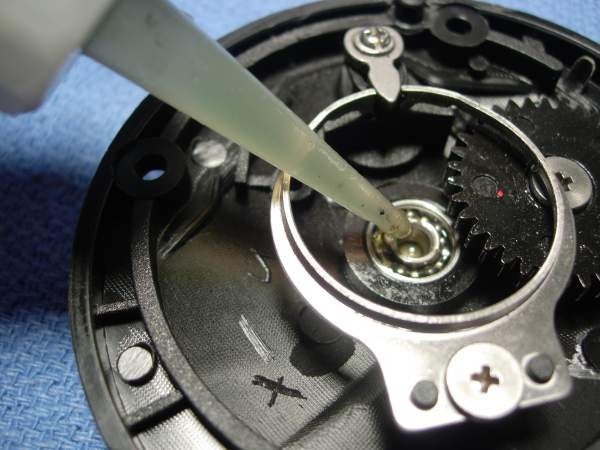
you can also pull the bearing and clean it out. on some models, you may have to remove the click pawl spring (key #305) and the transmission gear (key #707).
remove the spool assembly (key #400).
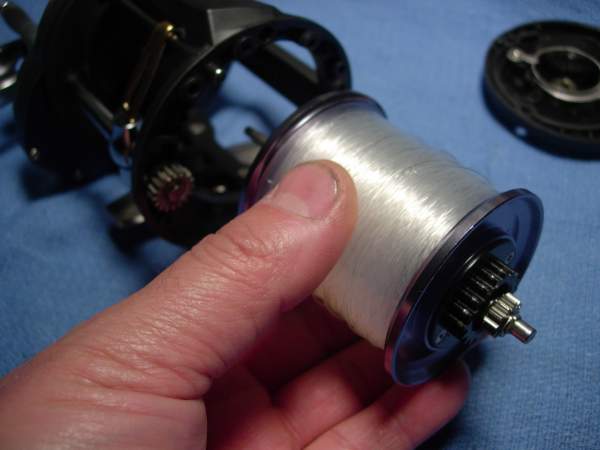
in all of the star drag reels, this right spool bearing (key #9107) that always fails first. it measures 6x13x3.5mm.
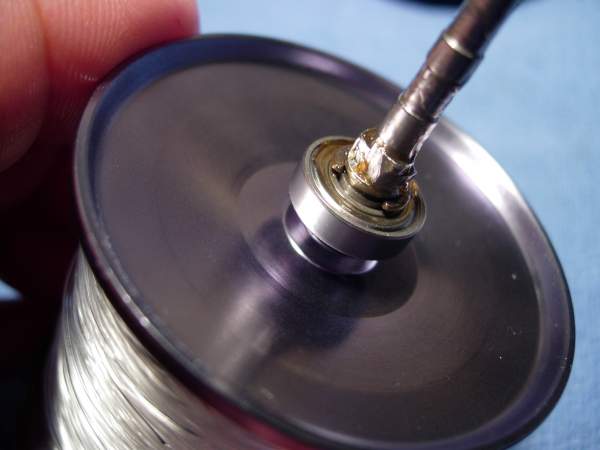
remove the retaining clip (key #9406).
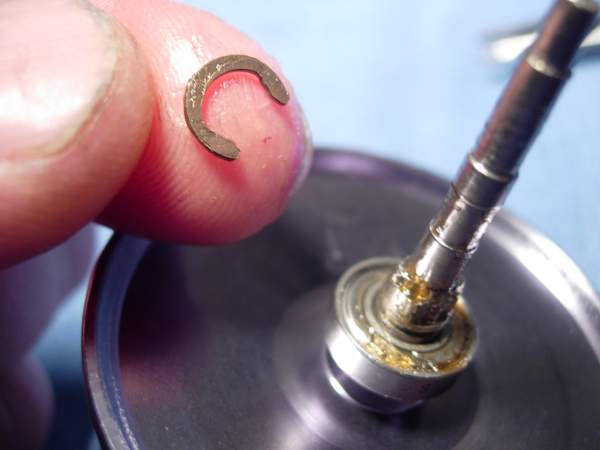
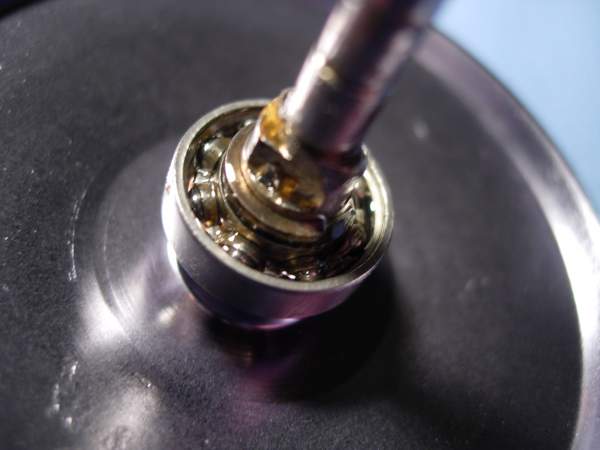
we're going to toss the shields and lube the bearing, then reinstall it and the retaining clip.
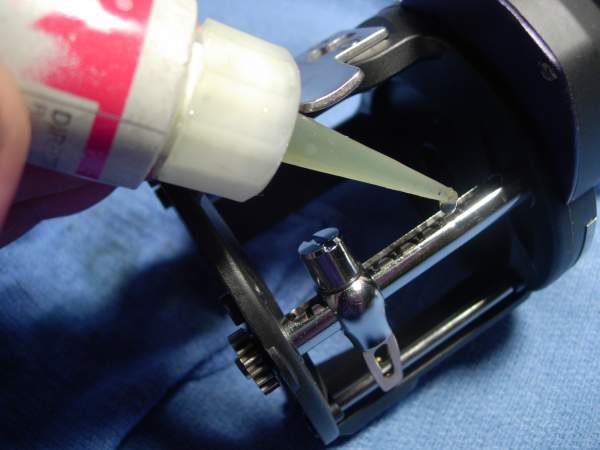
lube the worm shaft (key #712).
install the spool assembly (key #400).
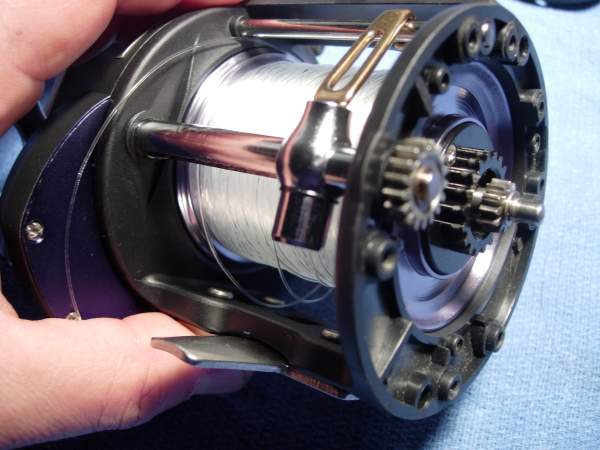
install the left side plate assembly (key #300).
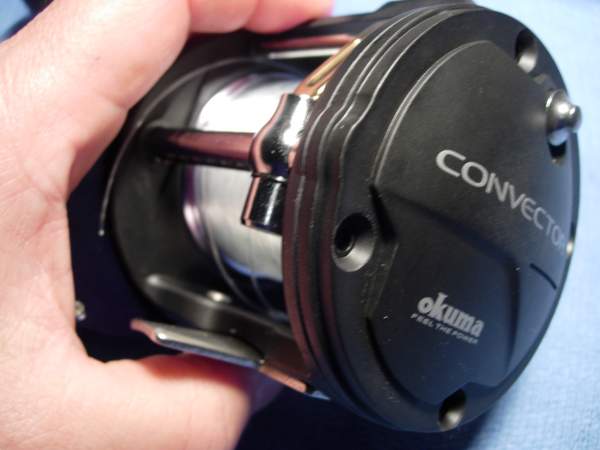
install the left side plate cover (key #311).
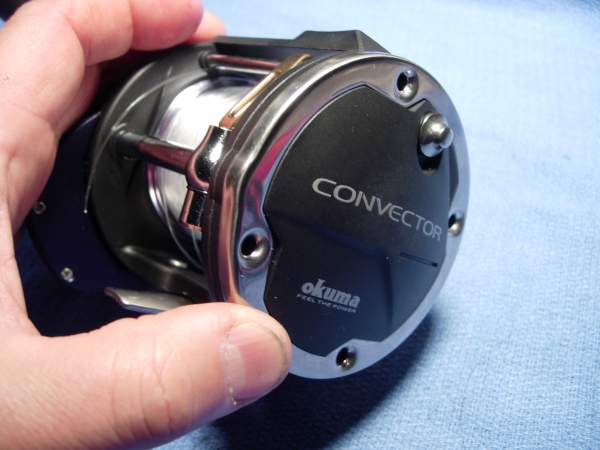
install the four left side plate screws (key #9311).
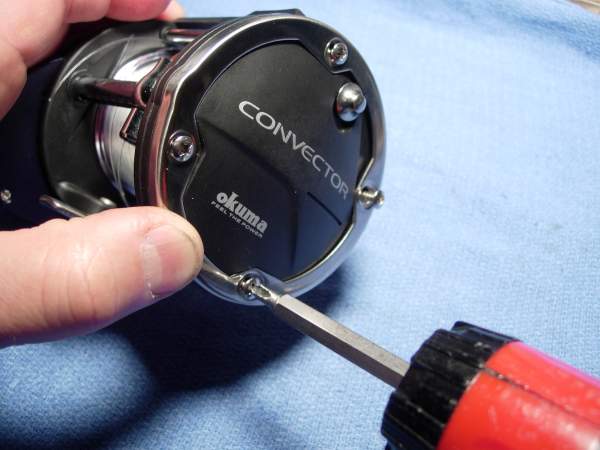
in the future, this will be the only work required to maintain your reel.
now for the right side.
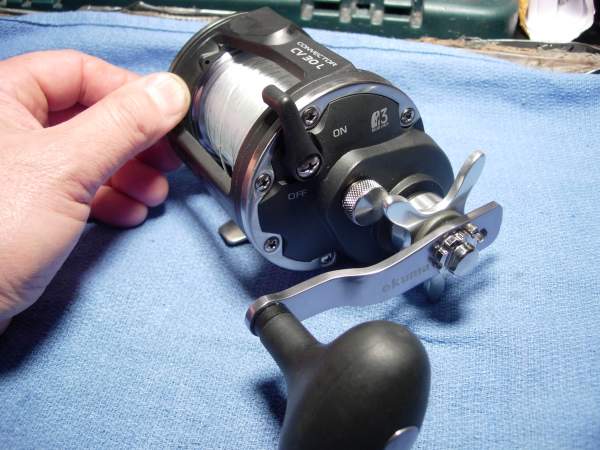
remove the handle nut holder screw (key #515).
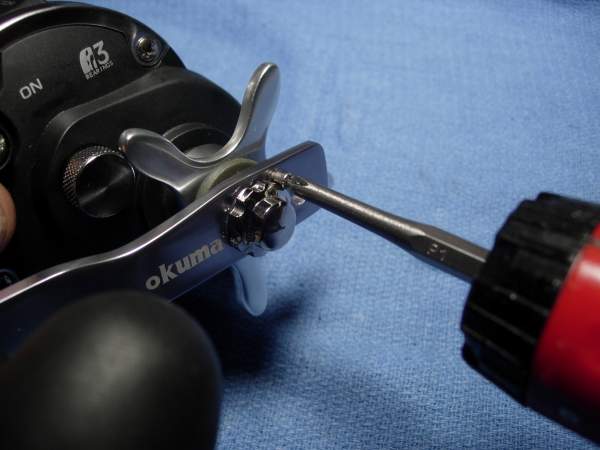
remove the handle nut (key #117).
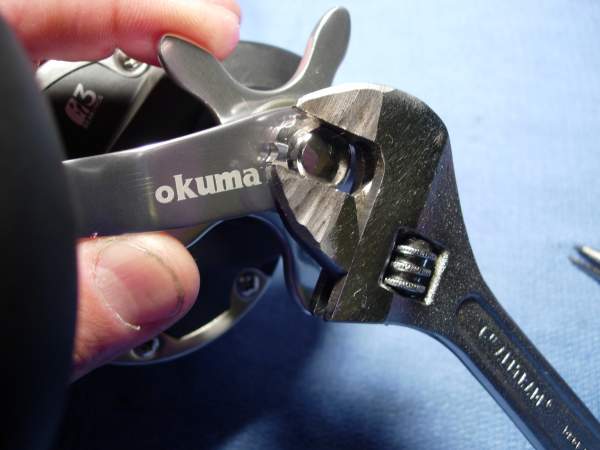
remove the handle washer (key #9204).
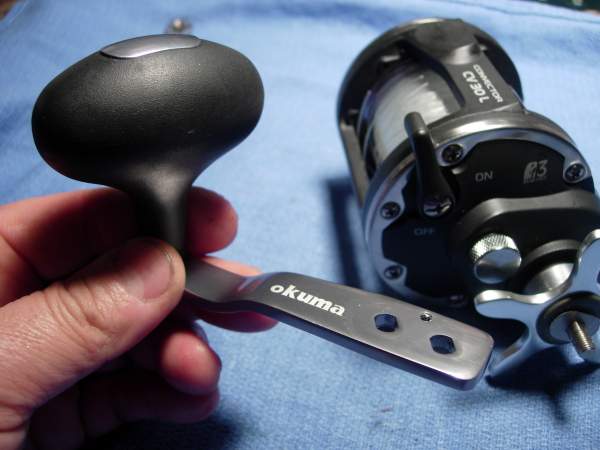
remove the handle assembly (key #500). at one point, the hadle arms were stainless steel. this particular arm is made of anodized aluminum.
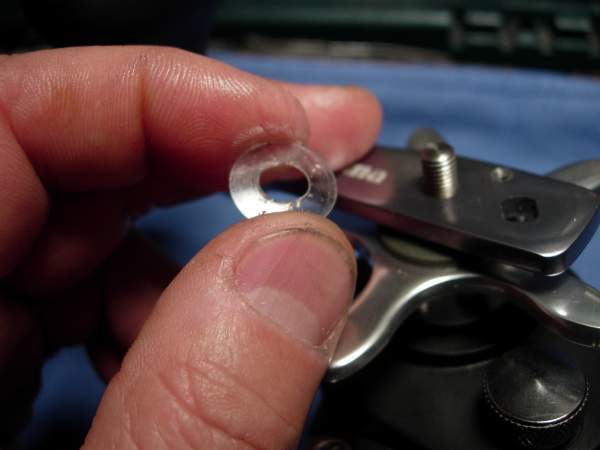
remove the tension washer (key #614).

remove the star drag (key #615). this is also anodized aluminum, not as good as stainless steel but better than the chromed zinc found in older models.
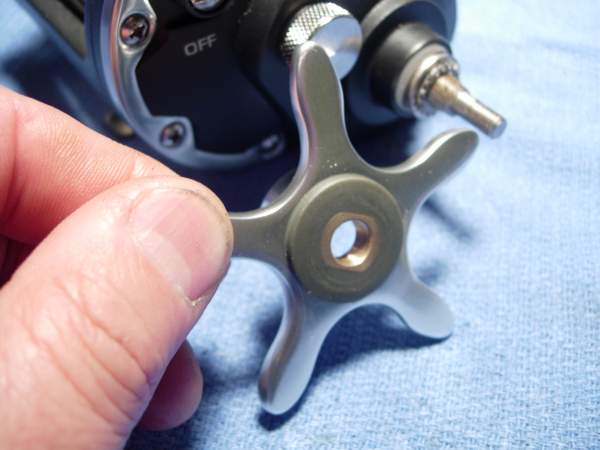
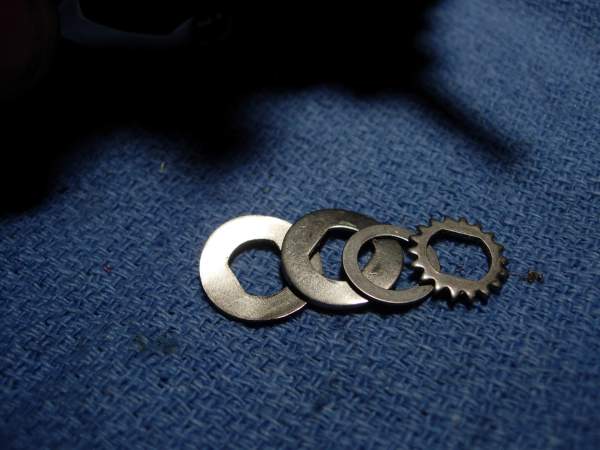
removed the washer stack and keep the washers in order (key #'s 9201, 609 and unk).
remove the 5 right side plate screws (key #9301).
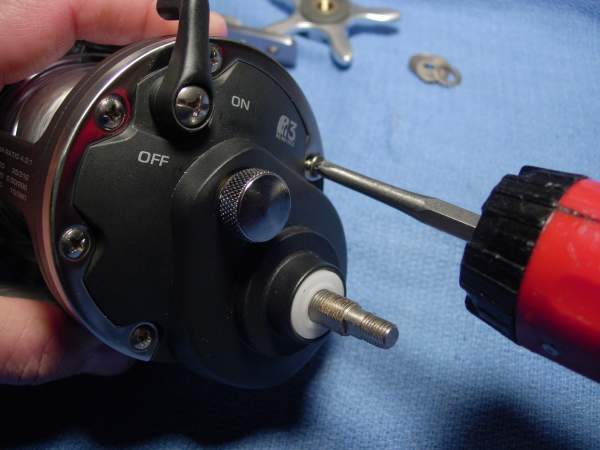
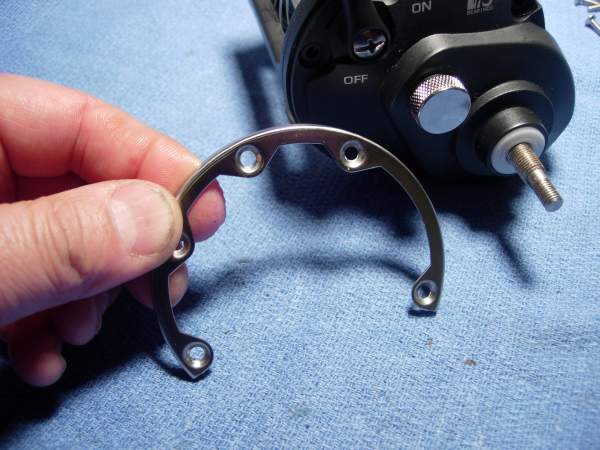
remove the right side plate cover (key #208).
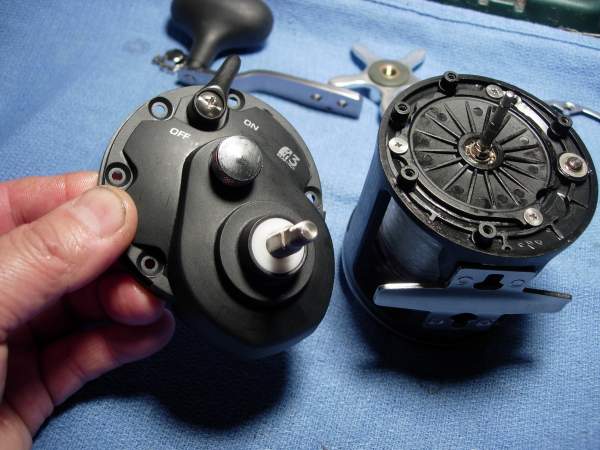
remove the right side plate assembly (key #200).
here's a shot of the inside of the assembly. it is different in appearance, but the basic "design" is same a penn 4/0 senator. one of the most impressive things about this particular reel is the amount of stainless steel in it.
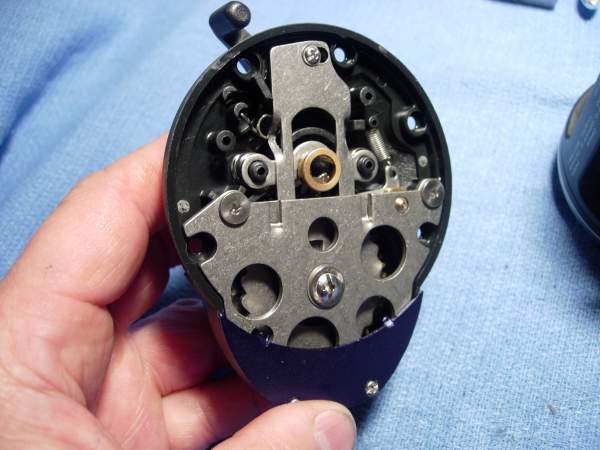
remove the two screws (key #930-1) for the hold plate cover (key #912).
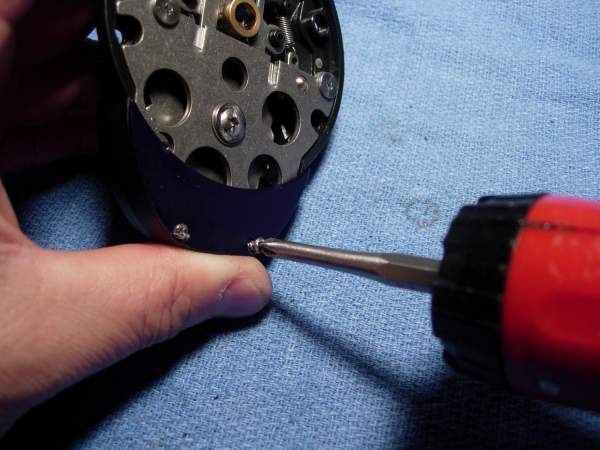
remove the hold plate cover (key #912).
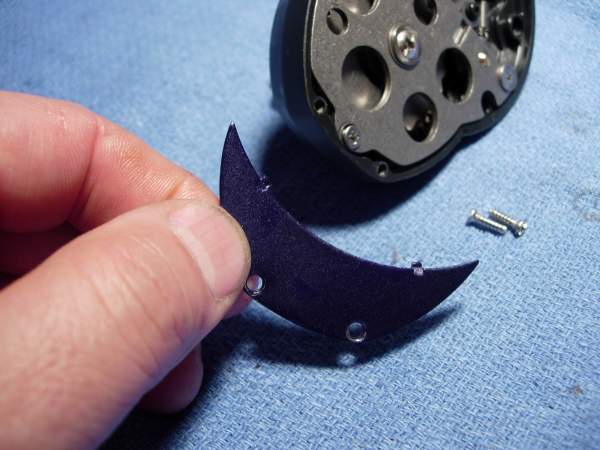
remove the clutch cam screw (key #9317)
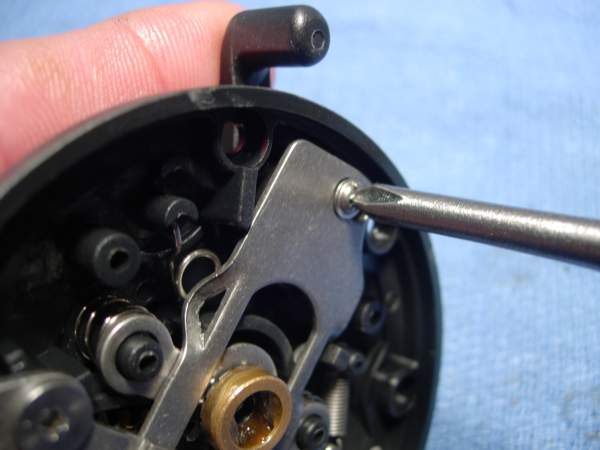
remove the clutch cam slider (key #804).
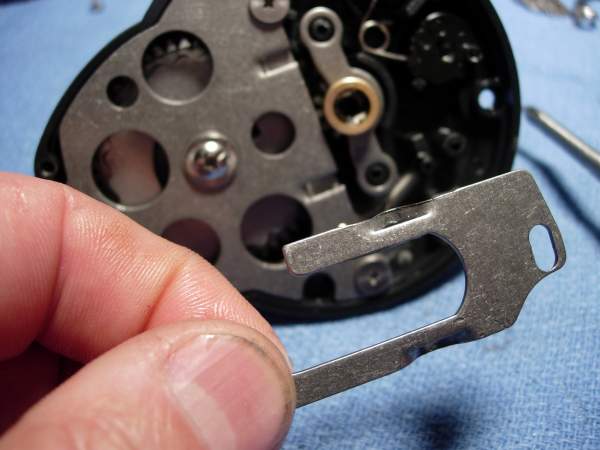
remove the pinion gear (key #702) and yoke (key #805) as a unit.
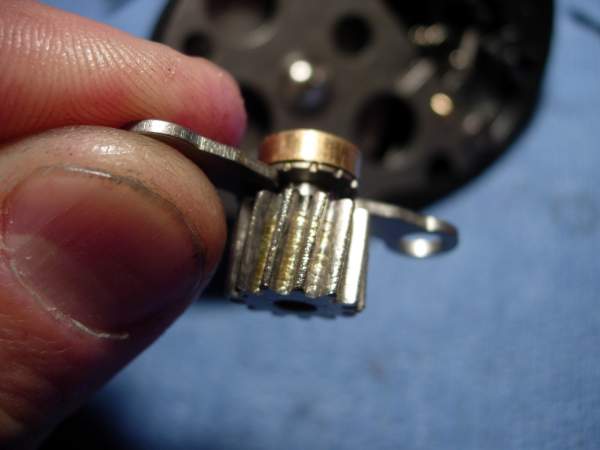
remove the two yoke springs (key #806).
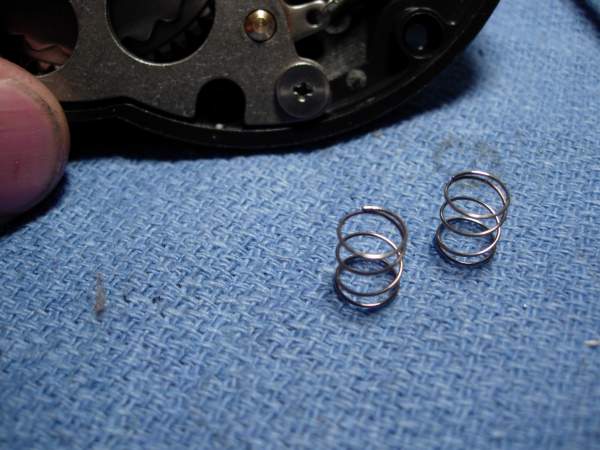
line everything up.
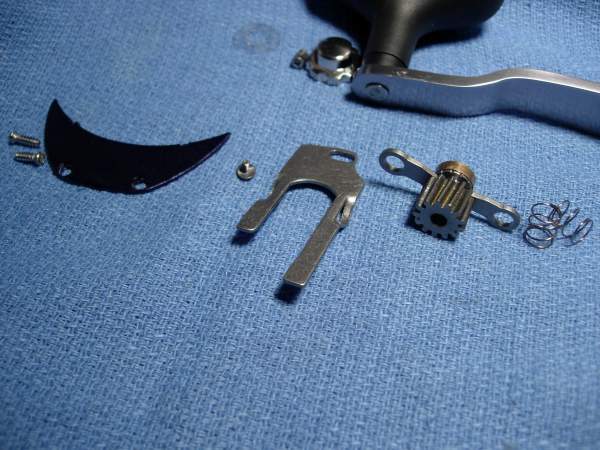
remove the two large hold plate screws (key #9302) on top.
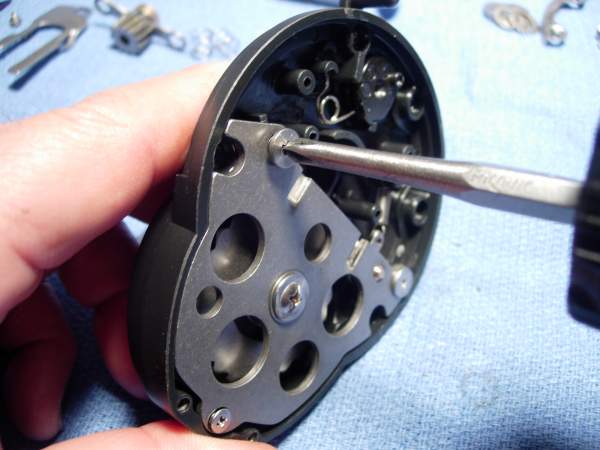
remove the smaller countersunk hold plate screw (key #9302-1) at the bottom.
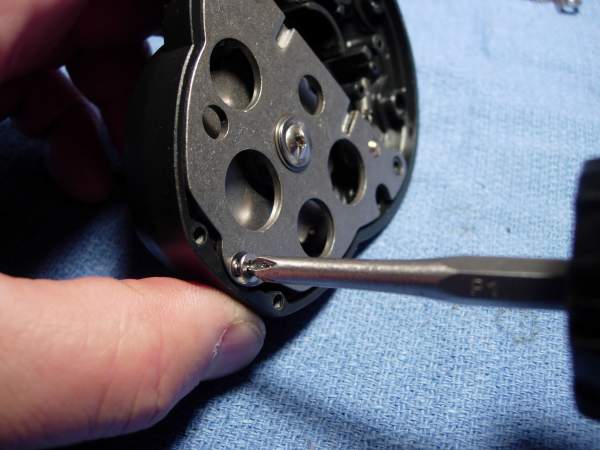
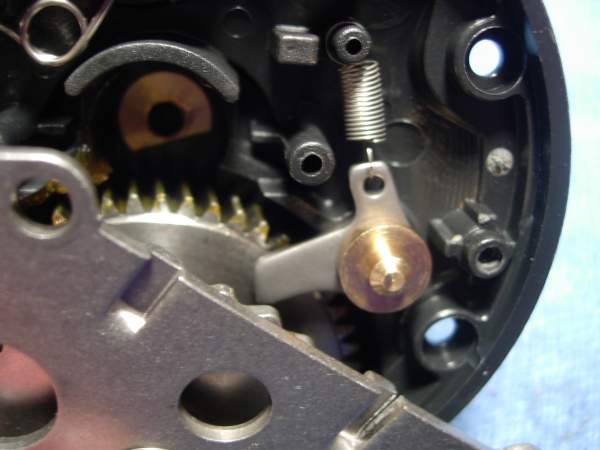
note the orientation of the anti-reverse pawl (key #201) assembly.
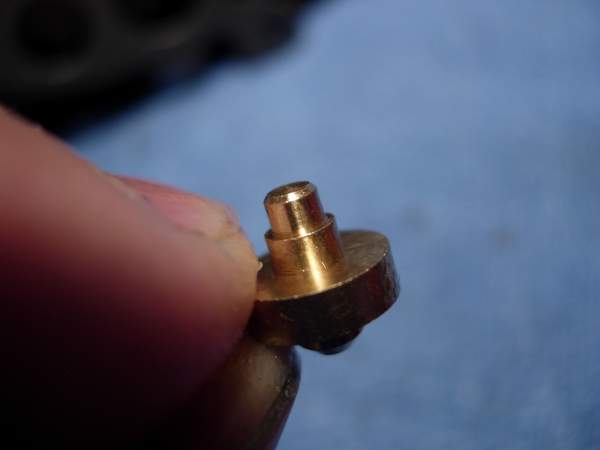
remove the anti-reverse pawl pin (key #211). this side is up....
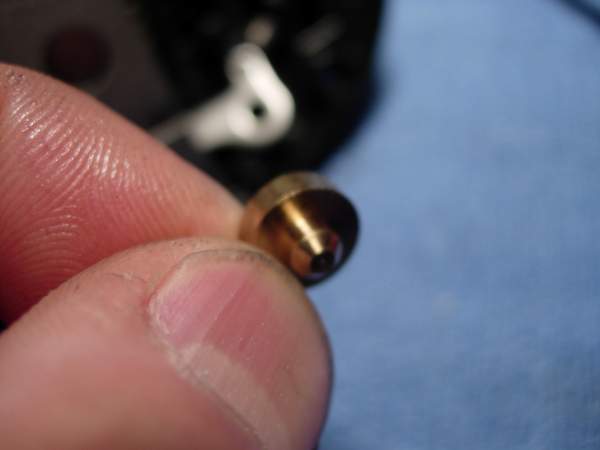
..... and this side is down.
remove the drive shaft assembly as a unit.
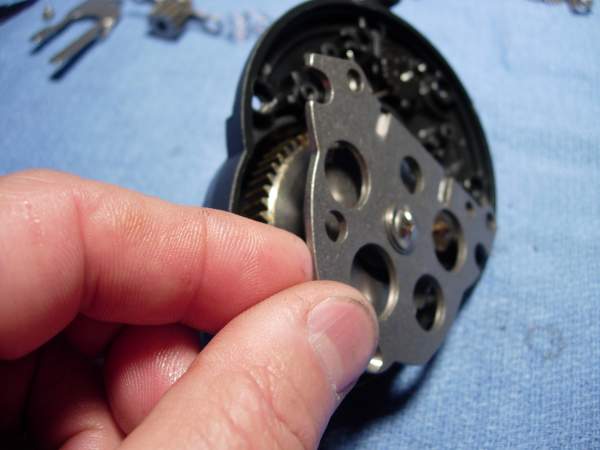
this model has a white nylon drive gear shaft bushing (part #17200005) that is not shown in the schematic.
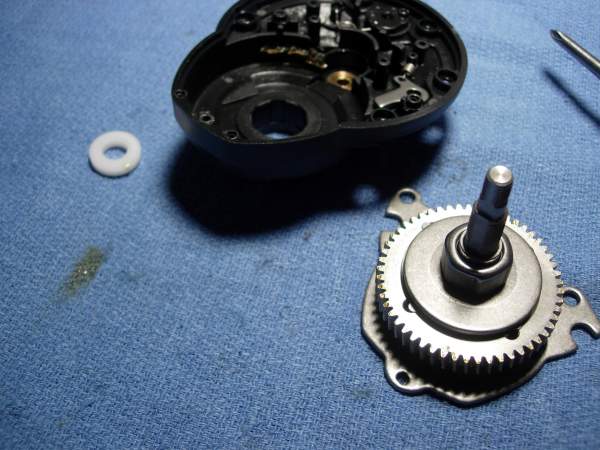

here is an expanded view of the drive shaft assembly.
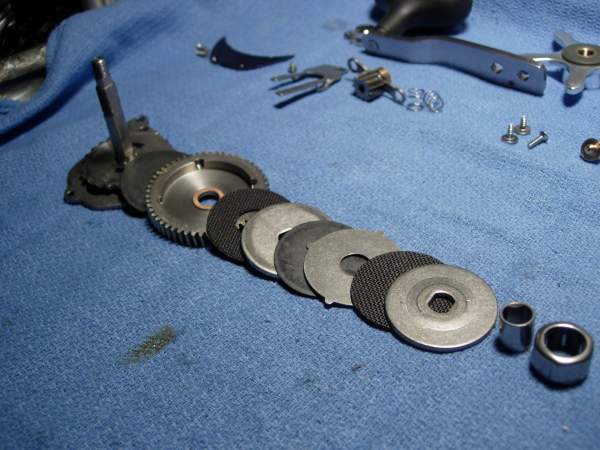
there are two drag washers (key #'s 9205 and 610) in this particular reel that are not made of carbon fiber and should be replaced. call okuma directly or use a penn ht-100 #56-440 as a replacement.
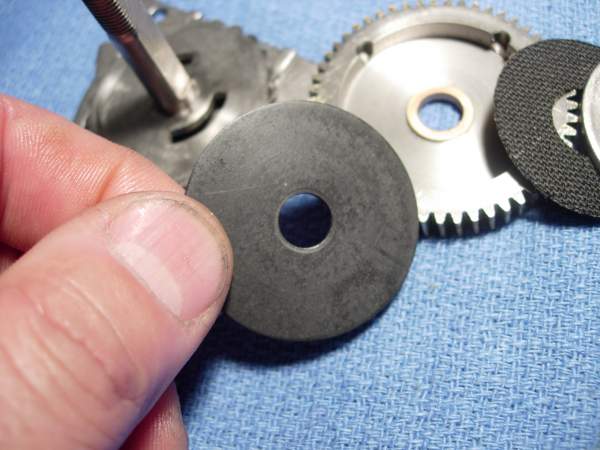
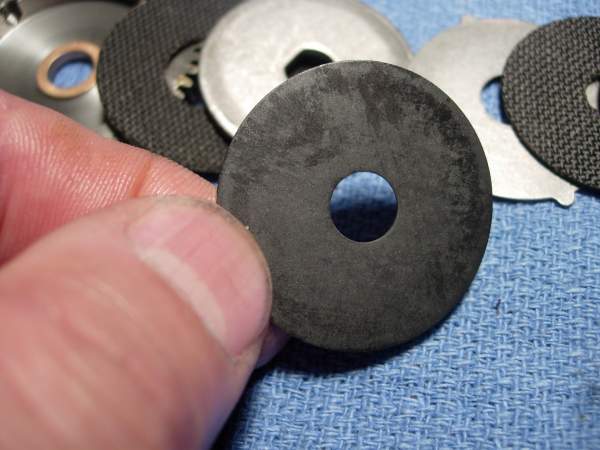
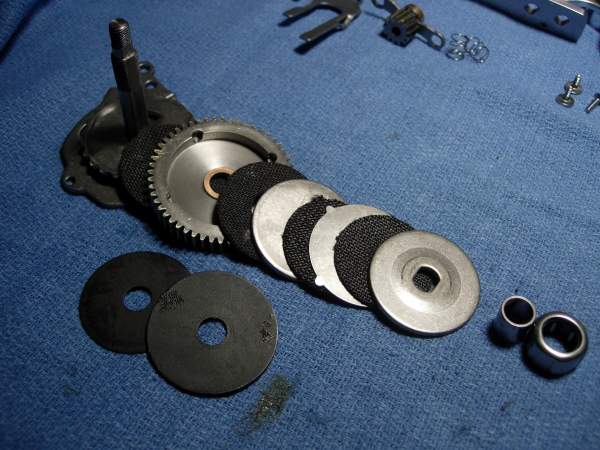
slap a thick coat of cal's grease on the carbon fiber drag washers and reassemble the drag stack. don't worry about the excess grease. it will simply squeeze out the sides.
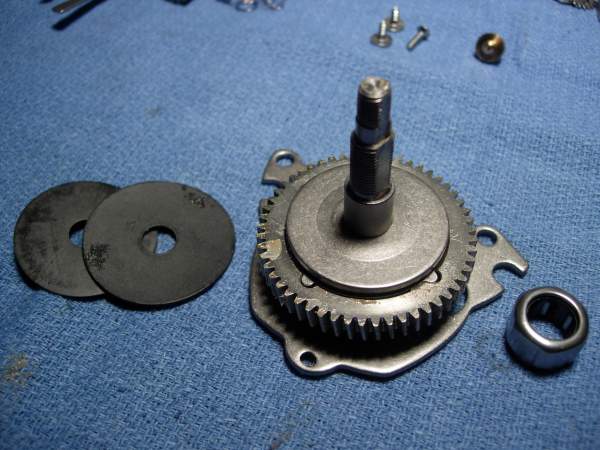
install the one way clutch bearing (key #9103). lube it first with corrosion x.
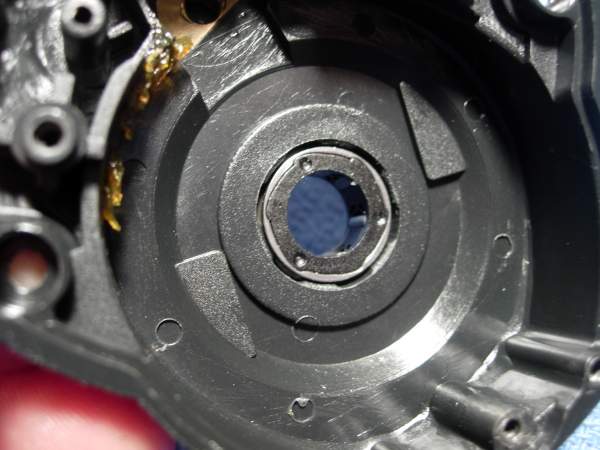
install the drive shaft assembly half way.
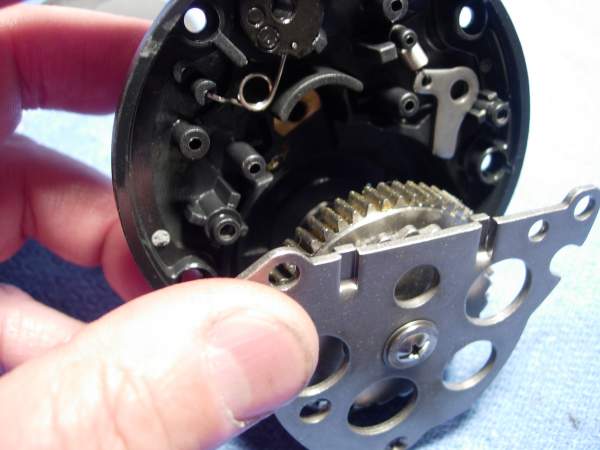
rotate the hold plate (key #207) clockwise about 30 degrees.
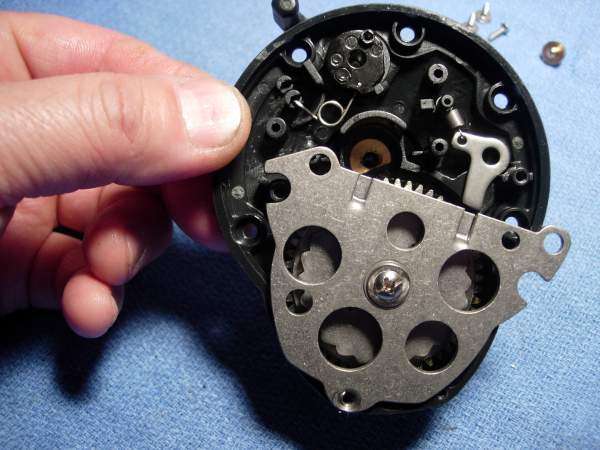
install the anti-reverse pawl pin (key #211) and align the anti-reverse pawl (key #201) with the the ratchet gear of the drive shaft assembly (key #701).
rotate the hold plate (key #207) couterclockwise 30 degrees and snap it into place.
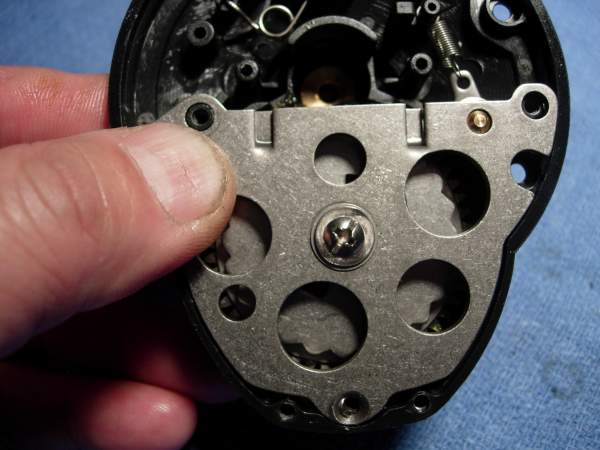
turn the drive shaft (key #701) and make sure the anti-reverse pawl (key #201) clicks properly.
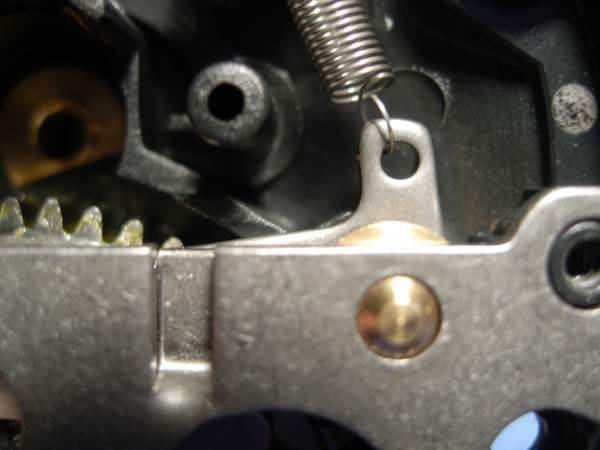
install the lower hold plate screw (key #9302-1).
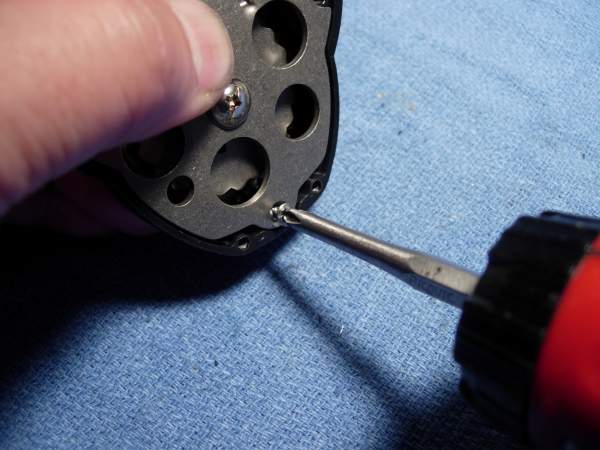
install the two upper hold plate screws (key #9302).
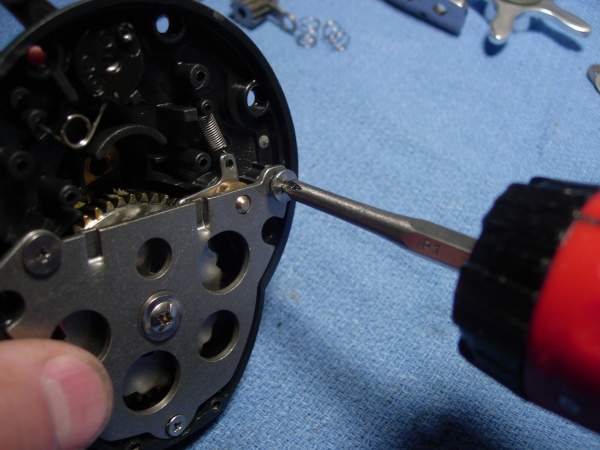
install the two yoke springs (key #806).
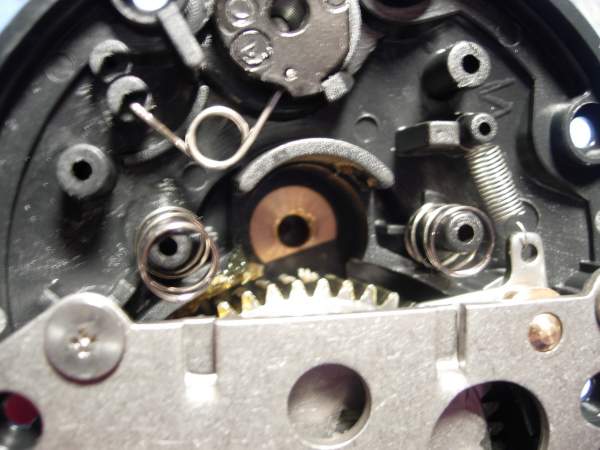
install the pinion gear (key #702) and yoke (key #805) as a unit.
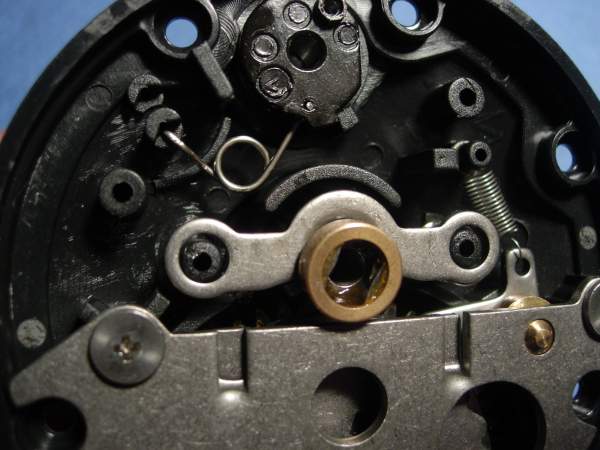
install the clutch cam slider (key #804).

install the clutch cam screw (key #9317).
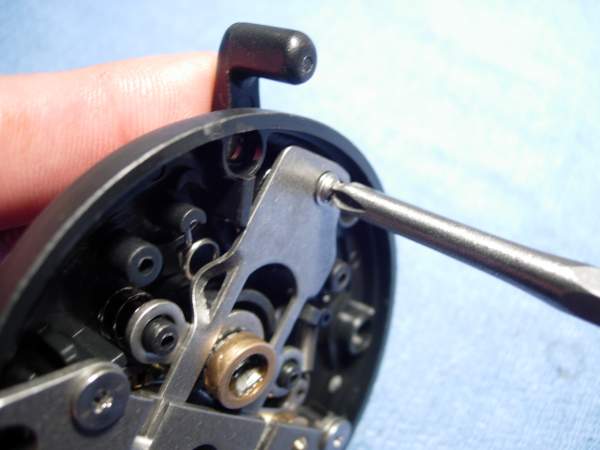
check the function of the clutch bar (key #802).
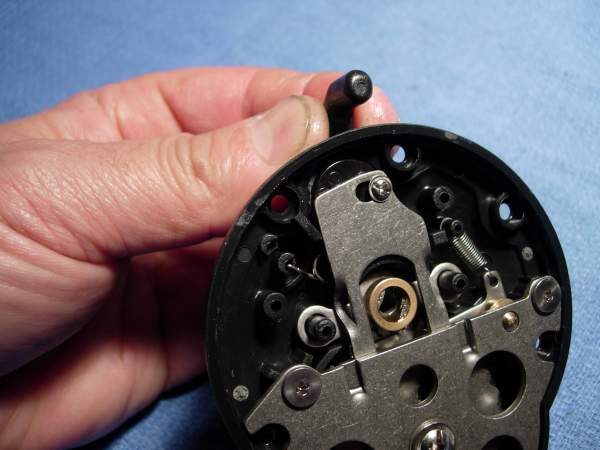
install the cover board (key #912).
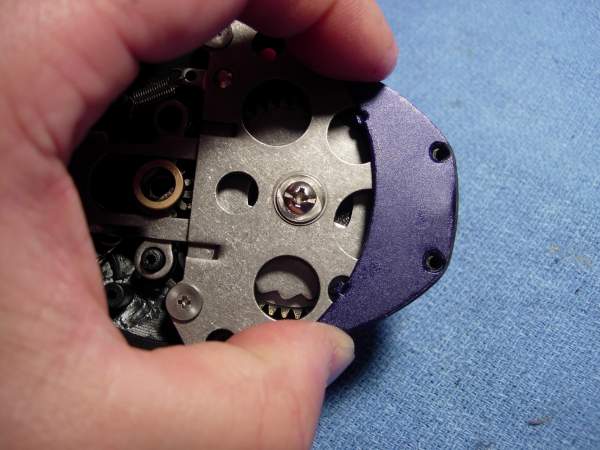
install the cover board screws (key #9301-1).
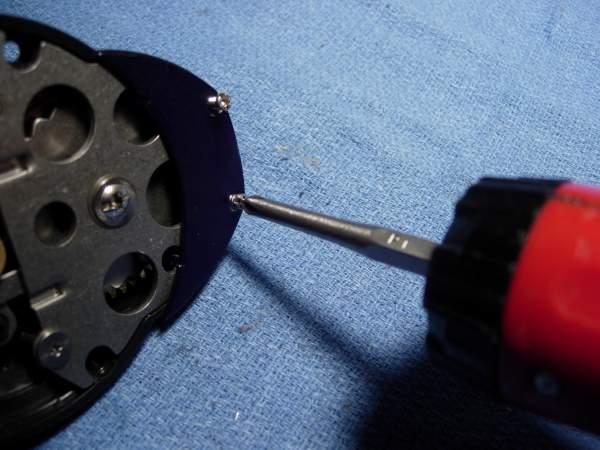
almost done!
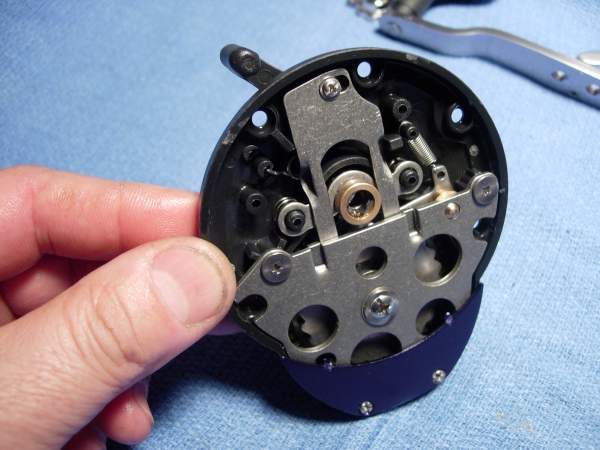
install the right side plate assembly (key #200).
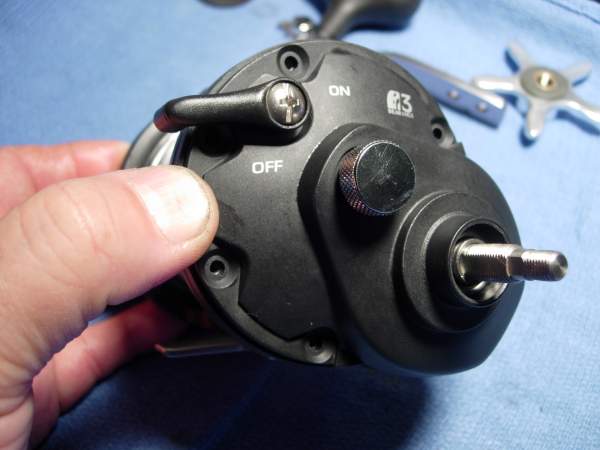
install the right side plate cover (key #208).
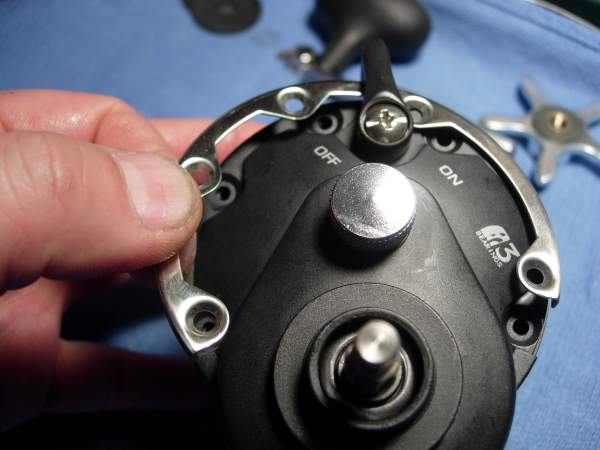
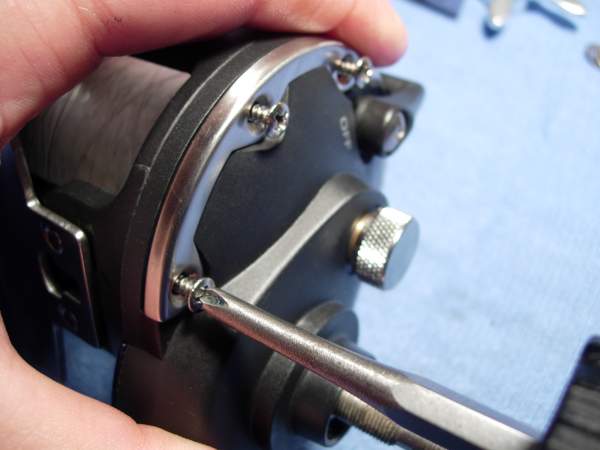
install the side plate cover screws (key #9301).
install the drive gear shaft bushing (no key #).
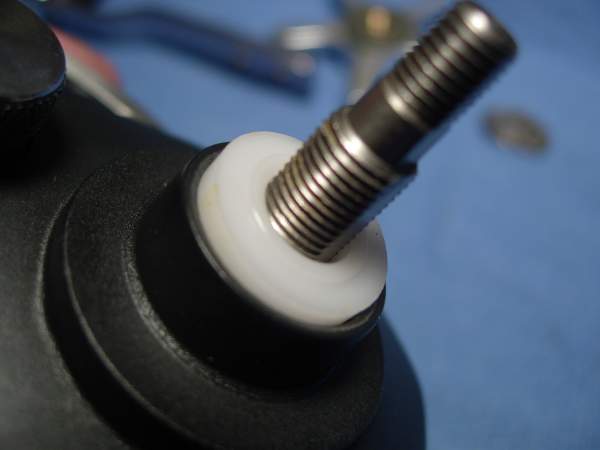
install the drag spring washers (key #609) in a "()" orientation.
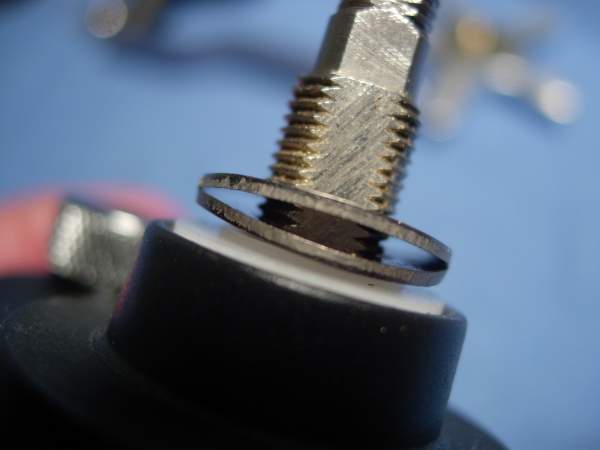
install the drive shaft gear washer (key #9201-1) and click gear (no key #).
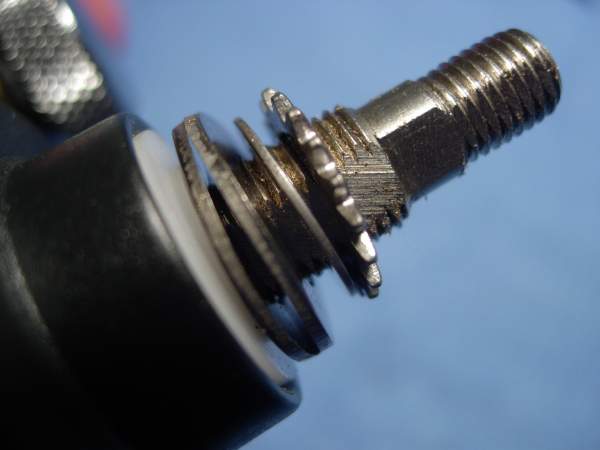
install the star drag (key #615) and turn it down past the shoulder of the drive shaft.
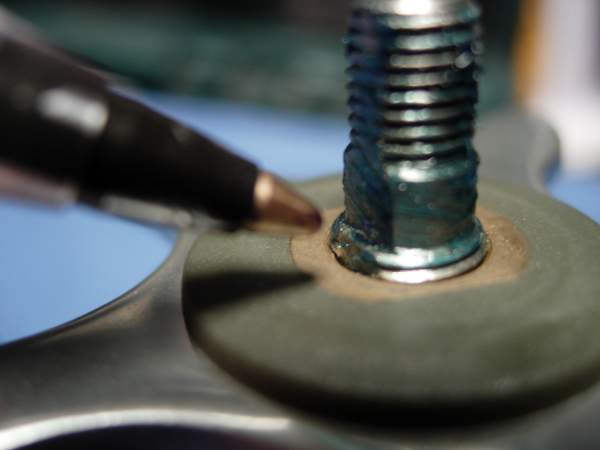
install the tension washer (key #614).
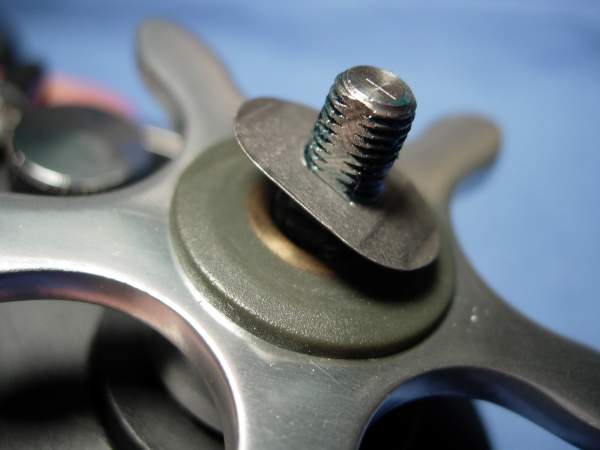
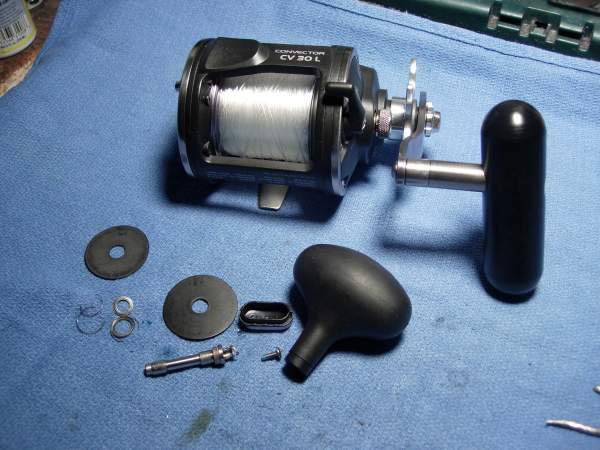
now for the handle assembly (key #500). it you need to lube it, pop the cover and back out this small screw.
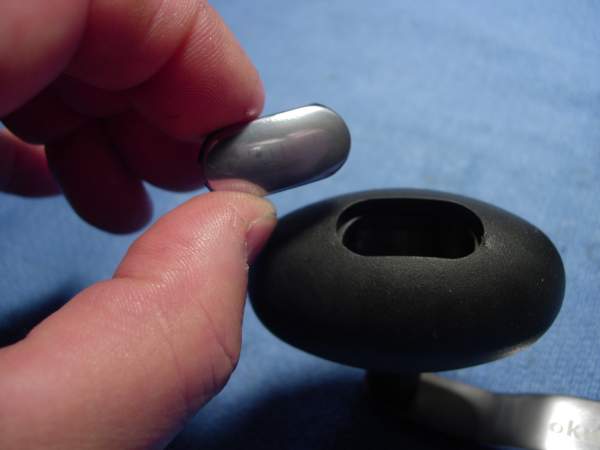
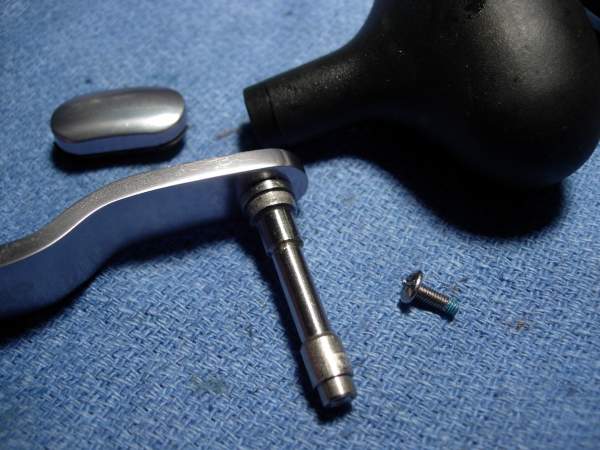
i'm going to drill this one out and install something a little more substantial.
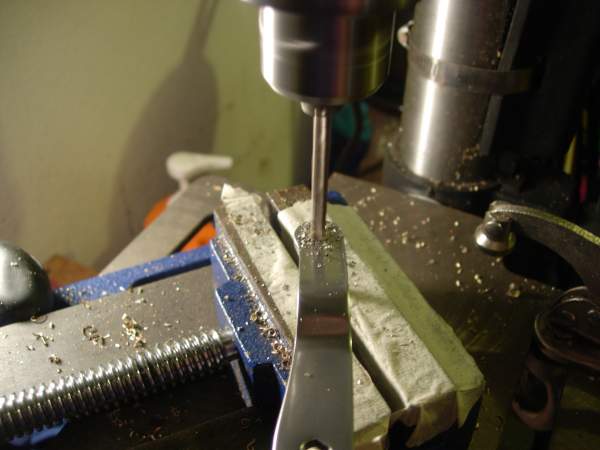
there, that's more like it!
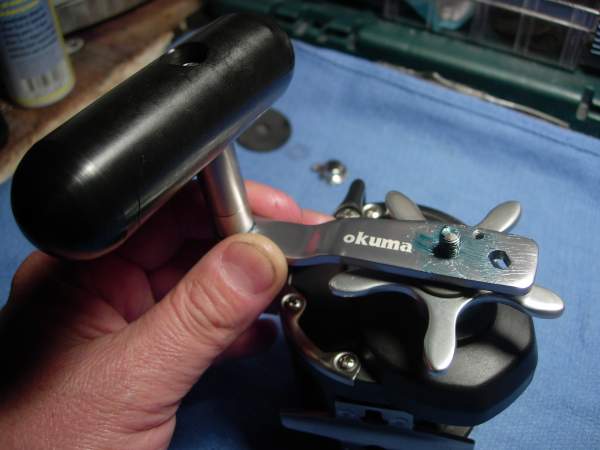
install the handle washer (key #9204).
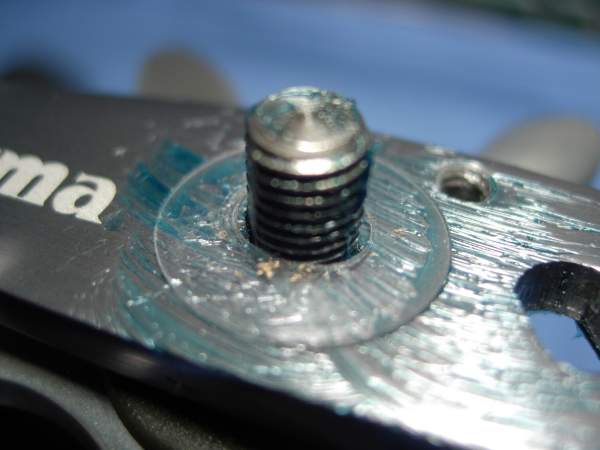
install the handle nut (key #117).
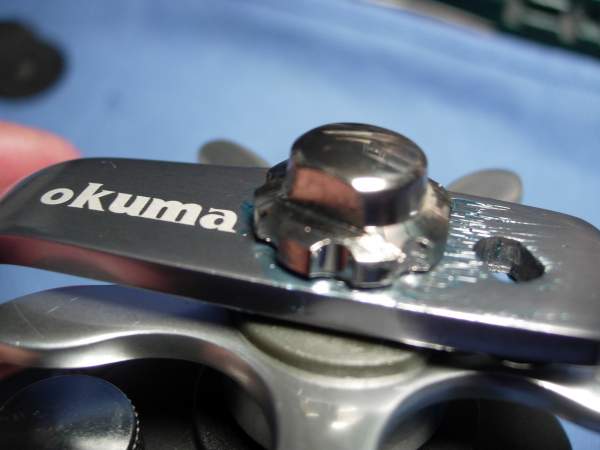
install the handle nut holder screw (key #515).
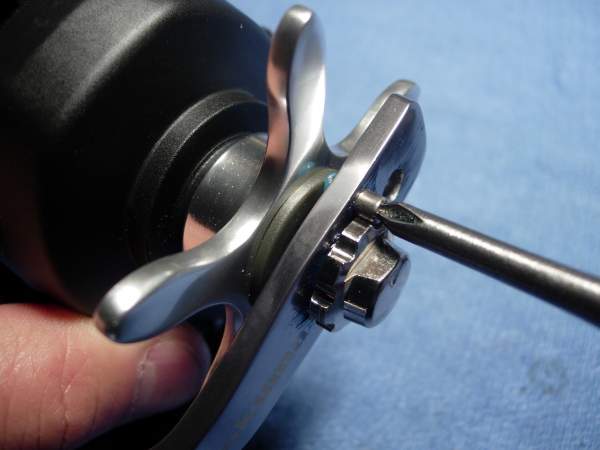
almost done.
the quickest way to damage the level wind assembly is to have the line and the leveler out of sync.
remember where the leveler was when we cut the line? right! crank the reel until you have the leveler on the far right side.
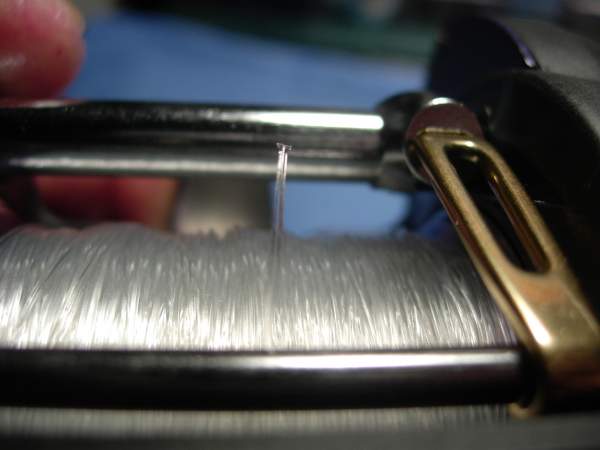
poke the line through the leveler and pull until you can clearly see that it is back in sync.
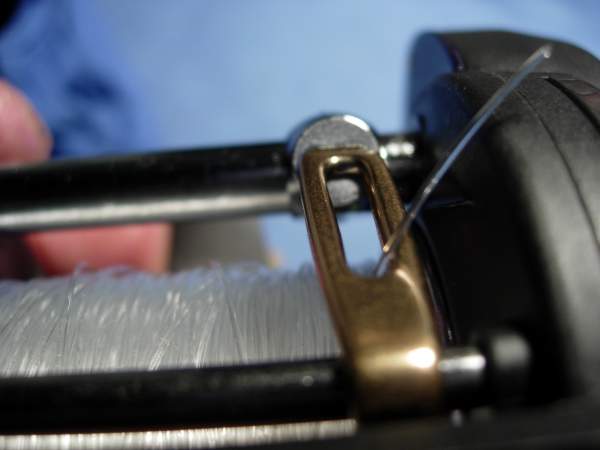
now tie a loop at the end, add a rubber band, and NOW you're done!
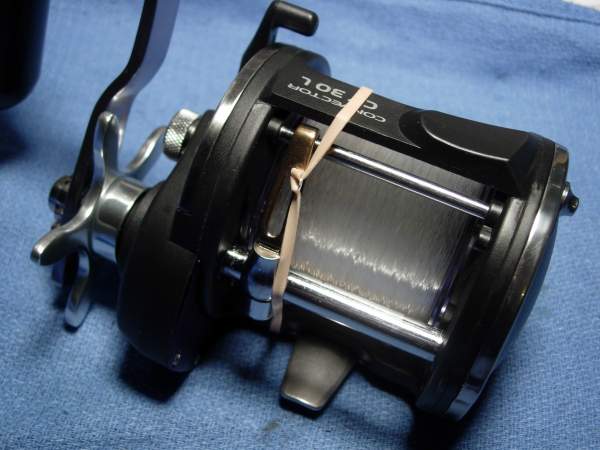
now, for a few comments. at the risk of sounding like a broken record, the bearings need servicing. and sneaking in two non-carbon fiber washers into the drag stack is not good. but the rest of this reel is fine! there is ALOT of stainless steel in this fishing reel. that by itself makes the reel worthy of consideration. stainless steel and graphite will last for years. the anodized aluminum handle arm, star and spool will have to be watched, but this reel will require very little maintenance after the initial service. i'm afraid i would have to rate this reel higher than the penn 330 gt2 and the shimano tekota because the convector is mostly graphite and stainless steel. if you're looking for a 30# levelwind, this is the one to get. alan
this will be the fist time that i've ever done a rebuild post on this style of fishing reel. it is a variation on the theme of the older mitchell, ocean city, penn, and newell reels, in which the bridge plate bolts to the side plate. these reels are found in large numbers in asia and to a lesser degree in the united states. it's like the m-16 vs ak-47 situation in this country. m-16's are more common, but there are plenty of ak's here and even more throughout the rest of the world. first, pull up the schematics.
http://www.mikesreelrepair.com/schematics/albums/okuma/Okuma_CV30L.pdf
here's our reel. it's last year's model of the okuma convector 30L. i had to do a few calculations, but it looks like this reel will hold a shade under 300 yards of 30# mono. that compares to the penn 330 gt2 holding 330 yards of 30# mono.
it's very important to keep the line and the leveler in sync. an easy way to do that is to pull out the line until the leveler moves to a far side, then cut the line. when the reel is back together, crank until the leveler moves back to that side, find the tag end of the line, poke it through the leveler, pull, tie it off and you're back in sync.
let's start by removing the four left side plate screws (key #9311).
stainless steel. very nice!
remove the left side plate cover (key #311), also stainless steel.
remove the left side plate cover (key #300) assembly.
here's a view of the inside. all stainless steel!
you can go cheap and easy here and just lube the right side plate bearing (key #9106) without pulling it out. this bearing measures 4x11x4mm.
you can also pull the bearing and clean it out. on some models, you may have to remove the click pawl spring (key #305) and the transmission gear (key #707).
remove the spool assembly (key #400).
in all of the star drag reels, this right spool bearing (key #9107) that always fails first. it measures 6x13x3.5mm.
remove the retaining clip (key #9406).
we're going to toss the shields and lube the bearing, then reinstall it and the retaining clip.
lube the worm shaft (key #712).
install the spool assembly (key #400).
install the left side plate assembly (key #300).
install the left side plate cover (key #311).
install the four left side plate screws (key #9311).
in the future, this will be the only work required to maintain your reel.
now for the right side.
remove the handle nut holder screw (key #515).
remove the handle nut (key #117).
remove the handle washer (key #9204).
remove the handle assembly (key #500). at one point, the hadle arms were stainless steel. this particular arm is made of anodized aluminum.
remove the tension washer (key #614).
remove the star drag (key #615). this is also anodized aluminum, not as good as stainless steel but better than the chromed zinc found in older models.
removed the washer stack and keep the washers in order (key #'s 9201, 609 and unk).
remove the 5 right side plate screws (key #9301).
remove the right side plate cover (key #208).
remove the right side plate assembly (key #200).
here's a shot of the inside of the assembly. it is different in appearance, but the basic "design" is same a penn 4/0 senator. one of the most impressive things about this particular reel is the amount of stainless steel in it.
remove the two screws (key #930-1) for the hold plate cover (key #912).
remove the hold plate cover (key #912).
remove the clutch cam screw (key #9317)
remove the clutch cam slider (key #804).
remove the pinion gear (key #702) and yoke (key #805) as a unit.
remove the two yoke springs (key #806).
line everything up.
remove the two large hold plate screws (key #9302) on top.
remove the smaller countersunk hold plate screw (key #9302-1) at the bottom.
note the orientation of the anti-reverse pawl (key #201) assembly.
remove the anti-reverse pawl pin (key #211). this side is up....
..... and this side is down.
remove the drive shaft assembly as a unit.
this model has a white nylon drive gear shaft bushing (part #17200005) that is not shown in the schematic.
here is an expanded view of the drive shaft assembly.
there are two drag washers (key #'s 9205 and 610) in this particular reel that are not made of carbon fiber and should be replaced. call okuma directly or use a penn ht-100 #56-440 as a replacement.
slap a thick coat of cal's grease on the carbon fiber drag washers and reassemble the drag stack. don't worry about the excess grease. it will simply squeeze out the sides.
install the one way clutch bearing (key #9103). lube it first with corrosion x.
install the drive shaft assembly half way.
rotate the hold plate (key #207) clockwise about 30 degrees.
install the anti-reverse pawl pin (key #211) and align the anti-reverse pawl (key #201) with the the ratchet gear of the drive shaft assembly (key #701).
rotate the hold plate (key #207) couterclockwise 30 degrees and snap it into place.
turn the drive shaft (key #701) and make sure the anti-reverse pawl (key #201) clicks properly.
install the lower hold plate screw (key #9302-1).
install the two upper hold plate screws (key #9302).
install the two yoke springs (key #806).
install the pinion gear (key #702) and yoke (key #805) as a unit.
install the clutch cam slider (key #804).
install the clutch cam screw (key #9317).
check the function of the clutch bar (key #802).
install the cover board (key #912).
install the cover board screws (key #9301-1).
almost done!
install the right side plate assembly (key #200).
install the right side plate cover (key #208).
install the side plate cover screws (key #9301).
install the drive gear shaft bushing (no key #).
install the drag spring washers (key #609) in a "()" orientation.
install the drive shaft gear washer (key #9201-1) and click gear (no key #).
install the star drag (key #615) and turn it down past the shoulder of the drive shaft.
install the tension washer (key #614).
now for the handle assembly (key #500). it you need to lube it, pop the cover and back out this small screw.
i'm going to drill this one out and install something a little more substantial.
there, that's more like it!
install the handle washer (key #9204).
install the handle nut (key #117).
install the handle nut holder screw (key #515).
almost done.
the quickest way to damage the level wind assembly is to have the line and the leveler out of sync.
remember where the leveler was when we cut the line? right! crank the reel until you have the leveler on the far right side.
poke the line through the leveler and pull until you can clearly see that it is back in sync.
now tie a loop at the end, add a rubber band, and NOW you're done!
now, for a few comments. at the risk of sounding like a broken record, the bearings need servicing. and sneaking in two non-carbon fiber washers into the drag stack is not good. but the rest of this reel is fine! there is ALOT of stainless steel in this fishing reel. that by itself makes the reel worthy of consideration. stainless steel and graphite will last for years. the anodized aluminum handle arm, star and spool will have to be watched, but this reel will require very little maintenance after the initial service. i'm afraid i would have to rate this reel higher than the penn 330 gt2 and the shimano tekota because the convector is mostly graphite and stainless steel. if you're looking for a 30# levelwind, this is the one to get. alan
