
benniejordaan
Sealiner
Not saying this is the only way, just the way I did it.

These plugs are actually quite expensive for what they are and anyone can make one with confidence it will work. Here is my method...
Step 1
1 - cut the nylon to size. I made mine 80mm long. I then squared it off on my sander.

2 - Then using a combination square, I found and marked the centre of both ends. I then used a sharpened pin that I made with a nail to lightly punch / mark the centre.


Step 2 - Drilling the holes:
What I did here, is a technique we use for drilling centre holes into poppers and stick baits.
1 - Put a centre pin in the chuck with the point inwards.

2 - Lower it down to the vice and clamp the pin in the vice. This ensures the pin is 100% in line with the drill press.

3 - Release the chuck leaving the pin secure in the vice.
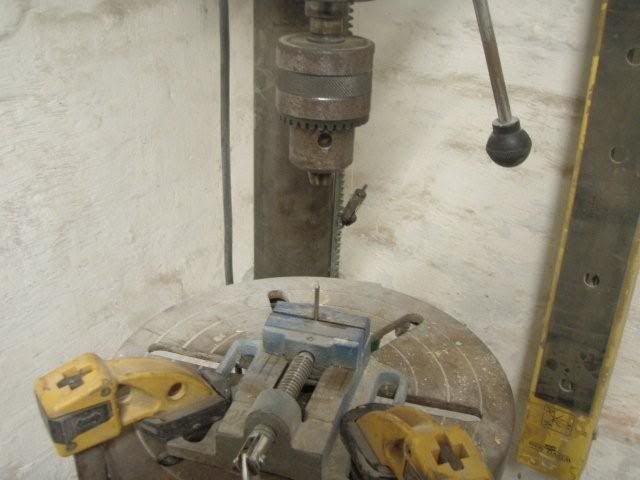
4 - Put a small drill bit in the drill press chuck. I used a 3mm drill. You then place the nylon plug on the pin with the pin in that centre mark you made. Drill as far as you can into the plug, turn it around and repeat.

5 - I then used my hand drill with a 4mm drill bit and drilled from both sides towards the cetre. Here you can see our drilling was fairly accurate.

6 - Then with a 10mm drill bit, I drilled approximately 30mm into the back of the plug. A little less than half way.

Shaping:
1 - First U marked more or less where I wanted chamfers and simply sanded it a little at a time. Sand and turn untill it gets warm, let it cool then repeat. But it didn't get too hot or "melt" significantly.

Finishing:
1 - Made a fairly long loop in 1,6mm SS wire.

2 - Pulled it through the tail to its final position and marked the front so I know where the front loop must be.

3 - Then pull it forward as far as it will go. The loop I made slides all the way to the bottom of the 10mm hole I drilled.

4 - Made a loop on the front end.

5 - Pushed it back and to it's final position.

6 - Placed it in the vice and poured led in the back till it was full. I over did this slightly so had to cut some away.

Cosmetics:
The last thing to do was fit some eyes.
1 - Mark out where the eyes must go. Not sure if you can see the pencil marks?

2 - Drilled some recesses.

3 - I have seen guys who use markers to outlining these recesses as eyes. I used 3D eyes though.
These plugs are actually quite expensive for what they are and anyone can make one with confidence it will work. Here is my method...
Step 1
1 - cut the nylon to size. I made mine 80mm long. I then squared it off on my sander.
2 - Then using a combination square, I found and marked the centre of both ends. I then used a sharpened pin that I made with a nail to lightly punch / mark the centre.
Step 2 - Drilling the holes:
What I did here, is a technique we use for drilling centre holes into poppers and stick baits.
1 - Put a centre pin in the chuck with the point inwards.
2 - Lower it down to the vice and clamp the pin in the vice. This ensures the pin is 100% in line with the drill press.
3 - Release the chuck leaving the pin secure in the vice.
4 - Put a small drill bit in the drill press chuck. I used a 3mm drill. You then place the nylon plug on the pin with the pin in that centre mark you made. Drill as far as you can into the plug, turn it around and repeat.
5 - I then used my hand drill with a 4mm drill bit and drilled from both sides towards the cetre. Here you can see our drilling was fairly accurate.
6 - Then with a 10mm drill bit, I drilled approximately 30mm into the back of the plug. A little less than half way.
Shaping:
1 - First U marked more or less where I wanted chamfers and simply sanded it a little at a time. Sand and turn untill it gets warm, let it cool then repeat. But it didn't get too hot or "melt" significantly.
Finishing:
1 - Made a fairly long loop in 1,6mm SS wire.
2 - Pulled it through the tail to its final position and marked the front so I know where the front loop must be.
3 - Then pull it forward as far as it will go. The loop I made slides all the way to the bottom of the 10mm hole I drilled.
4 - Made a loop on the front end.
5 - Pushed it back and to it's final position.
6 - Placed it in the vice and poured led in the back till it was full. I over did this slightly so had to cut some away.
Cosmetics:
The last thing to do was fit some eyes.
1 - Mark out where the eyes must go. Not sure if you can see the pencil marks?
2 - Drilled some recesses.
3 - I have seen guys who use markers to outlining these recesses as eyes. I used 3D eyes though.
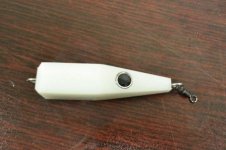
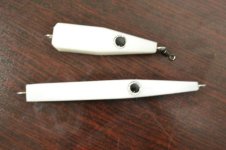

 Truly South African style:sa::thankie:first::respekt::cong: