benniejordaan
Sealiner
How to make a wood split body fishing lure.
As promised, I will outline the step by step process I use to make these lure from start to finish. I will attempt to use only the basic of equipment so everyone will be able to do this. I want to add that the lure I am making is "untested" so I don't even know how it will swim till I try it. I will however use a basic design that has worked for me as a guide.
First I am going to outline some of the materials and equipment that you will need / use.
Tools: These are the basic necessities. You really don't need that much.
Jigsaw
Files
Sander (not necessary, most can easily be done by hand which I will show. So I will not use a sander.)
Equipment for bending wire. I will use basic stuff.
bench Vice. These are cheap and will make your life so simple.
Sand paper. 38#, 200#, 800#
Materials:
Wood. The best wood to use is probably going to be:
Obeche - A soft wood with a very "organised" grain. The grain can mess you around later on when painting. Not serious though... The biggest advantage of this wood is that it is easy to work with.
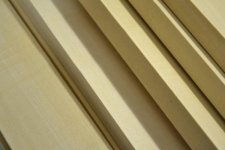
Jelutong - My favourite. It is soft and has a very low SG making much easier to balance. The wood also has no grain as such to it is easier to shape, sand and drill. The wood is however still quite hardy.
American Popler: Very similar to Pine in texture. Also a great wood, fairly easy to shape, sand etc. It is also the wood most used by commercial lure builders.
Pine: Stay away from S.A. Pine. In fact just avoid Pine. Pine has soft and hard grains. While you are sanding, the soft grains sand away while the hard "winter grains" refuse to budge.
For this project, I'm going to use Jelutong. I actually need to order some as I'm out of stock. What I do it I order my wood from Country Woods in Pinetown. I normally take the smallest plank in 50mm thick they have available and ask them to rip it and plane it into pieces. I normally ask for strips 50mm square for poppers and some strips 15mm thick X 50mm wide. This usually costs me about R200. If anyone doesn't want to invest in this much wood, let me know and I'll sort you out with some.
Wire:
Depending on the size of bait you want to make and the species of fish you want to target, select the apropriate wire. Most common would be 0,9mm, 1,2mm, 1,6mm and 2mm. If any of you have a hard time getting your hand on this, give me a shout. I have 0,9mm, 1,6mm and 2mm.
There may be other stuff like double sided tape etc. but nothing major.
Edit: I also have 1,2mm wire.
[align=right]...to be continued
[/align]
As promised, I will outline the step by step process I use to make these lure from start to finish. I will attempt to use only the basic of equipment so everyone will be able to do this. I want to add that the lure I am making is "untested" so I don't even know how it will swim till I try it. I will however use a basic design that has worked for me as a guide.
First I am going to outline some of the materials and equipment that you will need / use.
Tools: These are the basic necessities. You really don't need that much.
Jigsaw
Files
Sander (not necessary, most can easily be done by hand which I will show. So I will not use a sander.)
Equipment for bending wire. I will use basic stuff.
bench Vice. These are cheap and will make your life so simple.
Sand paper. 38#, 200#, 800#
Materials:
Wood. The best wood to use is probably going to be:
Obeche - A soft wood with a very "organised" grain. The grain can mess you around later on when painting. Not serious though... The biggest advantage of this wood is that it is easy to work with.
Jelutong - My favourite. It is soft and has a very low SG making much easier to balance. The wood also has no grain as such to it is easier to shape, sand and drill. The wood is however still quite hardy.
American Popler: Very similar to Pine in texture. Also a great wood, fairly easy to shape, sand etc. It is also the wood most used by commercial lure builders.
Pine: Stay away from S.A. Pine. In fact just avoid Pine. Pine has soft and hard grains. While you are sanding, the soft grains sand away while the hard "winter grains" refuse to budge.
For this project, I'm going to use Jelutong. I actually need to order some as I'm out of stock. What I do it I order my wood from Country Woods in Pinetown. I normally take the smallest plank in 50mm thick they have available and ask them to rip it and plane it into pieces. I normally ask for strips 50mm square for poppers and some strips 15mm thick X 50mm wide. This usually costs me about R200. If anyone doesn't want to invest in this much wood, let me know and I'll sort you out with some.
Wire:
Depending on the size of bait you want to make and the species of fish you want to target, select the apropriate wire. Most common would be 0,9mm, 1,2mm, 1,6mm and 2mm. If any of you have a hard time getting your hand on this, give me a shout. I have 0,9mm, 1,6mm and 2mm.
There may be other stuff like double sided tape etc. but nothing major.
Edit: I also have 1,2mm wire.
[align=right]...to be continued
[/align]