Tutorial: How to make your own Tin / white metal spoons

Tin spoons are probably the easiest lure to start your DIY career with. They are easy to make and require very little in the way of developing, materials, tools and finishing techniques. I am going to attempt to show your how to design the lure, make the plug, make a mould and finally cast a spoon. I will do this step by step and I encourage questions as well as criticism from the guys already making spoons.

To wet your appetite, here is a spoon I have already created and have been using with great success.

[flash=425,344]http://www.youtube.com/v/W-pmAfrrRSQ&hl=en&fs=1[/flash]
 

Attachments

  • rigged DIY spoon.jpg
    rigged DIY spoon.jpg
    12 KB · Views: 2,361
First step the plug.

I'm hoping that the pictures are fairly self explanatory. If you have any questions, please shoot them off and we can address them before moving to the next step.

Making the plug.

Material:

This is a "dummy" that we will later use to make a mould from. I use Jelutong simply because it is easy to work with. Jelutong is a great carving wood because it is soft and has no grain. Pine is a real pain with its hard winter growth rings. If you have never carved wood before, rather use Jelutong. I can send you some if you need.

Step 1 is to decide on a shape you are looking for. Cut a piece of wood to size and lay the design down on paper.


In this image, I have drawn the side and top profile. You will notice that I only draw half the profile on one half of the block. This is so I can fold it in half making sure the line is dead center and cutting it out. This ensures that the left side is exactly the same as the right.
TinSpoon123_zps4953ed99.jpg


Cut out the templates.

TinSpoon124_zps9805d6a2.jpg


Now you can draw the side profile on both sides of the block.

TinSpoon125_zpsd7f64e80.jpg


Carve to as close to the lines

TinSpoon126_zps9cfcf3bc.jpg


Then sand to final dimension

TinSpoon127_zpsa40a0f77.jpg


Now find the center on the back of the block. Lay the template over it lining the lines up and trace the shape.

TinSpoon128_zps44ebd1d7.jpg


Roughly carve the profile out.

TinSpoon129_zps533f54f1.jpg


Sand to final dimension

TinSpoon1210_zps744385dd.jpg


Then I used a compass to draw a line on both sides of the plug to which I will chamfer the profile.

TinSpoon1211_zps2770527f.jpg


Rough carve away

TinSpoon1212_zps3e4cc9da.jpg


Sand to final size.

TinSpoon1213_zpsbd6d49db.jpg


... To be continued.
 
Tip...

Glue sand paper on the side of blocks to make a sanding block. Then to final shape your plug, lay is down and use the block on a table to sand the sides. This way you know it is square to the surface.
 

Attachments

  • Tip 1.jpg
    Tip 1.jpg
    14.9 KB · Views: 2,601

chokka 123

New member
Thanks Benny! your tutorials are always helpful. Even though one has an idea how to do something there is always small details that can be learnt though tutorials that can make a difference!
 

m4kes

Senior Member
Thanks Bennie, awesome tutorial!!
Half time (rugby) & im checking out a fishing forum....
Giving my brother-in-law a call for some wood to practise with, carpenters always have bits & pieces in the workshop!
 
m4kes wrote:
Thanks Bennie, awesome tutorial!!
Half time (rugby) & im checking out a fishing forum....
Giving my brother-in-law a call for some wood to practise with, carpenters always have bits & pieces in the workshop!
Excellent. It's always good to know someone is reading this stuff.

I'll continue then.
 
Preparing the plug for moulding.


First, I drilled a small 1,6mm hole in it and bent/fitted a wire in it. This serves purely as something to hold for the next step. It will be removed later and the hole plugged.

TinSpoon1214_zps37208f14.jpg


Then I sealed it with and gave it 3-4 coats of paint, allowing to dry between coats. The idea is to get a solid coat.

TinSpoon1217_zps91a848e9.jpg


Once dry, Remove the wire and sand with 600# and then 1000# to fishing off with an ultra smooth surface. The more you put into your plug, the less you will need to do later and that applies to any lure you are moulding especially resin lures.

TinSpoon1219_zps435cda1a.jpg


The plug is ready, we are ready to start the mould.
 
Before we start the mould, this is what you will need.
 - Mouldmax 60 (available from AMT Composites) It will come with it's catalist. Do not bother with substitutes. MM 30 will not work for heat.

- Silicone thinners (available from AMT)

- A kitchen scale

- Something to mix in, make sure this is a container wider in size rather than deep. It will help to expel the air.
- Mixing utensil, I use tong depressors.

* If you mess MM 60 on anything, it will be stained for life*

Before we start. You need to add 8% by weight (not more than 10% max) of the thinners into the Mould Max 60 and let it stand for 24 hours before use.. This is very important, especially if you do not have a vacuum chamber. This will make the silicone flow better and assist in expelling air.

Air is our worst enemy especially when it comes to casting anything with heat. The heat will cause air pockets to expand and distort the mould.

siliconemould1_zpscc98c160.jpg
 

m4kes

Senior Member
Thanks Bennie, looking forward to the next installment.
Making my list of goodies to order for this :)
 

Andre Laas

Sealiner
Excellent tutorial Bennie

Some Questions:

1. Did you use normal rattle can paint to coat the wooden plug

2. I never knew you had to leave the silicone for 24 hours after thinning it. Could you thin your entire bucket of silicone at one time for future use, or will this just complicate accurate mixing later on?
 
Andre Laas wrote:
Excellent tutorial Bennie

Some Questions:

1. Did you use normal rattle can paint to coat the wooden plug

2. I never knew you had to leave the silicone for 24 hours after thinning it. Could you thin your entire bucket of silicone at one time for future use, or will this just complicate accurate mixing later on?
Hi,
1 - Yip a bog standard rattle can. A few coats.
2 - You can just thin the whole tub. You must leave it though for at least 12 hours, if you try to use it straight away I think it might not set properly due to dilution possibly. The recommended ratio is 100:3 parts for the catalist. I would use 100:2 parts which extends the pot life. Silicone does have a limited shelf life (although I have used old stuff with no real problems) but it will thicken over time becoming difficult to degas and you can only thin it once. There is an expiry date on the tub, look for the freshest stuff, it will be the most fluid.
 
The mould box... I am making a once off box that is simple to make with very little investment. Although the components can be re-used for similar size moulds, the parts will be re-used later on for casting.

Important: You need to make the box so that the mould is at least 10mm greater all round the lure. I prefer to be safe and go 15mm.

So for that box, I have the following materials:

Wood:
1. 1pc 120X50X20mm
2. 2pcs 120x50x5mm
3. 2pcs 70x50x5mm
4. Clay (available from AMT)
5. Super glue
6. Pencil
7. Tong depressors.

One of them I cut the end square which I will use to clean the clay up around the plug.
 

Attachments

  • mould box for White metal tin spoon.jpg
    mould box for White metal tin spoon.jpg
    22.8 KB · Views: 2,438
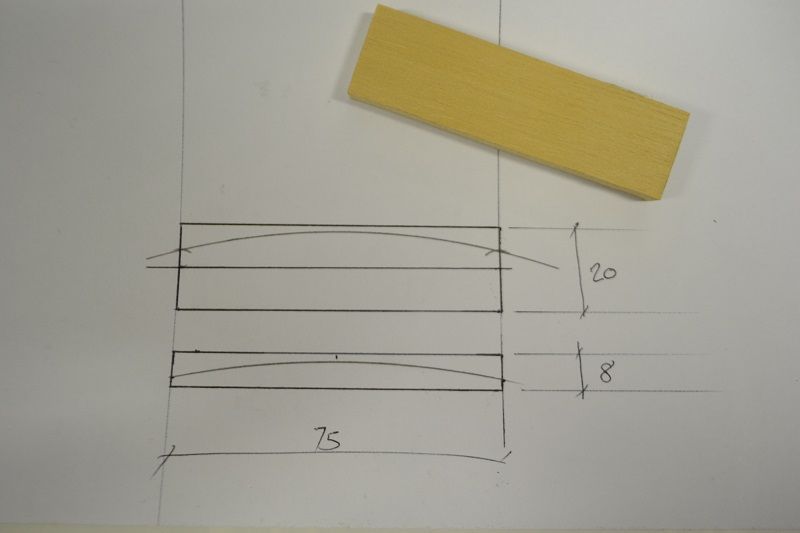
In order to allow myself the option of modifying the spoon later by making it a little heavier or lighter by increasing the thickness and also to allow myself the option in increase the sprew size, I decided that I will make the one mould half recess into the other. You will see later what I mean.

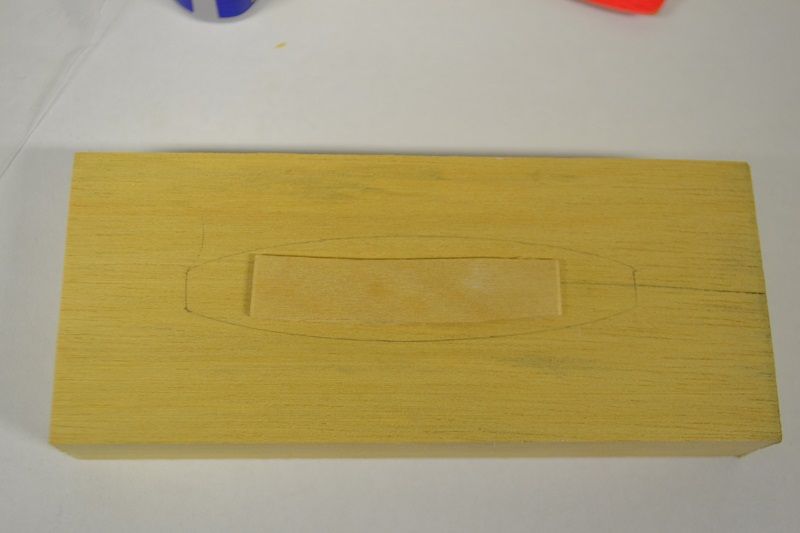
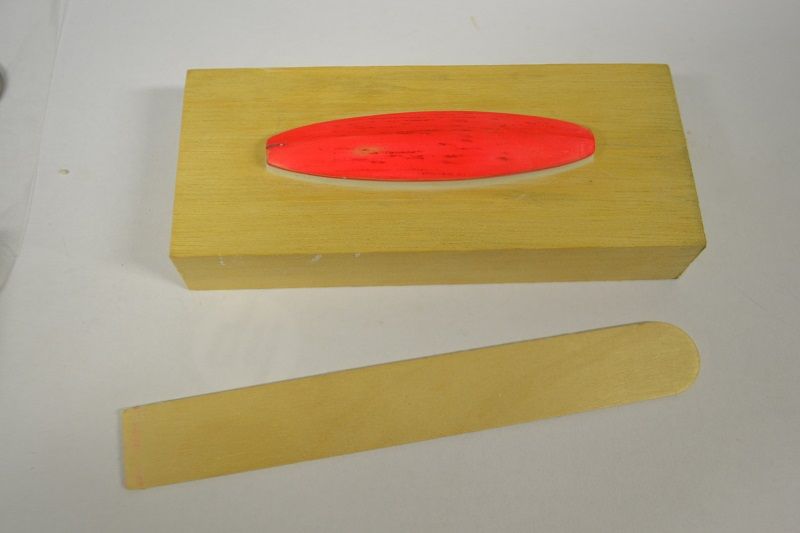
On the 20mm thick piece of wood, I marked where the lure should be positioned in the mould. You need minimum 10mm material around the spoon, I would recommend at least 15mm. I could have put it at a bit of an angle to facilitate the the pouring but to save materials I'll rather make it level and lean the mould slightly when pouring.

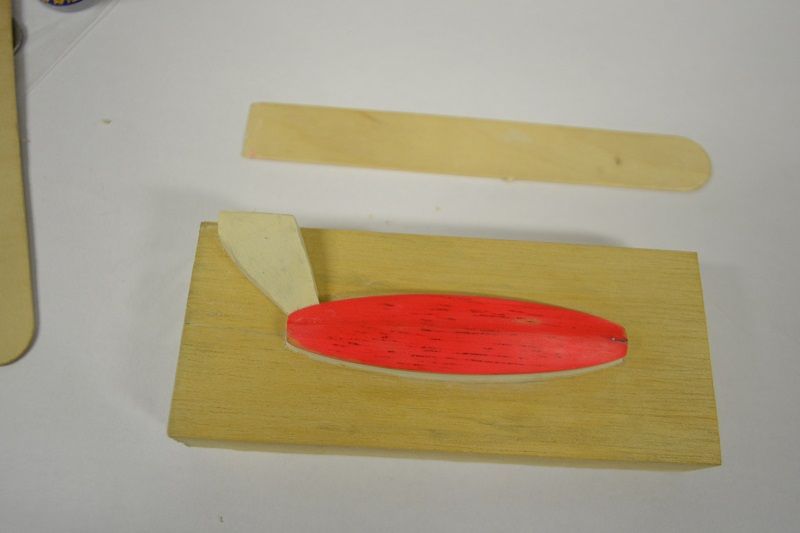
After marking the position, I cut a small piec of the tong depressor and glued it in the center just to lift it approximately 2mm.

TinSpoon1222_zps341b9b75.jpg


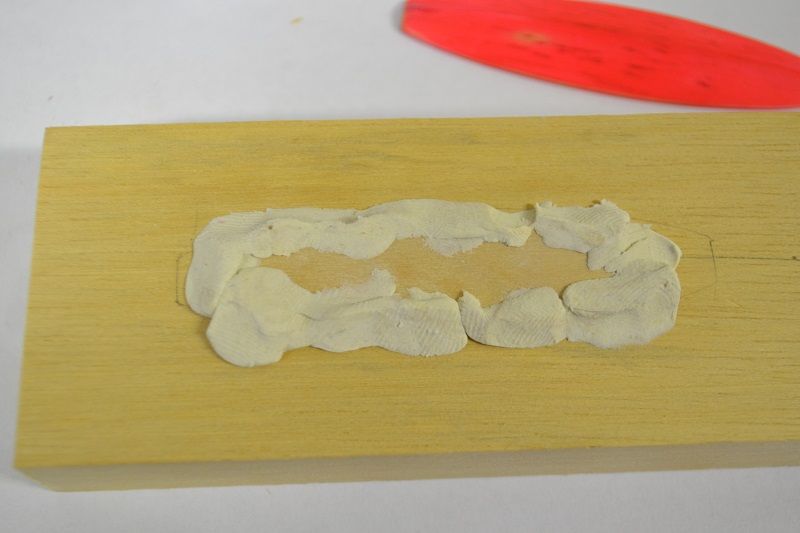
Then place some putty around the edges to hold the plug in position. Lay down extra that can be scraped clean later.

TinSpoon1223_zps0eb47a21.jpg


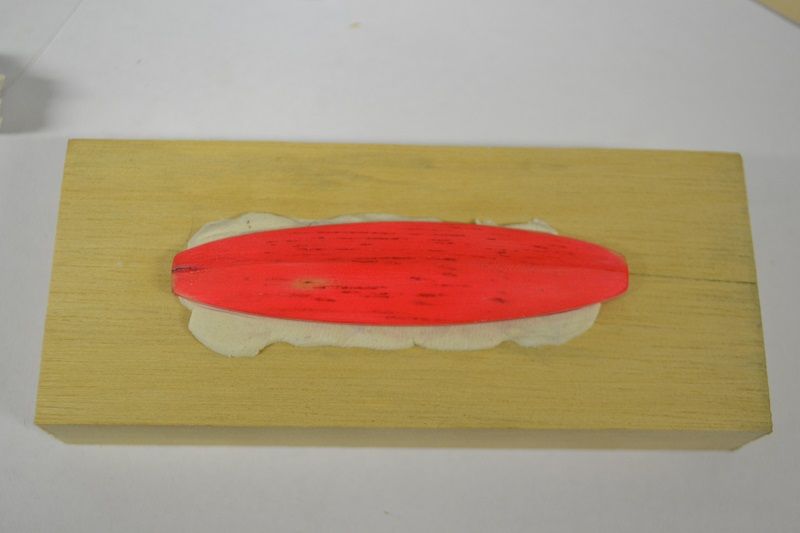
Stick the plug down.

TinSpoon1224_zps8b44d604.jpg


Scape the edges straight and clean with the squared off depressor.

TinSpoon1225_zps82d603a1.jpg


Before continuing place it in the freezer for 15min. This will harden the clay considerably and help keep everything put.

Now develop the sprew.

TinSpoon1226_zps6bd192d1.jpg


Place in freezer for another 15min to make the prew hard.

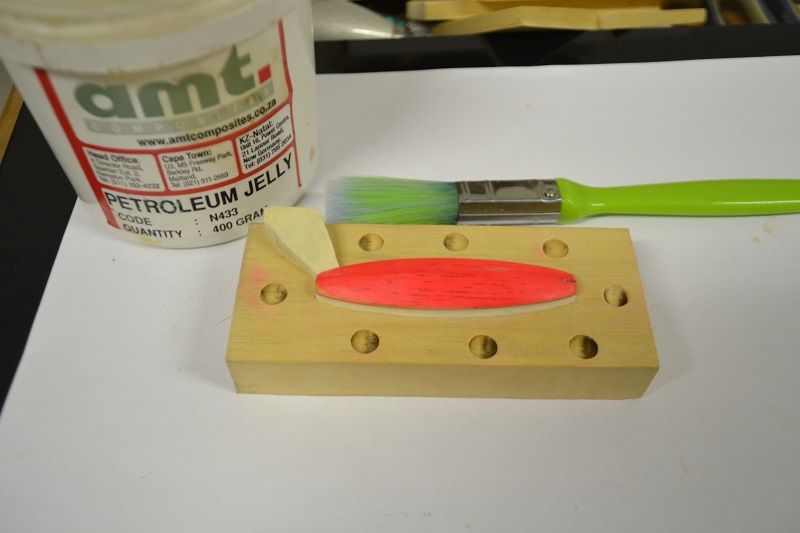
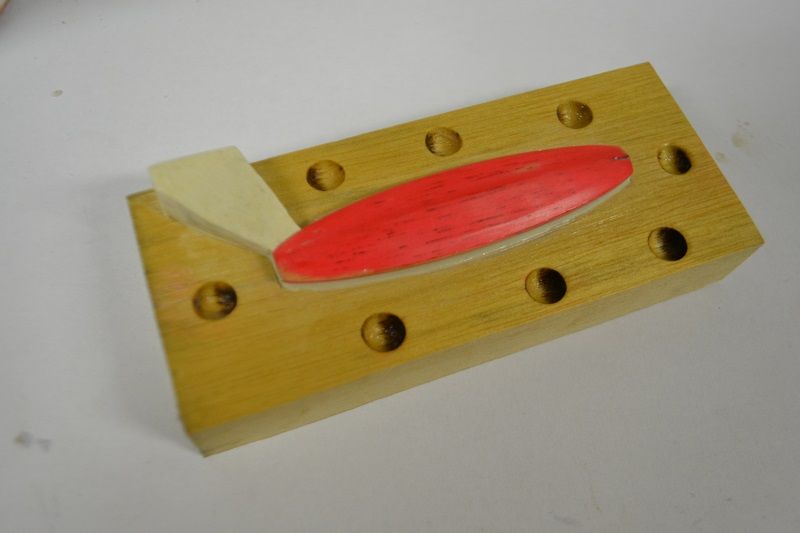
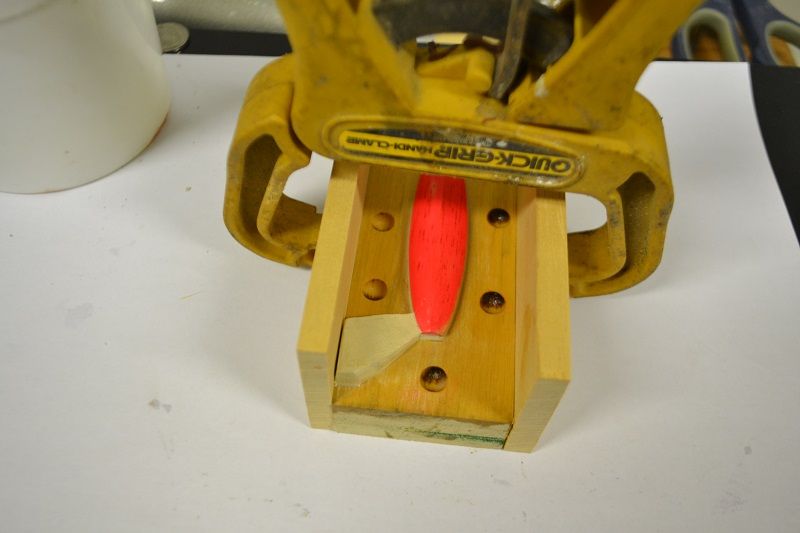
Next we need keys. For this you can use anything really. The half rounds you buy to stick over screws work nice. Or, as I did here, I used a round dremel tool to make half round indentations. I have used a counter sinking bit als on the past.

TinSpoon1228a_zpsbbef101a.jpg


Next, coat the entire piece of wood with a very light coating petroleum jelly (Vaseline). IT IS NOT NECESSARY TO COAT THE PLUG or prew. To be honest, you dont even really need to coat the wood. The only thing you need a barrier against is silicone. Silicone sticks to nothing but silicone. You don't even need to coat the wood with any barrier to be honest but it just helps to smooth out the wood grain. The silicone will seep into every tiny little groove.

TinSpoon1228_zps2defd50e.jpg


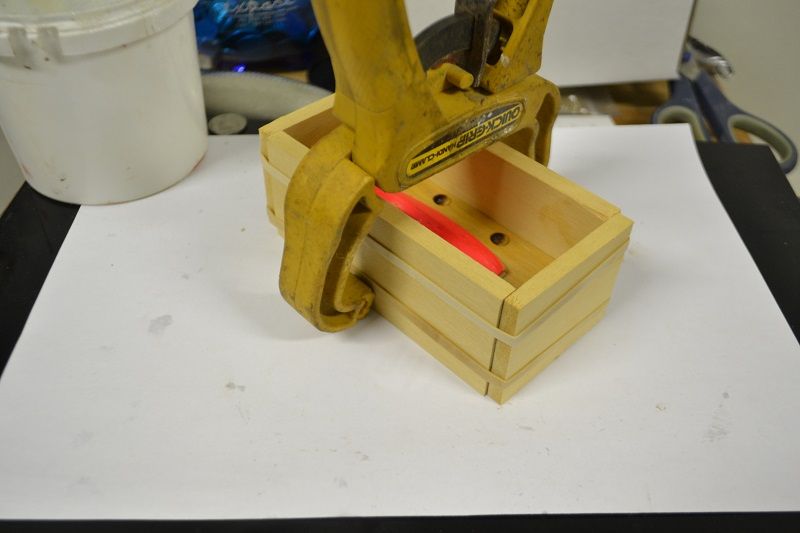
Next we place the 115X50X5 pieces of wood on the long edges and hold it in place with a clamp.

TinSpoon1229_zpse05fedc1.jpg


Then the 2 shorter planks and hold them in place with elastic bands.

TinSpoon1230_zpsb770ad4f.jpg


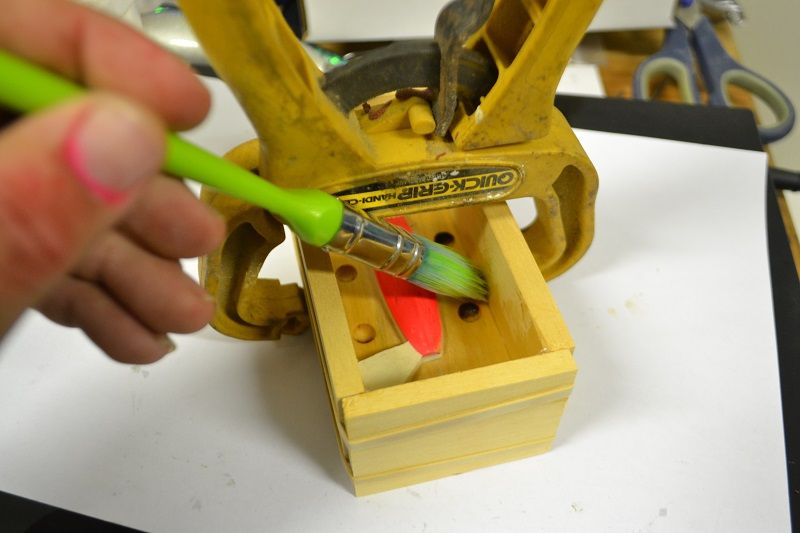
Now you need to smear every joint with petroleum jelly to prevent leakage.

TinSpoon1231_zps801261f4.jpg


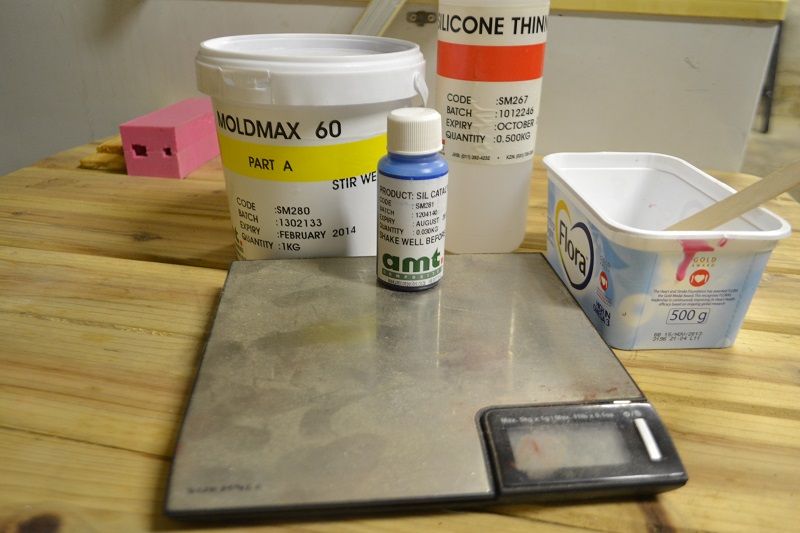
Your mould box is now ready. Next we look at the silicone, mixing and pouring.
 
Top