My first try

caesar

Member
I then placed the putty with the lure in the bottom of the box I made. It needs to fix tight or the silicone will leak out. I poured the silicone very slowly in the box. I started pouring at the lowest point and let the silicone run slowly over the lure. (Thanks again Bennie)

I let it stand over night and then then removed the putty with the lure from the box. I had no difficulty removing the silicone.
 

Attachments

  • DSC08614.JPG
    DSC08614.JPG
    41.1 KB · Views: 168

caesar

Member
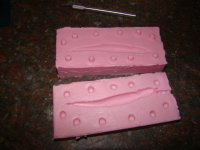
I then took the lure out of the putty and placed it back in the silicone. Then some Vasilene again and back into the box. Mix silicone, let it stand for the bubbles to escape and pour the same as with the first half.

Let it stand over night and remove from the box.

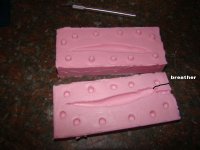
I cut a pouring spout but think it was a tad to small.
 

Attachments

  • DSC08616.JPG
    DSC08616.JPG
    32.8 KB · Views: 168

caesar

Member
benniejordaan wrote:
3 tips to pouring silicone.

1 - Use a large diameter bowl.
2 - Mix 8% thinner with it 24 hours before use to reduce viscosity.
3 - It takes a long time to cure - let it sit for a bit before using it.

Good stuff Caesar

I did mix 8% thinners and Im sure it made a big differance. Thank you for the tip.
 

caesar

Member
benniejordaan wrote:
The Onda Onde is a lure worthy of making and you can see into them for an idea for the lead.

Just a thought!

;)

The Onda Onde was my next move. I only have fake ones as I can not get them anywhere. The ones I have is painted so I can not see through them.
 
As for the sprew. What you can do is either cut the sprew bigger or cut another thin narrow breather on the other side of the wire loop.

Edit: The correct term is a vent.
 

Attachments

  • Caesar.JPG
    Caesar.JPG
    105.7 KB · Views: 168

caesar

Member
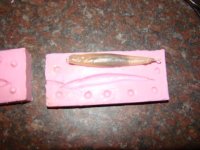
I then took stainless wire and for at least an hour tried to bend it to fit the shape. I also placed a small barrel sinker on the wire. There is not a lot of room to move the sinker around, so I hope it will do where I placed it.

I can for the life not bend the wire like Bennie does.

I then got busy and missed taking some photos. I mixed some resin in injected it into the mould. I had a lot of problems with bubbels in the mould. I somehow got most of it out. After about 2 hours I demoulded the lure which came out without any promlems.
 

Attachments

  • DSC08617.JPG
    DSC08617.JPG
    41.8 KB · Views: 168

caesar

Member
This is what it looks like after the demould. Not as perfect as I wanted it, but I am going to swim this one in December.
 

Attachments

  • DSC08618.JPG
    DSC08618.JPG
    40.7 KB · Views: 168

caesar

Member
There you can see the marks that I can not get out for the life of me. I have even sanded it till my fingers bled, but it sits.
 

Attachments

  • DSC08622.JPG
    DSC08622.JPG
    34.1 KB · Views: 167
Nothing wrong with that mold for a first time, now it can only get better, will try and get a pic of how I do the first part with the sprue, vents and mold keys, all the while having a flat surface to work with, in that mold box with which you can decide the thickness of your mold etc etc.

Another thing I like using instead of the vaseline is a liquid wax thingy I got from the company where I buy the RTV from, will go check out the name, that I apply before i use the airbushe to spray a very thin layer of PVA release paint/agent, looks like strawberry syrup they use a Milky lane hahahahaha, lemme go take pics quickly.
 

caesar

Member
The paint job is coming along. Had to redo it twice. I have now done the clear. Will post pics as soon as I can. A paint presentation will be great.
 

caesar

Member
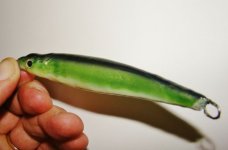
Ok here is the painted lure. It did not come out the way I wanted. I re-painted it twice. The airbrush thing is still new to me, but Im sure it will get better the more I do it.

The lure is not perfect, but Im working on that. All I need from it is to swim and catch a fish now. That will be the ultimate.
 

Attachments

  • DSC08887.JPG
    DSC08887.JPG
    21.4 KB · Views: 133
Top