
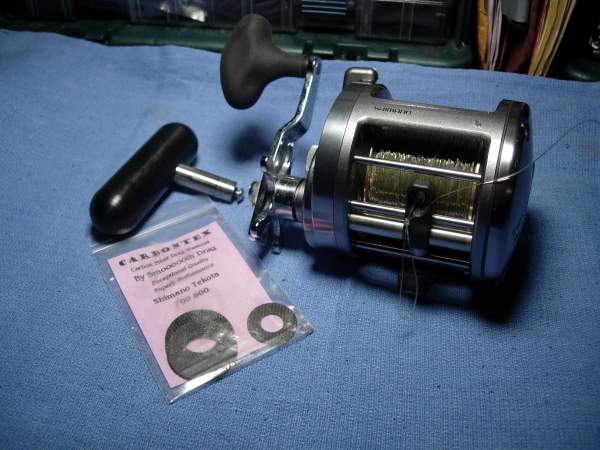
the shimano tekota 700 is a great trolling reel with a very solid levelwind assembly. heavily used models are plagued by drag failures and internal corrosion. the handle grip is also very small. we are going to changed out the stock drag washers for greased carbontex, bolt on a 4/0 kolekar handle grip, service the bearings and brush a light coat of grease on all of the non-exposed metal and graphite surfaces. you're really going to like the results. here's a link to the schematic - http://fish.shimano.com/media/fishing/techdocs/en/TEK700_v1_m56577569830498849.pdf and here is our reel.
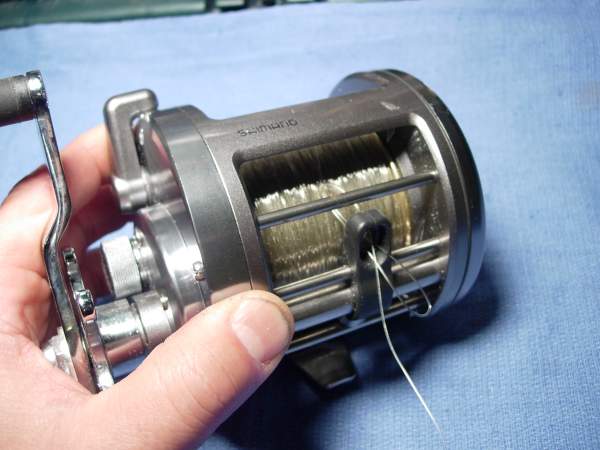
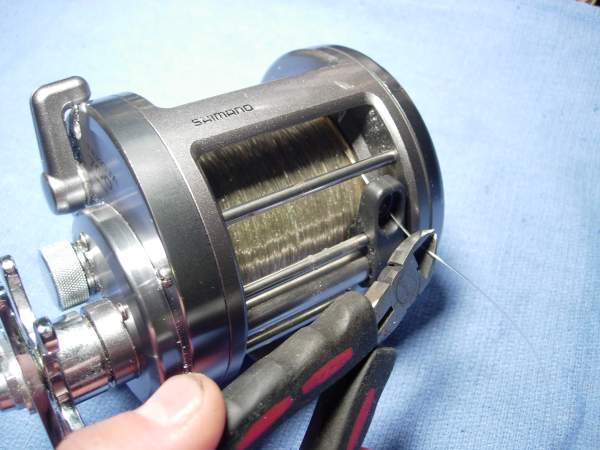
when a reel is shipped to me for service, i need line on the reel to test the drags. in the case of a levelwind, i like to return the reel with the line and the leveler in sync. what i will do in this case is pull the line all the way over the left side and cut the line. when i'm done, i can wind the leveler over to the far left, find the end of the line, poke it through the leveler and i'm back in sync. pretty smart, huh!
back out the four left side plate screws (key #546).

remove the two piece left side plate (key #592) and cover (key #593).
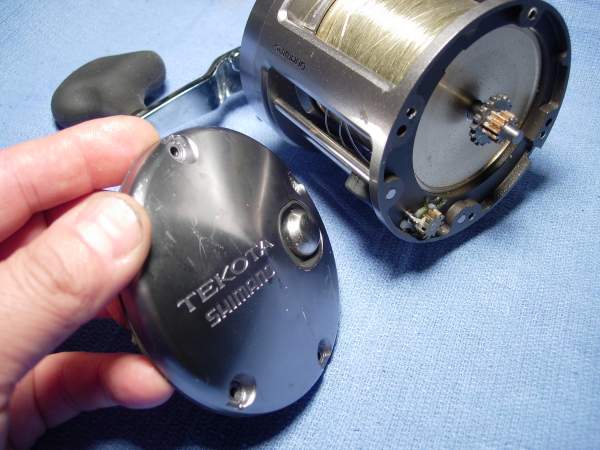
here's the inside of the left side plate assembly.

remove idler gear "B" (key # 586), idler gear "D" (key #587) and the left side plate bearing (key #584).


this bearing measures 5 x 11 x 4mm. lube the bearing and the idler gears with xtreme reel +.

corrosion and salt build up are VERY SERIOUS problems with this series of reels. take the time now to brush in a light coat of grease onto all of the non-exposed metal AND graphite surfaces of this reel.

lube the right spool bearing with xtreme reel +. this bearing measures 7 x 14 x 5mm. to service this bearing, carefully press out the crosspin.
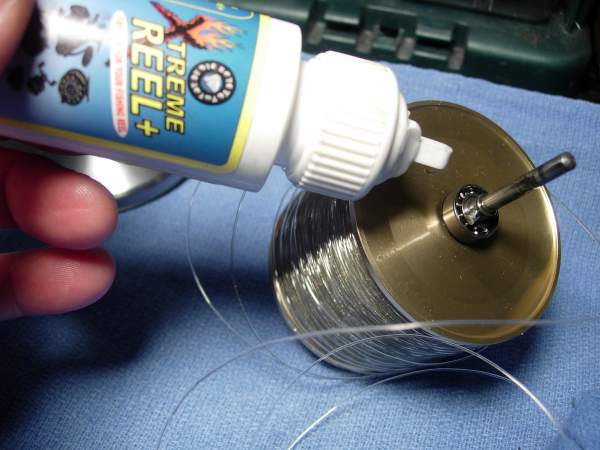
if you are going to cast with this reel, lube the levelwind assembly with xtreme reel +. if you are just trolling, you can use corrosion x or any oil that you wish.

this reel has an excellent feature, a stabilizer bar "A" (key #579) that will prevent the loss of the pawl cap (key #522).
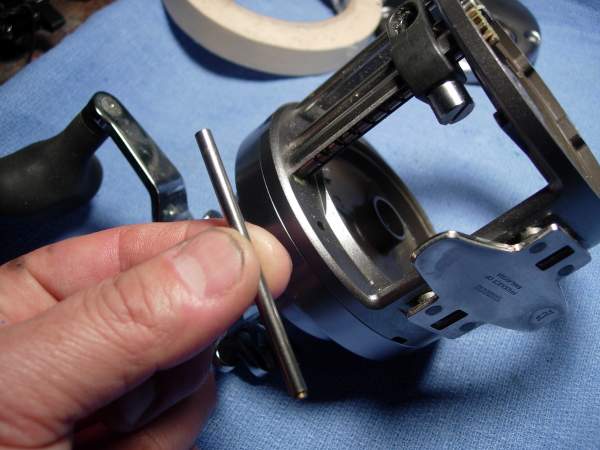
remove the pawl cap (key #522).

lube the line guide pawl (key #47).

re-install the pawl (key #47), the cap (key #522) and stabilizer bar "A" (key #579).


install the left side plate (key #592) and cover (key #593). add a bead of grease to each screw hole.

reinstall the four left side plate screws (key #546).
give the spool a spin. nice, huh!
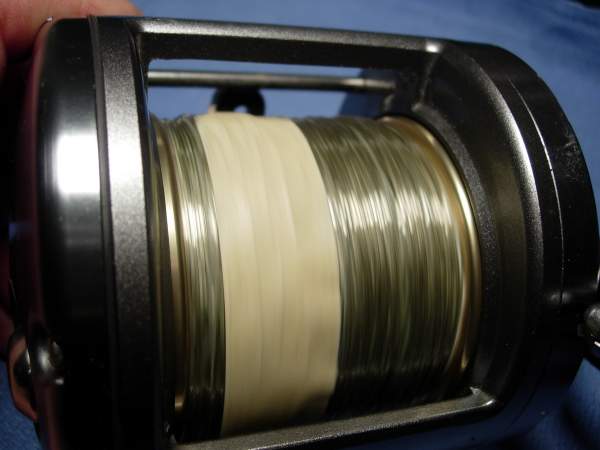
now for the right side plate. remove the handle nut plate screw (key #128).
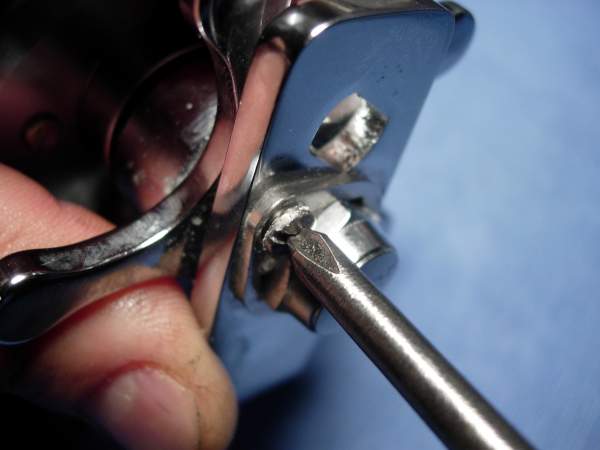
remove the handle nut plate (key #557).

remove the 13mm handle nut (key #425).

remove the handle assembly (key #558).

see the hole in the drive shaft (key #571)? there is a click pin (key #295) that will shoot out in that direction. let's try to not let it shoot out into never never land. back out the star drag (key #559) and look for the click pin to pop out.

there it is.

remove the star drag washer (key #429) and the four drag spring washers (key #'s 430 and 431).

remove the bearing seal (key #433) and bearing thrust washers (key #481).

remove the two right side plate screws "B" (key #506).

remove the shorter right side plate screw "A"'s(key #560) and longer "B"'s (key #523).
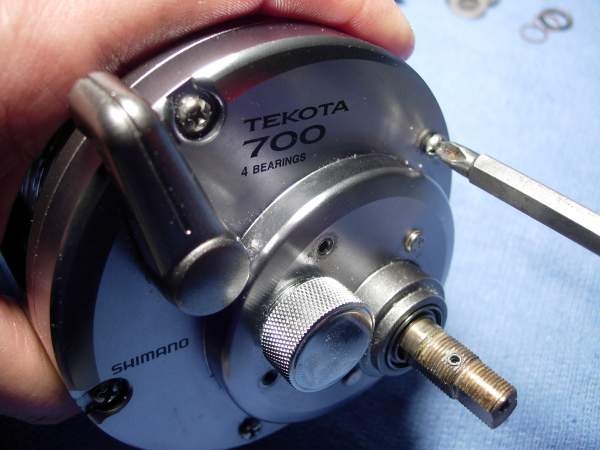
line everything up and keep things in order.

carefully lift up the right side plate (key #561). some parts are going to stay with the side plate.


pull the roller clutch inner tube (key #564) out of the right side plate.

remove the drive shaft bearing (key #486). it measures 10 x 15 x 4mm.

remove the yoke springs (key #299).

there are two small thrust washers (no key #) that sit on top of the support shafts for the yoke springs. set them aside.


take a second for a quick survey. double dogs! very nice.

remove the drive gear (key #568) with drag washers.

spread out all of the metal key and eared washers (key #'s 565 and 567) and dartanium drag washers "A" and "B" (key #'s 566 and 569).

take a close look. this is what a very sticky dartanium drag looks like.

we're going to toss the old washers and install a set of carbontex drag washers from http://smoothdrag.com/price.html.

let's clean up the base plate first.

pull the yoke plate (key #577), the yoke (key #300) and pinion gear (key #576).

remove the four anti-reverse pawl screws (key #305) and anti-reverse pawl keepers (key #306).

remove the anti-reverse pawls (key #303) and the anti-reverse ratchet (key #570).

take a look at the pawls (key #303) and make sure they are not banged up.

clean up the base plate and spread the grease around evenly with an old toothbrush.


these pins (no key #) require no servicing.

add the anti-reverse pawls (key #303) to the anti-reverse ratchet (key #570).

install the pawls and ratchet as a unit.

install the anti-reverse pawl keepers (key #306) and screws (key #305).

install the yoke plate (key #577).

add some xtreme reel + to the spool shaft to clean the grease off the shaft and leave a coat of teflon.

the yoke (key #300) has to be installed "bevelled side" down.

install the yoke (key #300) and pinion gear (key #576) as a unit.

install the thrust washers (no key #) on top of the yoke springs supports.

install the yoke springs (key #299).

let's rebuild the drag stack. slap a coat of drag grease on all of the carbontex drag washers.

keep the fiber and metal washers in their original order. metal washers alternate "keyed, eared, keyed."

install the roller clutch inner tube (key #564).

take an old toothbrush and spread an even coat of grease on the inside of the right side plate (key #561).

add a bead of grease to each screw hole in the base plate.

install the right side plate. make sure that the yoke plate (key #577) is "up" and that the clutch lever (key #562) is in the forward or "in gear" position.
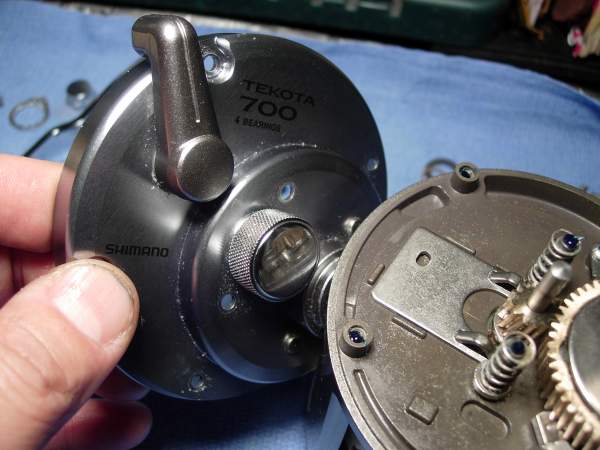
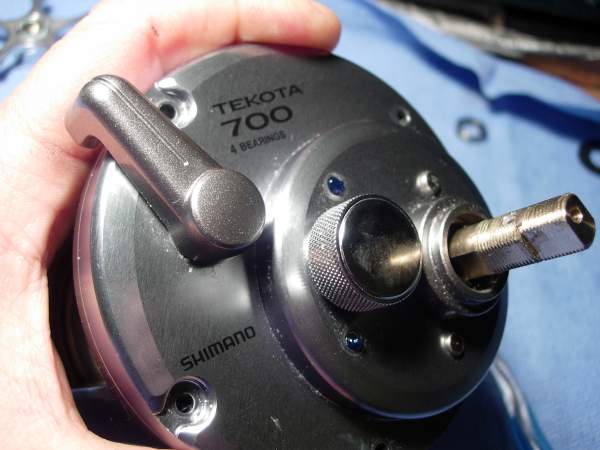
install the six right side plate screws "A" (key #560), "B" (key #506) and "C" (key # 523).
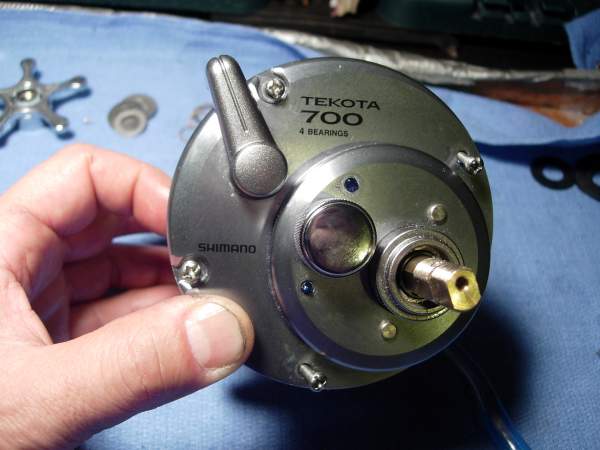

install the drive shaft bearing (key #486), pack it with grease first.


install the bearing seal (key #433) and bearing thrust washers (key #481).

install the four drag spring washers (key #'s 430 and 431) and star drag washer (key #429).

install the click pin (key #295). the click spring (key #296) should already be inside.

push the click pin down and insert a toothpick into the drive shaft to hold the pin in a down position.

install the star drag (key #559).

turn the star drag (key #559) down until it clears the shoulders of the drive shaft (key #571).
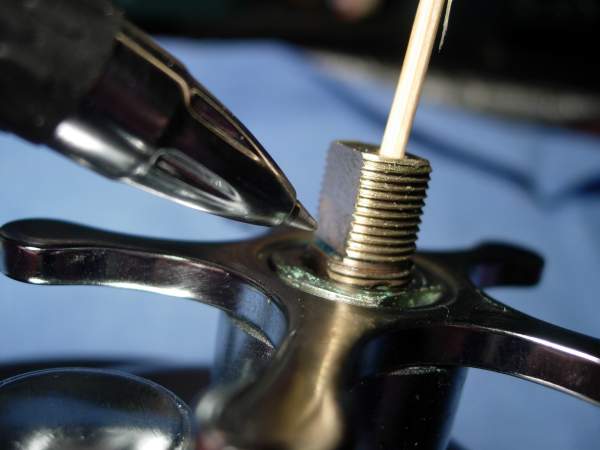
install the drive shaft shield (key #427). this was not shown during tear down.

now we're going to drill out the old handle grip and bolt on a new kolekar grip. this dot on the rivet will help.
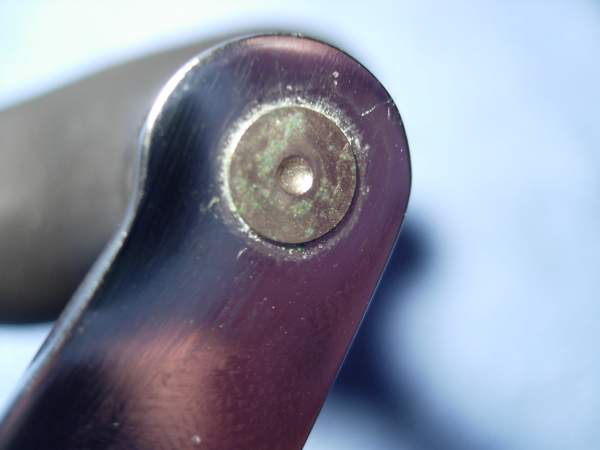
use a 3/16ths inch drill bit to drill out the rivet.

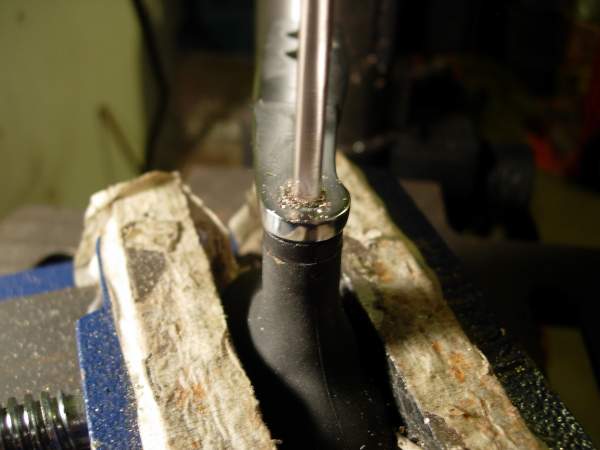


compare the old grip to the new one.

use a 1/8th inch hex drive for this 10-32 hex socket cap screw.

changing out the handle grip is a very important part of this upgrade.

install the new kolekar handle.

install the 13mm handle nut (key #425) and handle nut plate (key #557).

install the handle nut plate screw (key #128).

and done!!!!!!!!! a quick check of the freespool shows that the line leveler will travel the width of the spool three times before stopping.

oops, not quite done. crank the handle until the line guide (key #574) travels to the far left, find the tag end of the fishing line, poke it through the line guide and tie it off.

ok, now we're done!

when a reel is shipped to me for service, i need line on the reel to test the drags. in the case of a levelwind, i like to return the reel with the line and the leveler in sync. what i will do in this case is pull the line all the way over the left side and cut the line. when i'm done, i can wind the leveler over to the far left, find the end of the line, poke it through the leveler and i'm back in sync. pretty smart, huh!
back out the four left side plate screws (key #546).
remove the two piece left side plate (key #592) and cover (key #593).
here's the inside of the left side plate assembly.
remove idler gear "B" (key # 586), idler gear "D" (key #587) and the left side plate bearing (key #584).
this bearing measures 5 x 11 x 4mm. lube the bearing and the idler gears with xtreme reel +.
corrosion and salt build up are VERY SERIOUS problems with this series of reels. take the time now to brush in a light coat of grease onto all of the non-exposed metal AND graphite surfaces of this reel.
lube the right spool bearing with xtreme reel +. this bearing measures 7 x 14 x 5mm. to service this bearing, carefully press out the crosspin.
if you are going to cast with this reel, lube the levelwind assembly with xtreme reel +. if you are just trolling, you can use corrosion x or any oil that you wish.
this reel has an excellent feature, a stabilizer bar "A" (key #579) that will prevent the loss of the pawl cap (key #522).
remove the pawl cap (key #522).
lube the line guide pawl (key #47).
re-install the pawl (key #47), the cap (key #522) and stabilizer bar "A" (key #579).
install the left side plate (key #592) and cover (key #593). add a bead of grease to each screw hole.
reinstall the four left side plate screws (key #546).
give the spool a spin. nice, huh!
now for the right side plate. remove the handle nut plate screw (key #128).
remove the handle nut plate (key #557).
remove the 13mm handle nut (key #425).
remove the handle assembly (key #558).
see the hole in the drive shaft (key #571)? there is a click pin (key #295) that will shoot out in that direction. let's try to not let it shoot out into never never land. back out the star drag (key #559) and look for the click pin to pop out.
there it is.
remove the star drag washer (key #429) and the four drag spring washers (key #'s 430 and 431).
remove the bearing seal (key #433) and bearing thrust washers (key #481).
remove the two right side plate screws "B" (key #506).
remove the shorter right side plate screw "A"'s(key #560) and longer "B"'s (key #523).
line everything up and keep things in order.
carefully lift up the right side plate (key #561). some parts are going to stay with the side plate.
pull the roller clutch inner tube (key #564) out of the right side plate.
remove the drive shaft bearing (key #486). it measures 10 x 15 x 4mm.
remove the yoke springs (key #299).
there are two small thrust washers (no key #) that sit on top of the support shafts for the yoke springs. set them aside.
take a second for a quick survey. double dogs! very nice.
remove the drive gear (key #568) with drag washers.
spread out all of the metal key and eared washers (key #'s 565 and 567) and dartanium drag washers "A" and "B" (key #'s 566 and 569).
take a close look. this is what a very sticky dartanium drag looks like.
we're going to toss the old washers and install a set of carbontex drag washers from http://smoothdrag.com/price.html.
let's clean up the base plate first.
pull the yoke plate (key #577), the yoke (key #300) and pinion gear (key #576).
remove the four anti-reverse pawl screws (key #305) and anti-reverse pawl keepers (key #306).
remove the anti-reverse pawls (key #303) and the anti-reverse ratchet (key #570).
take a look at the pawls (key #303) and make sure they are not banged up.
clean up the base plate and spread the grease around evenly with an old toothbrush.
these pins (no key #) require no servicing.
add the anti-reverse pawls (key #303) to the anti-reverse ratchet (key #570).
install the pawls and ratchet as a unit.
install the anti-reverse pawl keepers (key #306) and screws (key #305).
install the yoke plate (key #577).
add some xtreme reel + to the spool shaft to clean the grease off the shaft and leave a coat of teflon.
the yoke (key #300) has to be installed "bevelled side" down.
install the yoke (key #300) and pinion gear (key #576) as a unit.
install the thrust washers (no key #) on top of the yoke springs supports.
install the yoke springs (key #299).
let's rebuild the drag stack. slap a coat of drag grease on all of the carbontex drag washers.
keep the fiber and metal washers in their original order. metal washers alternate "keyed, eared, keyed."
install the roller clutch inner tube (key #564).
take an old toothbrush and spread an even coat of grease on the inside of the right side plate (key #561).
add a bead of grease to each screw hole in the base plate.
install the right side plate. make sure that the yoke plate (key #577) is "up" and that the clutch lever (key #562) is in the forward or "in gear" position.
install the six right side plate screws "A" (key #560), "B" (key #506) and "C" (key # 523).
install the drive shaft bearing (key #486), pack it with grease first.
install the bearing seal (key #433) and bearing thrust washers (key #481).
install the four drag spring washers (key #'s 430 and 431) and star drag washer (key #429).
install the click pin (key #295). the click spring (key #296) should already be inside.
push the click pin down and insert a toothpick into the drive shaft to hold the pin in a down position.
install the star drag (key #559).
turn the star drag (key #559) down until it clears the shoulders of the drive shaft (key #571).
install the drive shaft shield (key #427). this was not shown during tear down.
now we're going to drill out the old handle grip and bolt on a new kolekar grip. this dot on the rivet will help.
use a 3/16ths inch drill bit to drill out the rivet.
compare the old grip to the new one.
use a 1/8th inch hex drive for this 10-32 hex socket cap screw.
changing out the handle grip is a very important part of this upgrade.
install the new kolekar handle.
install the 13mm handle nut (key #425) and handle nut plate (key #557).
install the handle nut plate screw (key #128).
and done!!!!!!!!! a quick check of the freespool shows that the line leveler will travel the width of the spool three times before stopping.
oops, not quite done. crank the handle until the line guide (key #574) travels to the far left, find the tag end of the fishing line, poke it through the line guide and tie it off.
ok, now we're done!

