Portable Live Bait Tank

B8FISH

Senior Member
[align=center][size=[font="Times New Roman"]Portable Live Bait Tank[/font]][/size][/b][/align]
 

I used two 200 litre plastic drums. The top of the drums have two access points, which are not ideal for making a useable surface to make a live bait tank, therefore I used the bottom sides of both drums to construct the tank. I cut the one drum at about 50cm and used the other drum to create the new top so that the height of the whole unit fitted comfortably in the canopy in my truck, the bottoms on the drums are better, as they are flatter, and easier to mount the sealable lid that I used. The white silicone seal shows where the drums were cut. I took the cut drums to a plastic welder (Poly Weld) and he welded the two pieces together. The live bait tank sits 70cm high, thus fitting into the trucks canopy easily.

The orange webbing was sewed by a friend of mine with an industrial sowing machine. It makes for easier moving around.

The tank comfortably takes between 80- 100 litres of water.


Attachments

  • DSC02822.JPG
    DSC02822.JPG
    39.9 KB · Views: 1,727

B8FISH

Senior Member
This is the view of the top of the tank. It seals completely, therefore not spilling any water from the tank when driving over rough terrain. This lid costs a bit, but is worth it.
 

Attachments

  • DSC02823.JPG
    DSC02823.JPG
    29.2 KB · Views: 1,717

B8FISH

Senior Member
Next is the inside of the tank and probably the most important part. This is the part that makes all the difference between success and failure. I stole with my eyes properly from a very successful Natal angler to get how a successful tank works. There are a couple important factors that need to be taken into consideration to ensure that your live bait survives. One is oxygenating the water, secondly is creating a current in the tank and lastly is removing dentritis (read by-products) from the water or in other words, some sort of filtration. Do not get too carried away with the filtration, you will see that my filter system is very simple compared to the commercial products on sale, but it is very effective.

To mount the pumps that are required to run the tank, a piece of moranti wood is used. I sealed the wood with marine resin to ensure the woods longevity. On this assembly I mounted two bilge pumps, both 12V DC. This is to ensure that I can travel with the pumps running. One bilge pump runs the filter at 360 Gallons per minute, the other bilge pump creates current in the tank and spray on the surface to oxygenate the water at minimum 500 Gallons per minute.

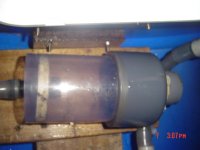
From the above image one can see how the moranti wood backing is attached to the top the tank via two stainless steel nut and bolts. The filtration system is also illustrated. It consists of an inlet pipe, on the left, coming from the 360 GPM pump and leaves the cylinder on the right, back into the tank. In this cylinder one uses a fine mesh bag filled with activated charcoal and filter floss (the white thick cotton wool used in fish tanks). This simple filtration system works beautifully to remove dentritis.
 

Attachments

  • DSC02827.JPG
    DSC02827.JPG
    24.5 KB · Views: 1,720

B8FISH

Senior Member
In this next illustration are the two bilge pumps. The 360 GPM feeds the filter system which you can see at the top of the image. The orange pump is 500 GPM, it is connected directly to a vertical pipe as illustrated. This vertical pipe has holes drilled on one side to create a current in the tank. If one wants to, tubing can be connected to the orange pump and connected to an oxygen tank, run the oxygen through the pipes to the current and spray works very well.


Attachments

  • DSC02826.JPG
    DSC02826.JPG
    32.8 KB · Views: 1,710

B8FISH

Senior Member
The vertical pipe runs to a pipe fitted horizontally as illustrated below, holes facing down ensure a spray onto the water, thus oxygenating the tank.
 

Attachments

  • DSC02829.JPG
    DSC02829.JPG
    21.8 KB · Views: 1,714

B8FISH

Senior Member
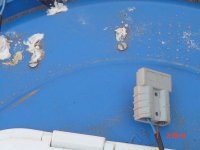
This image shows two stainless steel bolts. The whole internal assembly is mounted on these two bolts.

At the top of the image, the wiring from the bilge pumps. The socket in the image is the same used by caravaners, I have one fitted in my truck, and one on the tank.


In closing, the tank has worked nicely, I change 50% of the water every 12hrs. If I am travelling long distances, I change the water every 200km. Yes, that means I find a way to get 50% fresh sea water into the tank every 200km. This is mainly to change water temperature. By the time I get to my destination, the live bait is acclimatized to the temperature of the water where I am fishing.


To run the tank overnight I connect the Bilge pump to a Car Battery Charger, simple as that.
 

Attachments

  • DSC02825.JPG
    DSC02825.JPG
    31.2 KB · Views: 1,697

angler 1

Sealiner
Grear stuff ,tell me what charger r u using and how many amps it is.many thanks oh and what produces the current ,is it the outlet from the filter
 

B8FISH

Senior Member
I'll have to check the charger's amperage.
If you look at tha bottom bilge pump you will see a pipe coming off it running vertically up. This pipe has holes in it, and creates current. This vertical pipe leads to a horizontal pipe fixed to the roof of the tank. This horizontal pipe also has holes in it, and sprays water back into the tank. this spray creates bubbles and helps with the aeration. I hope this helps.
 
Top