
penn 209 rebuild - 12/27/09
this is another post that is long overdue. here is our reel, a basic, stock penn 209.
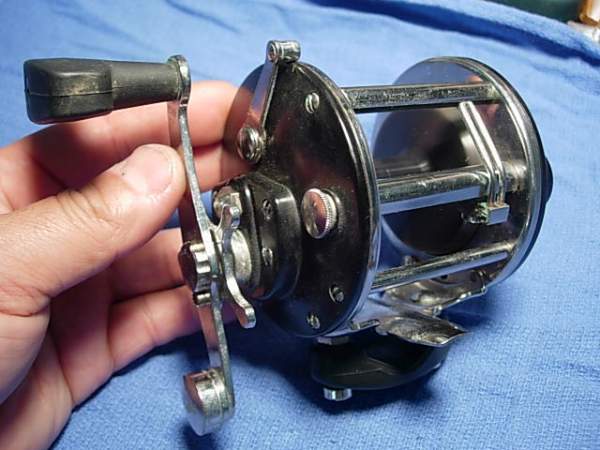
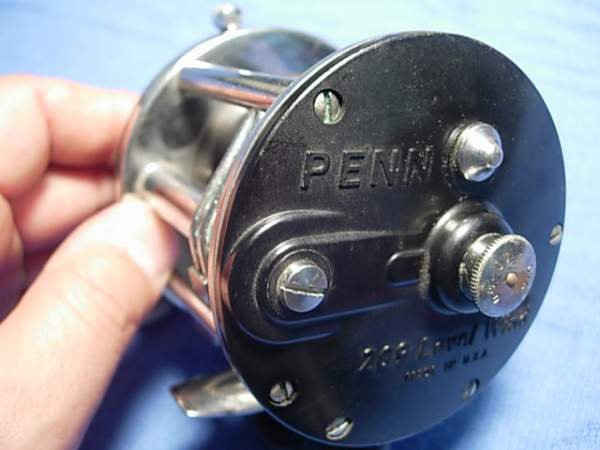
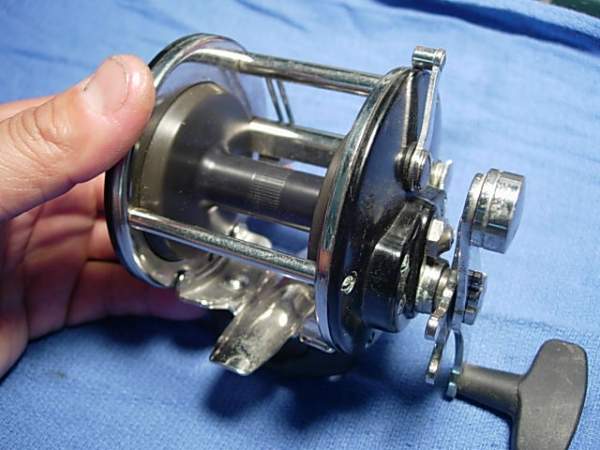
we're going to start with the left side plate. all we have to do be back out each of the left side plate screws (key #'s 32 and 38), one at a time.
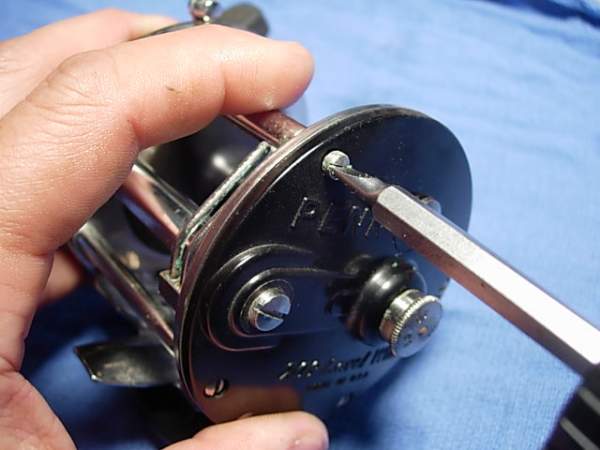
add a bead of grease to each screw or screw hole, but do this one screw at a time.
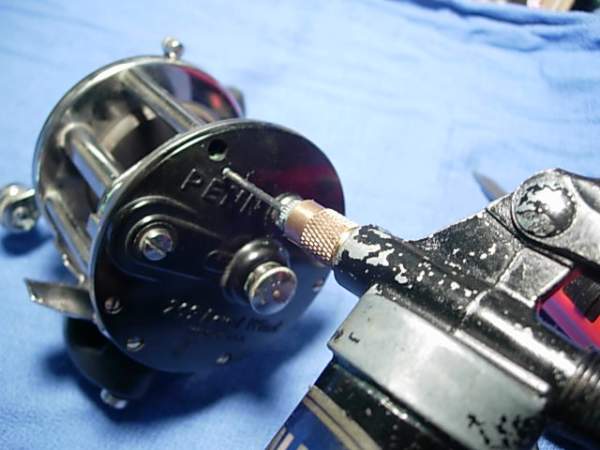
now back out each of the right side plate screws (key #32 and 38) and set them aside.
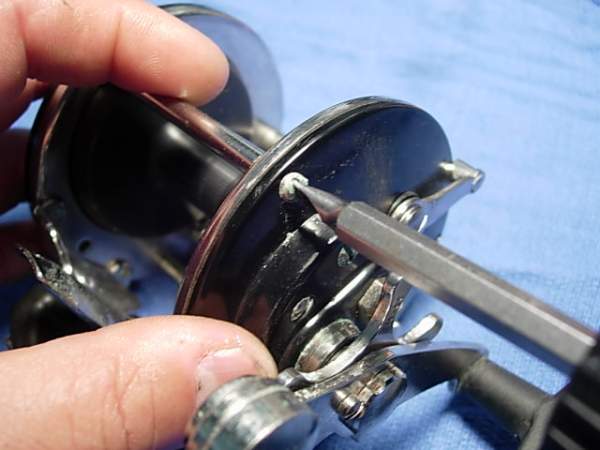
at this point, the reels separates multiple pieces.
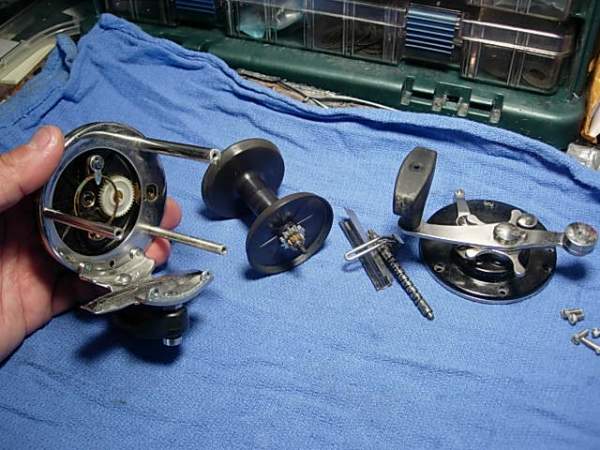
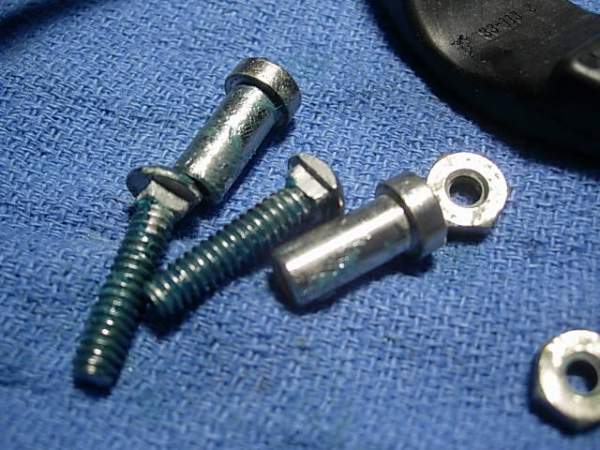
lightly grease the clamp screws (key #34), then reassemble the rod clamp assembly.
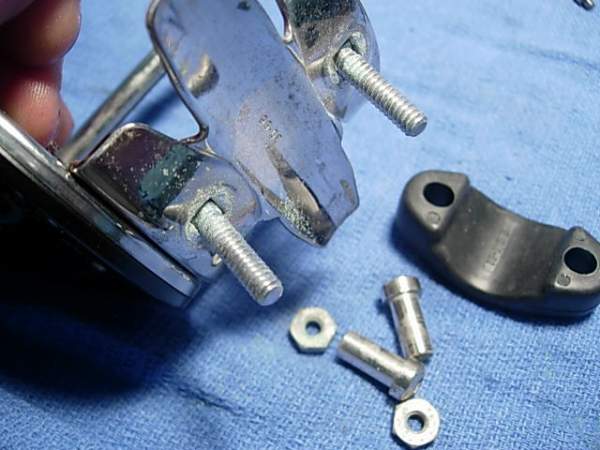
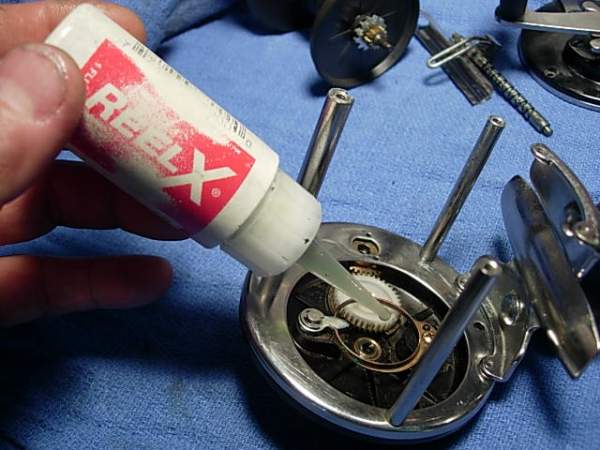
this reel is not going to win any distance casting competitions, so we'll lube the left side bushing (key #40) with corrosion x.
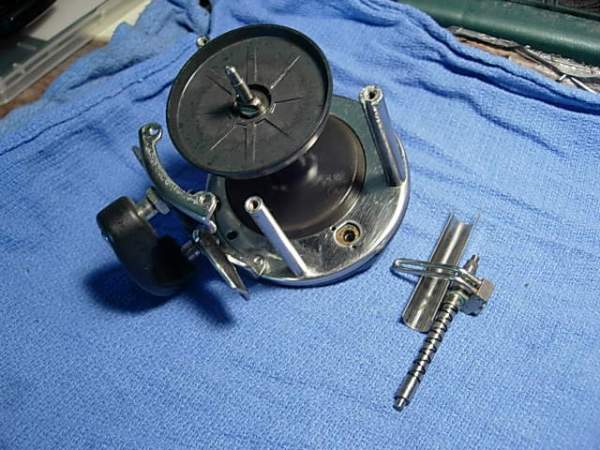
install the spool (key #29L) back into the left side plate assembly (key #27) and set it aside.
now for the right side plate. remove the handle lock screw (key #23A).
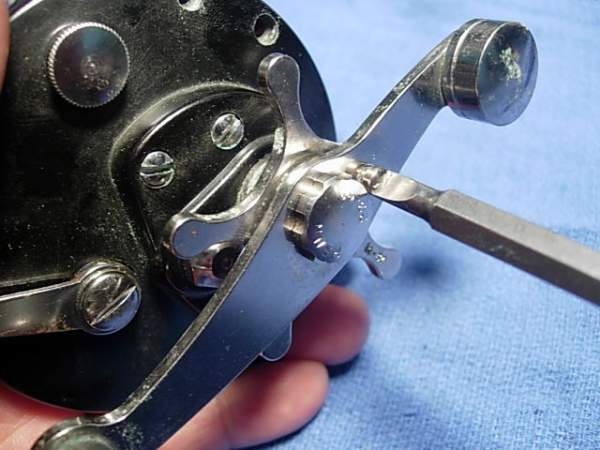
remove the handle screw (key #23).
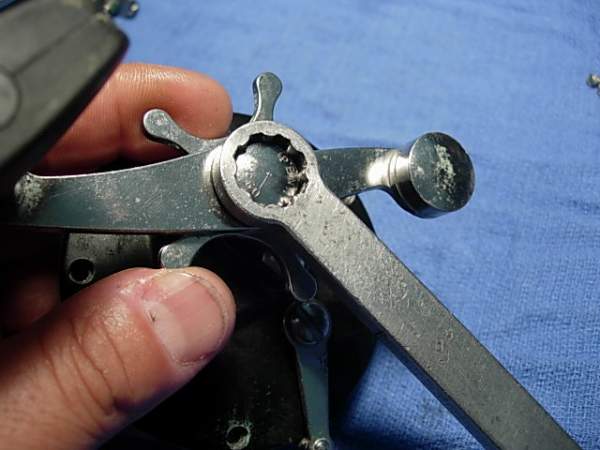
removed the handle assembly (key #24).
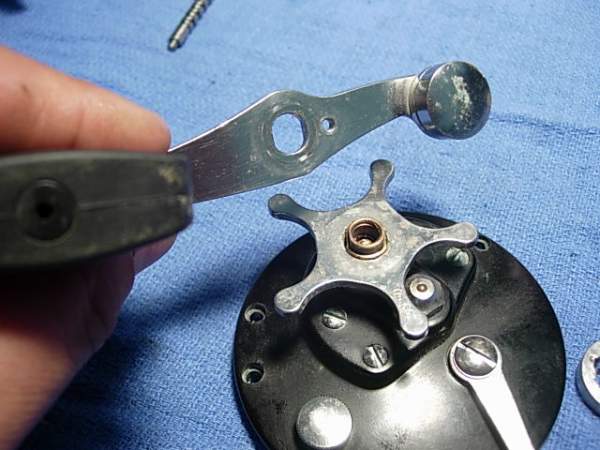
remove the star drag (key #10).
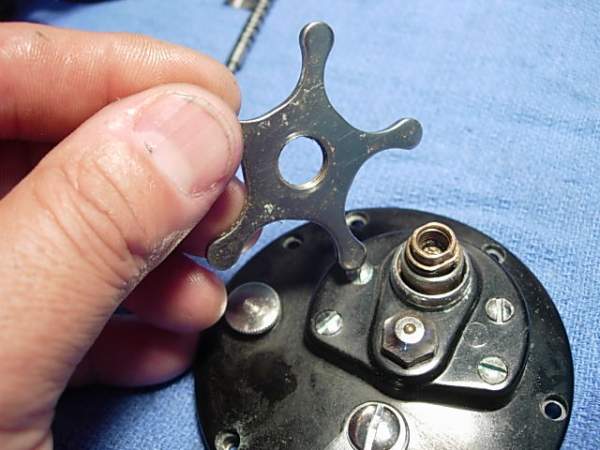
note the condition of the brass gear sleeve (key #98). this one is fine.
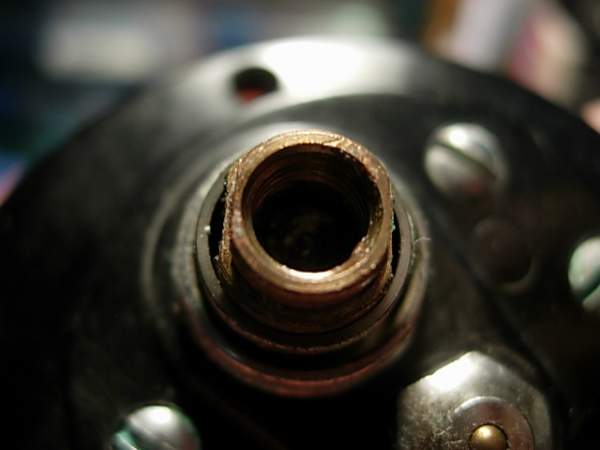
back out the four bridge screws (key #'s 16 and 17).
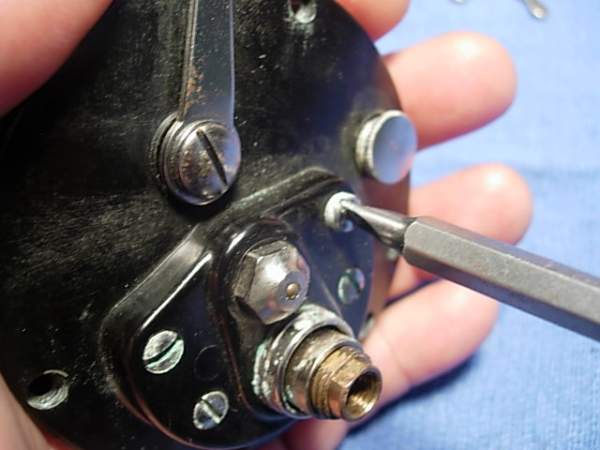
the bridge assembly (key #3) will drop right out. carefully set the side plate down and leave all the other parts right where they are. do not flip the right side plate (key #1) over at this time.
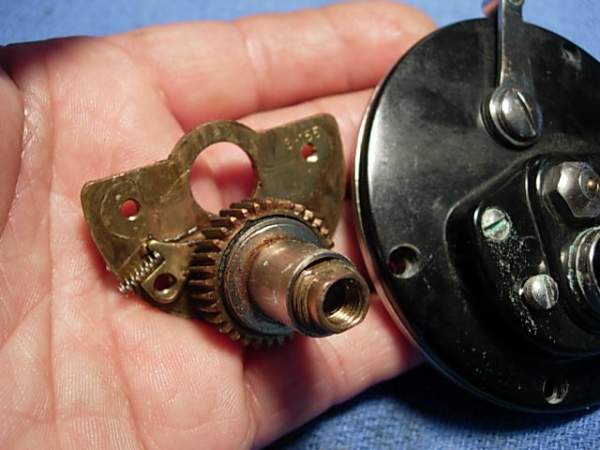
take a moment now to find the dog (key #15) and dog spring (key #14) and place them in a safe place.
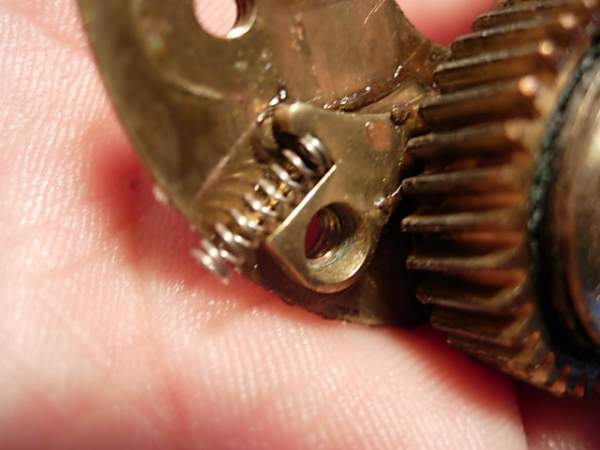
now for the bridge assembly (key #3).
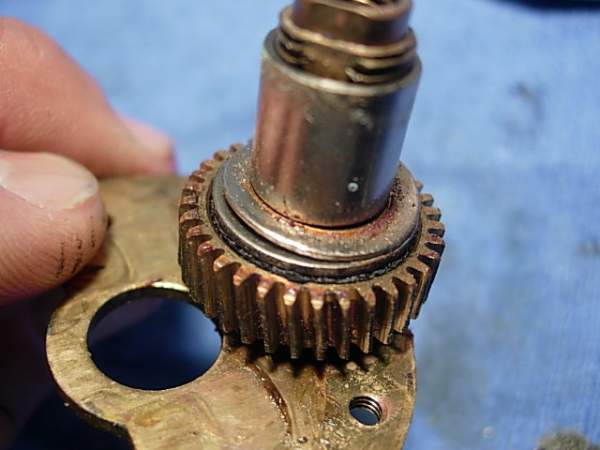
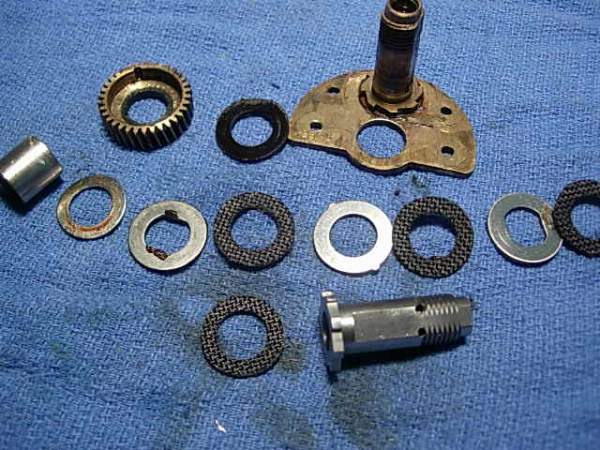
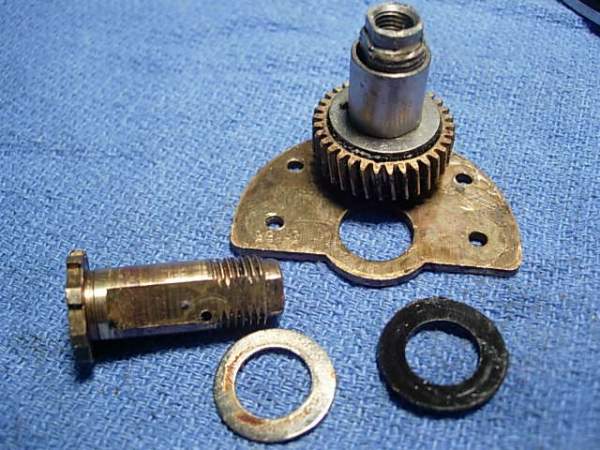
here's what it looks like when it's in pieces. we are going to change out the fiber washer (key #4) for a penn #6-113 drag washer that has been ground down to size. we are also going to change out the brass gear sleeve (key #98) for an aftermarket stainless steel gear sleeve (pennparts.com #98-155AT) that has been double drilled for the most precise fit.
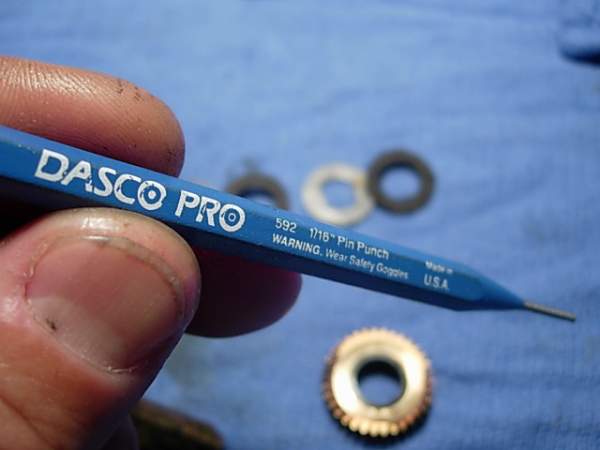
use a pin punch to remove the retaining pin from the stock gear sleeve (key #98).
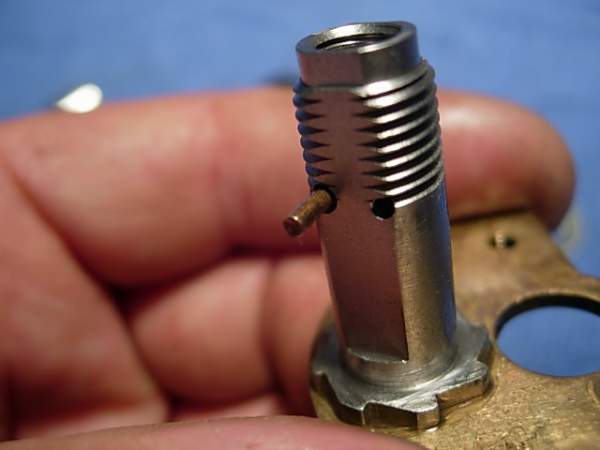
to install the new stainless steel gear sleeve (pennparts.com #98-155AT), lube the inside with corrosion x, slide the gear sleeve over the post of the bridge plate, then select the retaining pin hole that gives you the least amount of play without binding.
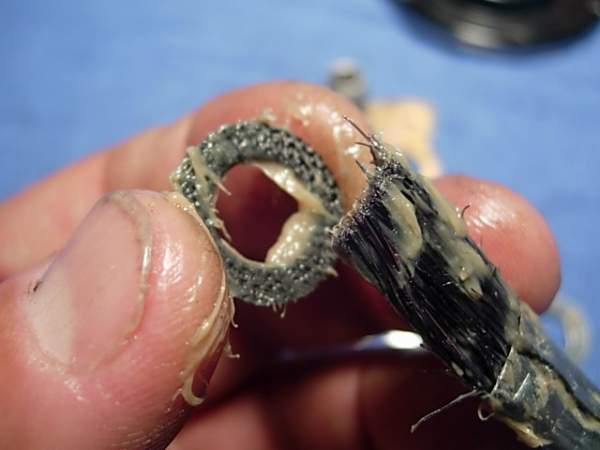
add a coat of cal's grease to the four carbon fiber drag washers (key #6).
here is the final bridge assembly. we have to leave out the tension washer (key #8) because the #6-113 drag washer replacing the fiber washer (key #4) under the main gear (key #5) is thicker.
a full discussion of the rebuild procedure for these side plates is in the 500 jigmaster rebuild post http://alantani.com/index.php?topic=20.0 . please review this post if the side plate bridge screws have been removed. for now, let's just say that your side plate is sitting quietly and in one piece, just like this.
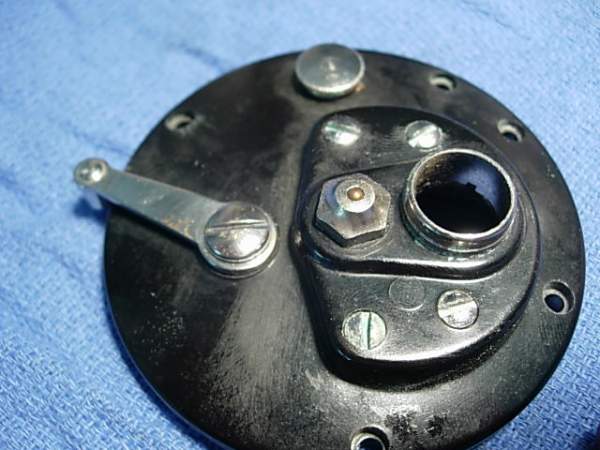
place your left index and middle fingers over the four bridge screws (key #16 and 17).
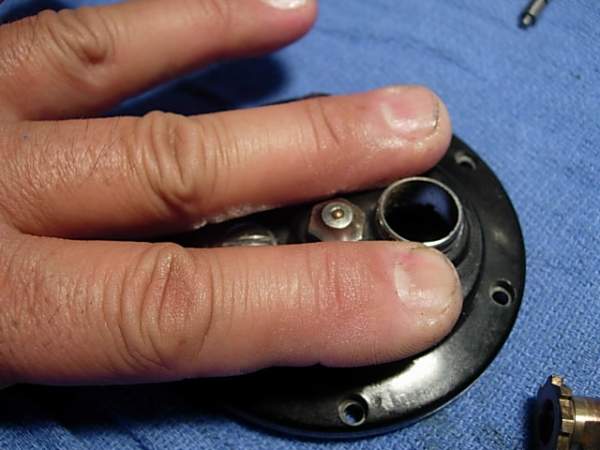
hold the right side plate assembly (key #1) carefully between your left thumb and ring finger.
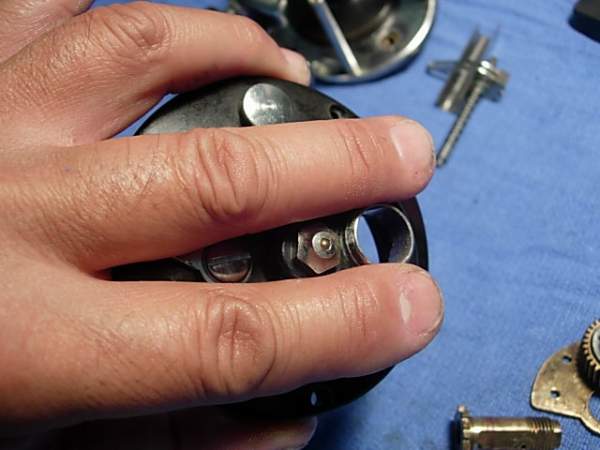
now you can flip over the right side plate assembly without fear of the bridge screws falling out.
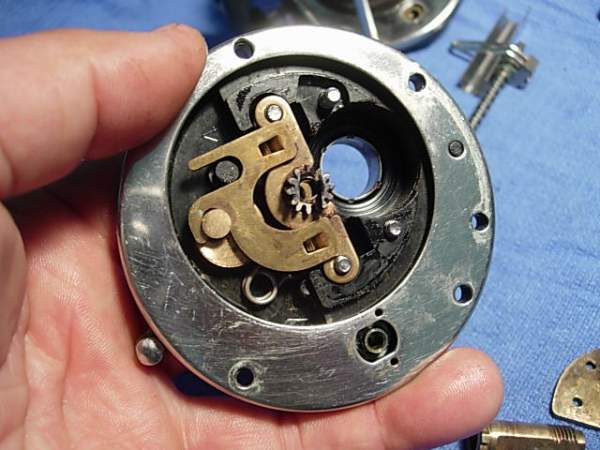
lube with pinion gear (key #13) and right side bushing (key #26) with corrosion x.
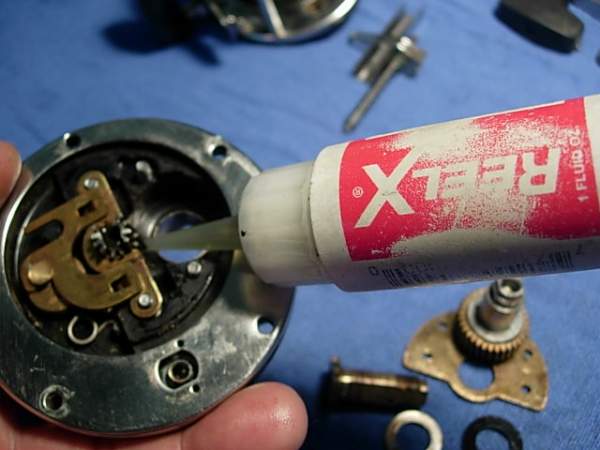
slide the bridge assembly (key #3) into place, the rotated it 90 degrees counterclockwise from it's final position as seen here.
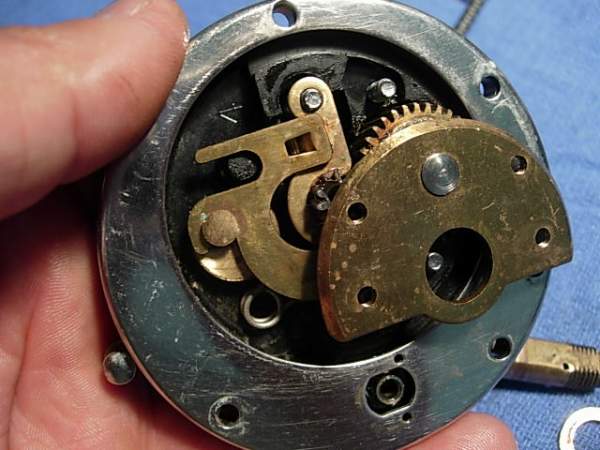
install the dog (key #15).
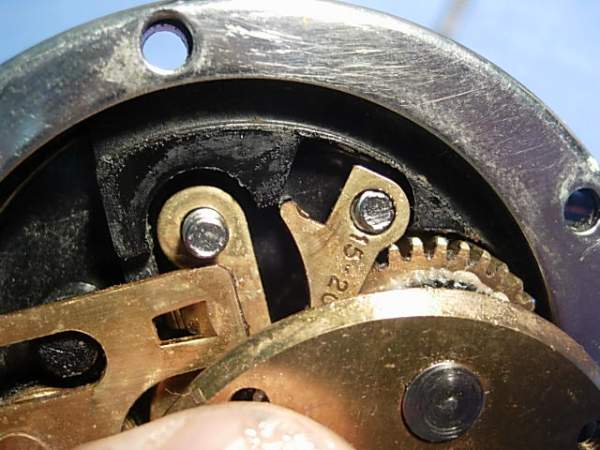
rotate the bridge clockwise (key #3) until it covers half of the bridge screw (key #16).
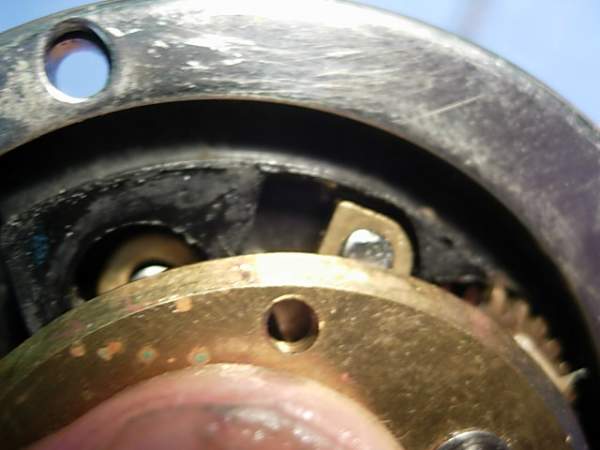
press down on the bridge plate (key #3) and install the dog spring (key #14) as shown.
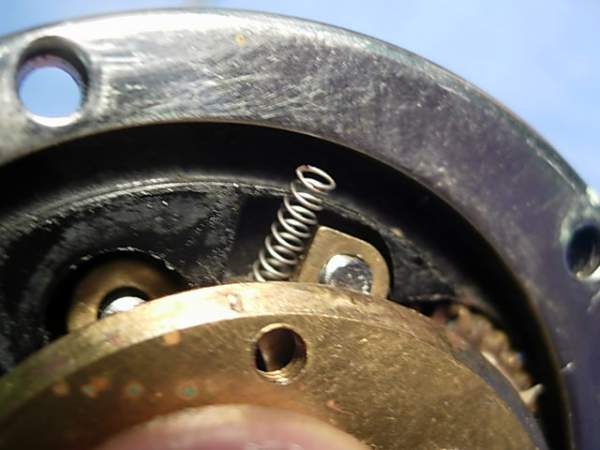
with your right index finger, press the dog spring (key #14) into position.
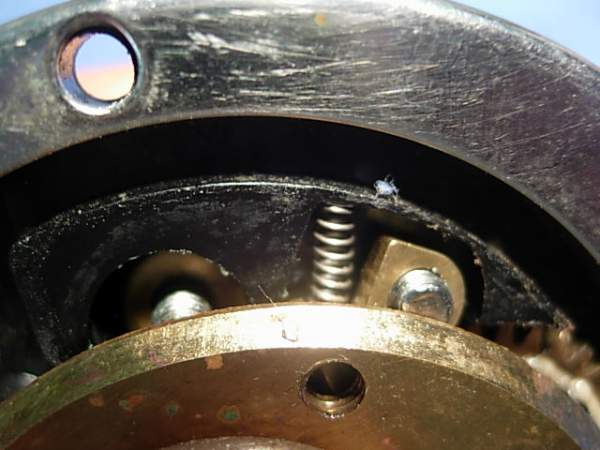
rotate the bridge plate (key #3) clockwise to its final position. your left ring and index fingers have been covering the bridge screws (key #16 and 17) this entire time.
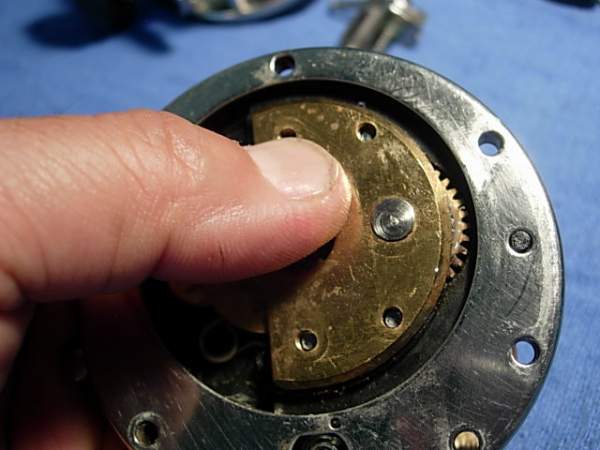
with a right hand assist, flip the right side plate assembly (key #1) over while holding the bridge assembly (key #3) in place.
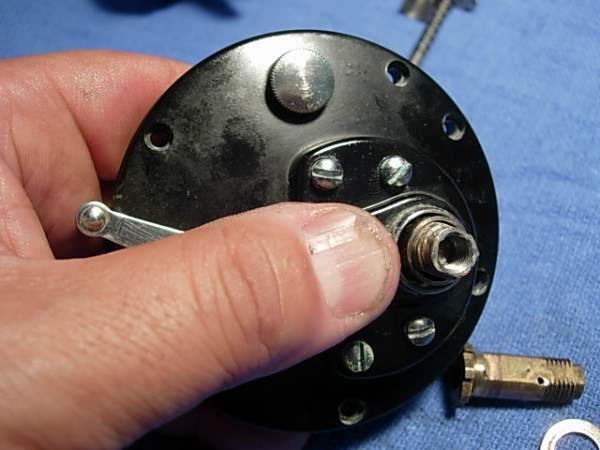
cinch down the four bridge screws (key #'s 16 and 17).
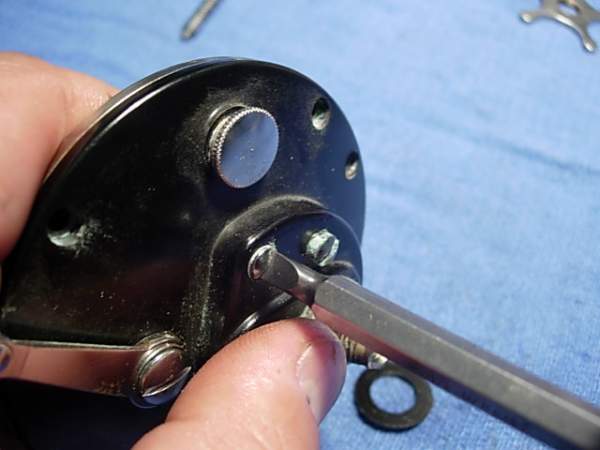
let's check your work so far. turn the gear sleeve (key #98). make sure it clicks in the forward direction and does not go backwards.
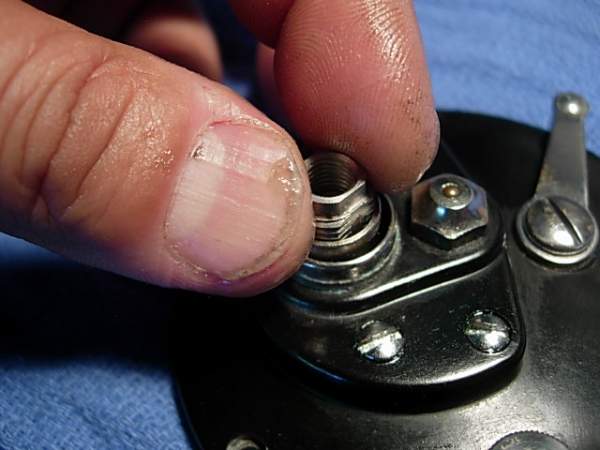
work the eccentric lever (key #27) and make sure that the pinion gear (key #13) moves in and out.
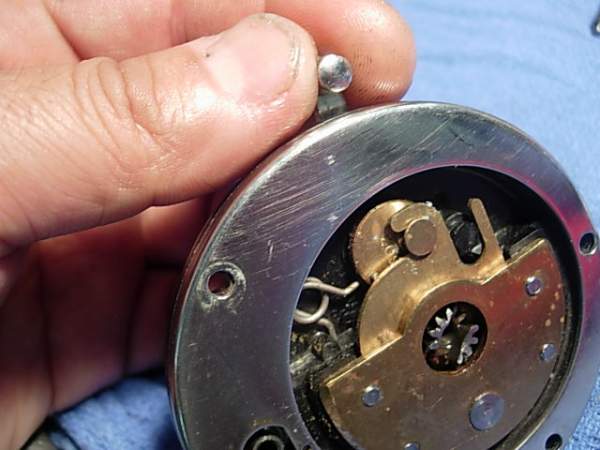
install the star drag (key #10) and turn it down until the star clears the "shoulders" of the gear sleeve (key #98).
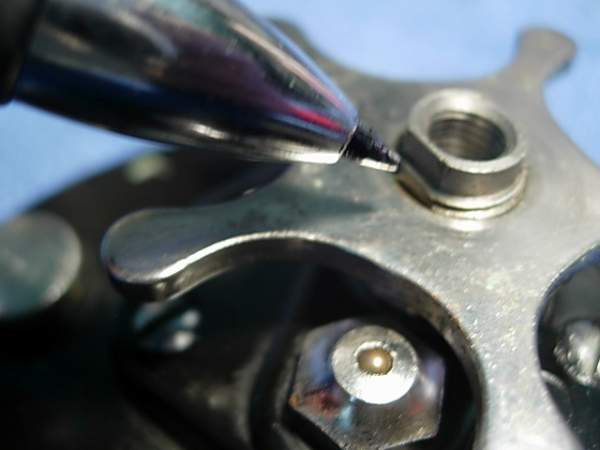
this is already way more work than the reel is worth, but we're going to install a kolekar handle grip. to start, we are going to drill out the back of the spindle of the handle grip.
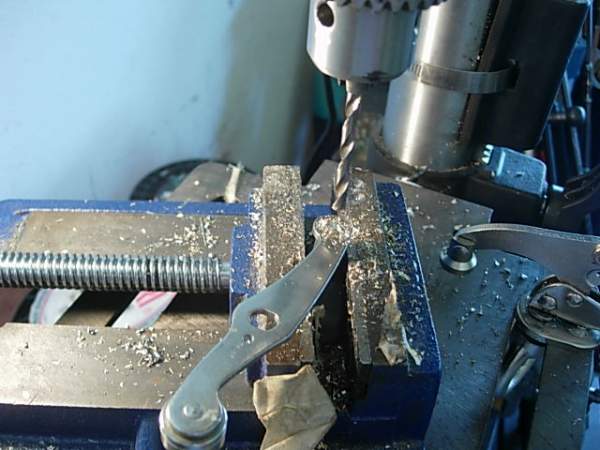
remove the handle arm and toss the old grip.
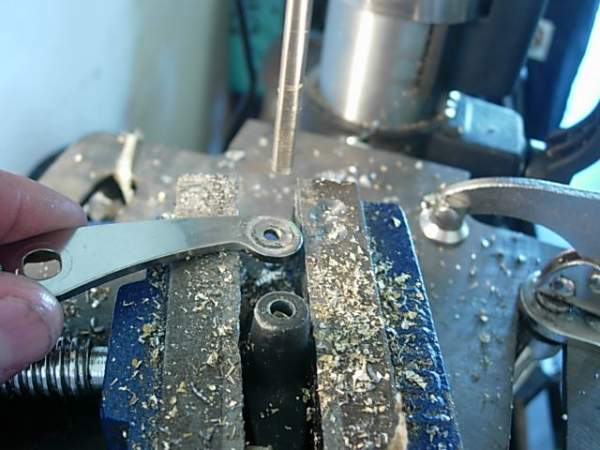
drill out the hole just a little larger using a 3/16ths inch drill bit.
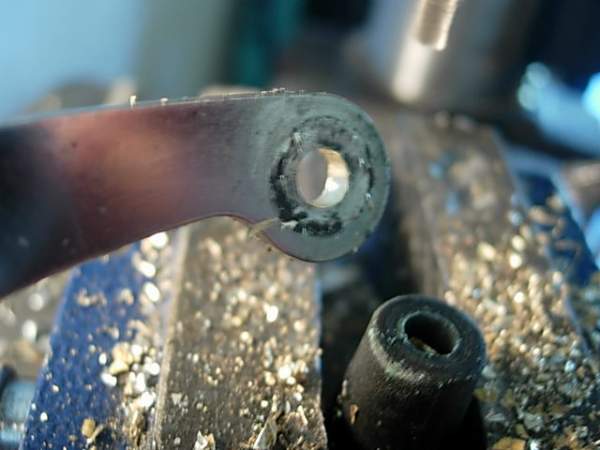
bolt on a 2/0 kolekar grip.
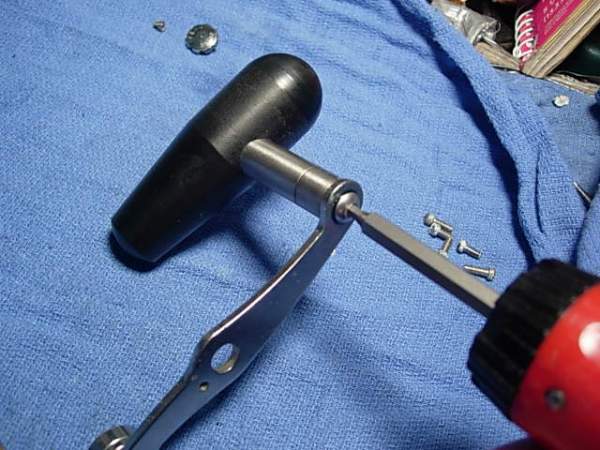
install the new handle assembly (key #24).
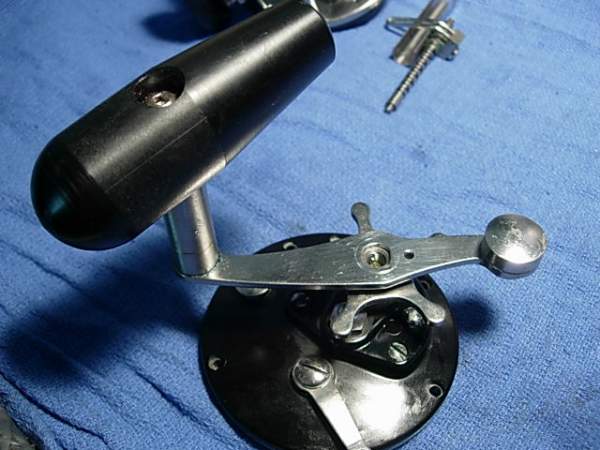
install the handle screw (key #23), lining up the ridges to install the handle lock screw (key #23A).
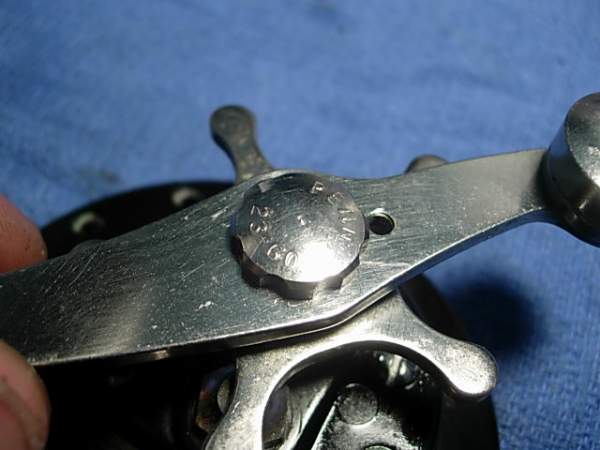
install the handle lock screw (key #23A).
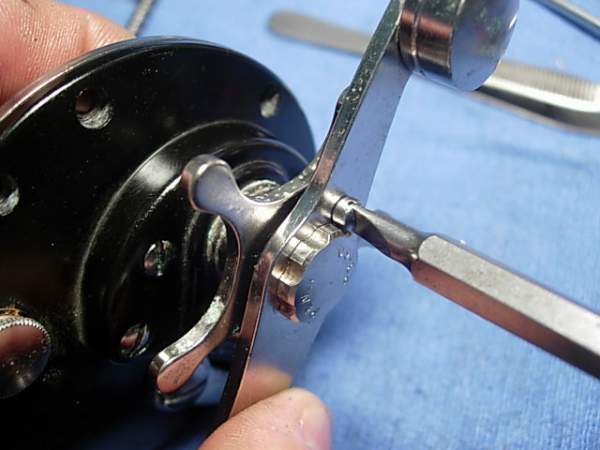
now to assemble the reel. the spool (key #29L) is already in the left side plate (key #27) and frame assembly. install the right side plate (key #1) and screw in ONLY one of the right side plate screws. we're going in just a few threads, and that's all. it's staying loose. watch, you'll see why in a minute.
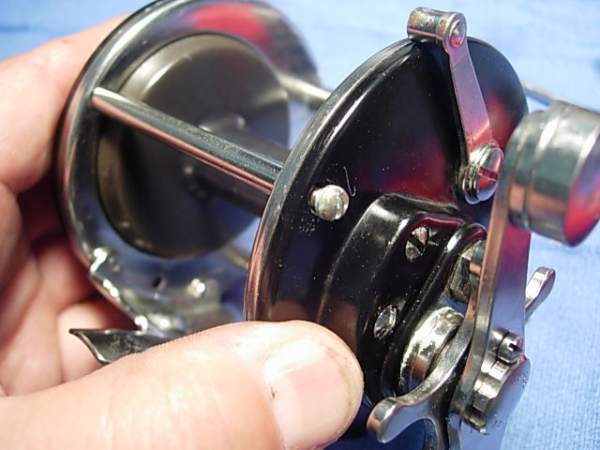
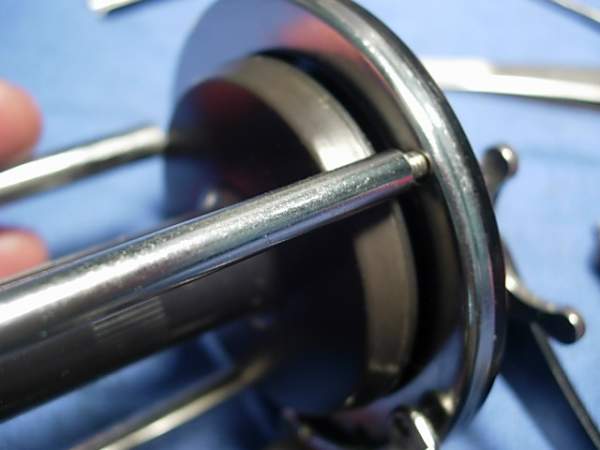
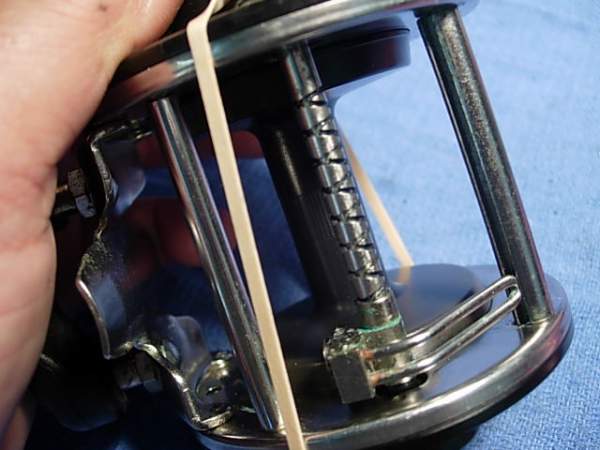
now wrap a rubber band around the reel at the 3 and 9 o'clock positions.
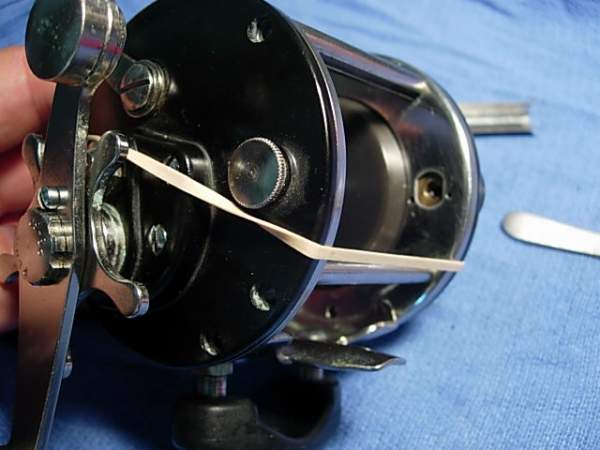
install the worm (key #42) and line guide assembly (key #'s 46, 47 and 48) as a unit.
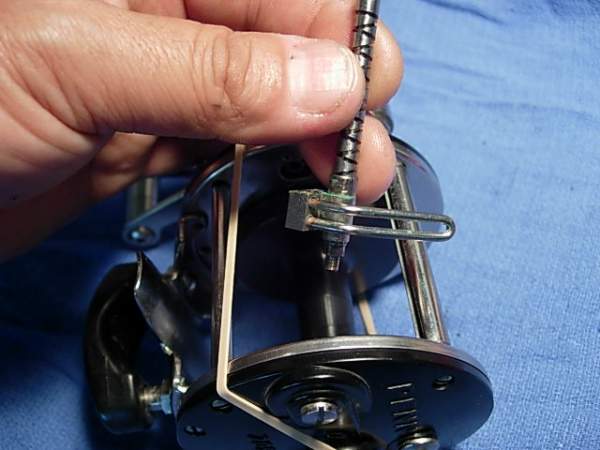
note first the flat faces on the left side of the worm (key #42).
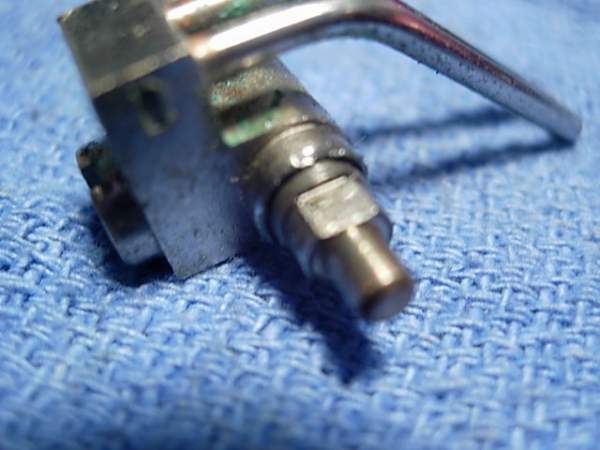
the worm (key #42) will fit properly when the left side is keyed into the worm gear (key #45).
now for the worm shield (key #50). note that it is asymmetric and that there are tabs on the ends.
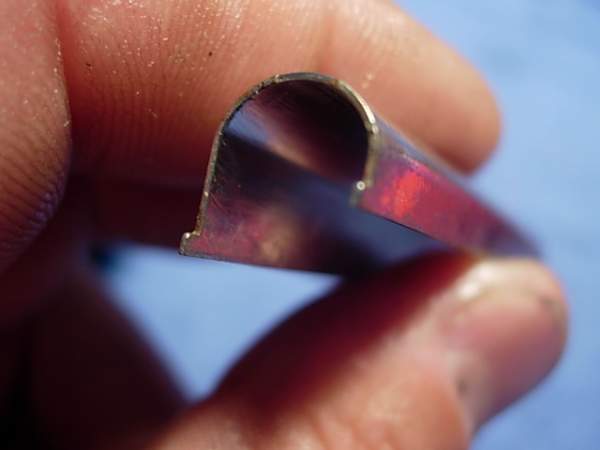
install the shield with the "shallow side out."
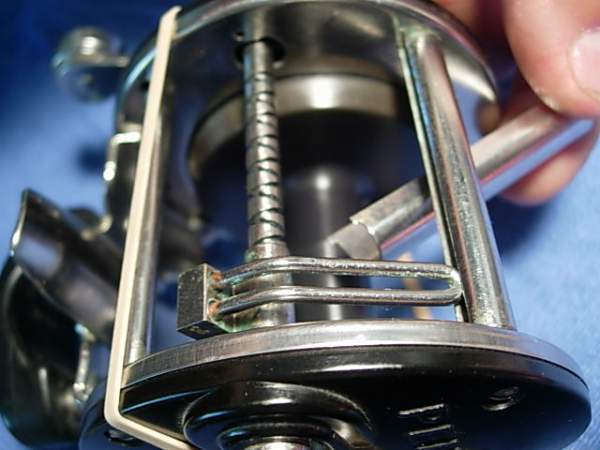
match up the tabs of the worm shield (key #50) with the holes in the side rings (key #'s 2 and 28).
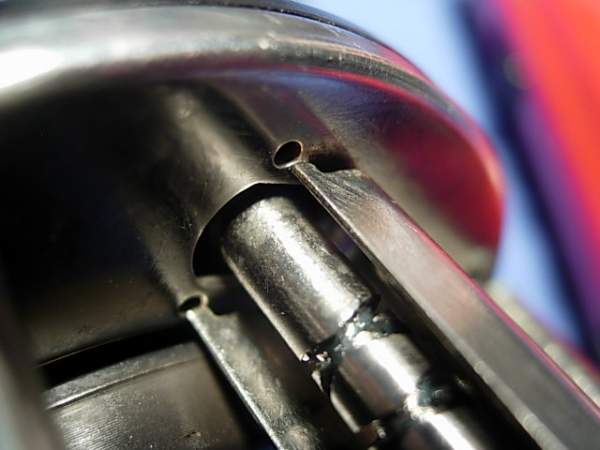
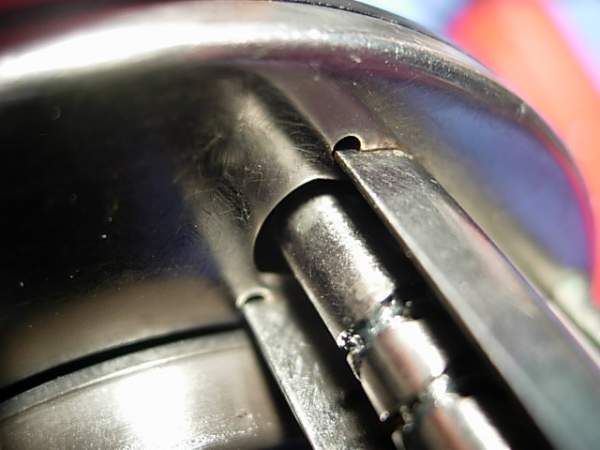
everything is all lined up, right? give the spool a spin just to make sure. if everything is lined up properly, the spool will spin easily.
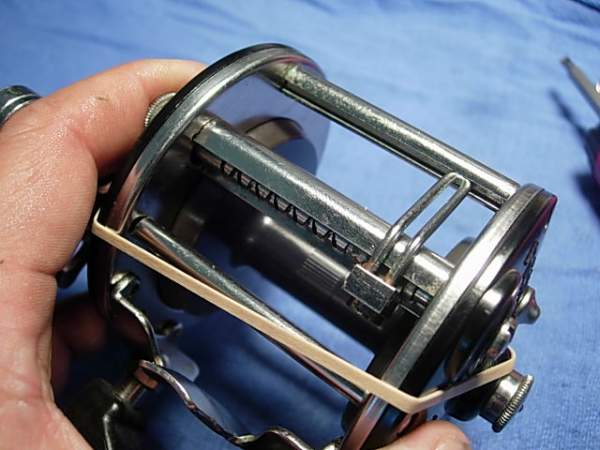
install the remaining right side plate screws (key #'s 32 and 38) and you're ready to adjust the reel.
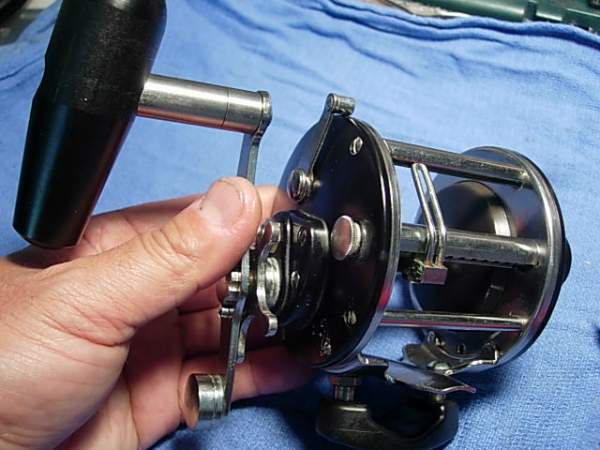
ok, your reel is all together and it looks great! the handle turns easily, the star drag puts plenty of pressure on the drag stack and the drag is smooth. now we need only adjust the spool tension and the leveler tension. let's start by backing off the tension on the right side worm bearing (key #43) until it's nice and loose.
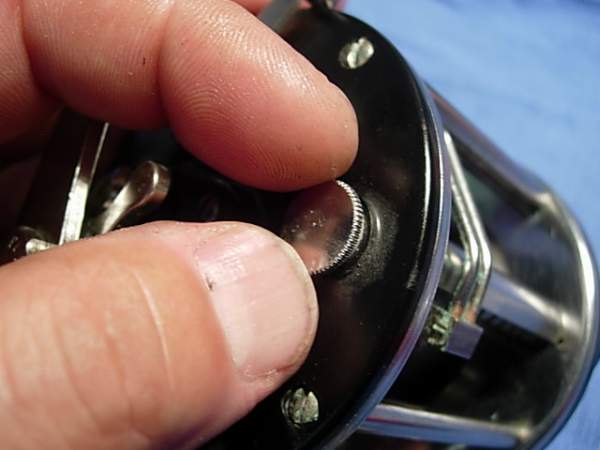
now back the tension off of the left side spool bearing (key #40).
now spin the spool (key #29L) and it should spin freely.
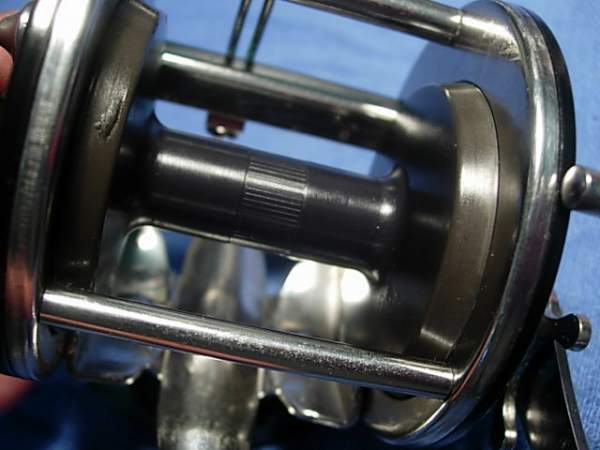
tighten down the left side spool bearing (key #40) until you have zero load and zero freeplay. the spool should still spin freely.
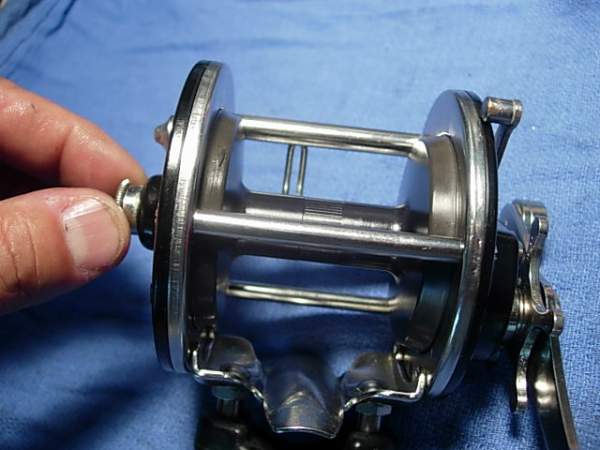
finally, tighten down the right side worm bearing (key #43) until it also has zero load and zero freeplay.
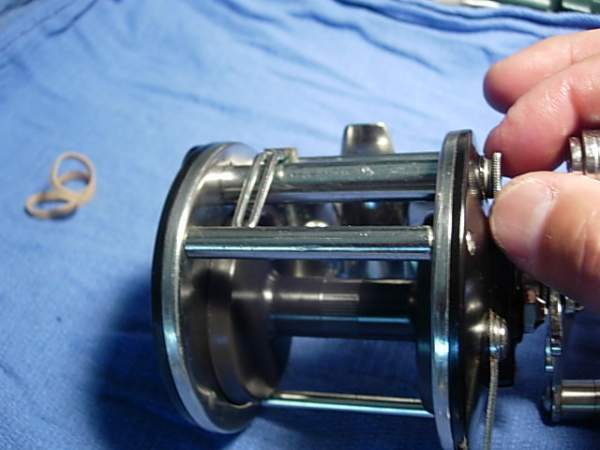
and you're done!
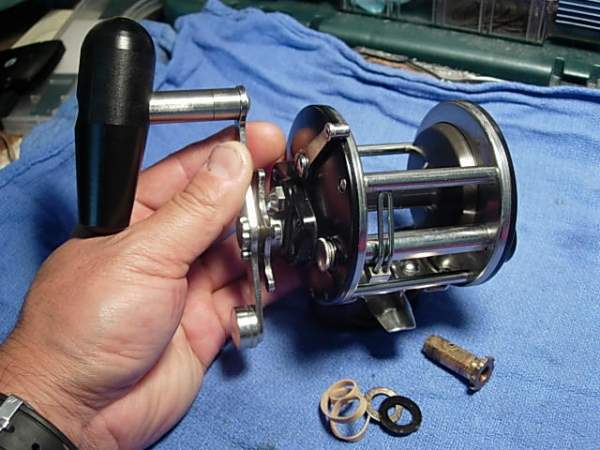
this is another post that is long overdue. here is our reel, a basic, stock penn 209.
we're going to start with the left side plate. all we have to do be back out each of the left side plate screws (key #'s 32 and 38), one at a time.
add a bead of grease to each screw or screw hole, but do this one screw at a time.
now back out each of the right side plate screws (key #32 and 38) and set them aside.
at this point, the reels separates multiple pieces.
lightly grease the clamp screws (key #34), then reassemble the rod clamp assembly.
this reel is not going to win any distance casting competitions, so we'll lube the left side bushing (key #40) with corrosion x.
install the spool (key #29L) back into the left side plate assembly (key #27) and set it aside.
now for the right side plate. remove the handle lock screw (key #23A).
remove the handle screw (key #23).
removed the handle assembly (key #24).
remove the star drag (key #10).
note the condition of the brass gear sleeve (key #98). this one is fine.
back out the four bridge screws (key #'s 16 and 17).
the bridge assembly (key #3) will drop right out. carefully set the side plate down and leave all the other parts right where they are. do not flip the right side plate (key #1) over at this time.
take a moment now to find the dog (key #15) and dog spring (key #14) and place them in a safe place.
now for the bridge assembly (key #3).
here's what it looks like when it's in pieces. we are going to change out the fiber washer (key #4) for a penn #6-113 drag washer that has been ground down to size. we are also going to change out the brass gear sleeve (key #98) for an aftermarket stainless steel gear sleeve (pennparts.com #98-155AT) that has been double drilled for the most precise fit.
use a pin punch to remove the retaining pin from the stock gear sleeve (key #98).
to install the new stainless steel gear sleeve (pennparts.com #98-155AT), lube the inside with corrosion x, slide the gear sleeve over the post of the bridge plate, then select the retaining pin hole that gives you the least amount of play without binding.
add a coat of cal's grease to the four carbon fiber drag washers (key #6).
here is the final bridge assembly. we have to leave out the tension washer (key #8) because the #6-113 drag washer replacing the fiber washer (key #4) under the main gear (key #5) is thicker.
a full discussion of the rebuild procedure for these side plates is in the 500 jigmaster rebuild post http://alantani.com/index.php?topic=20.0 . please review this post if the side plate bridge screws have been removed. for now, let's just say that your side plate is sitting quietly and in one piece, just like this.
place your left index and middle fingers over the four bridge screws (key #16 and 17).
hold the right side plate assembly (key #1) carefully between your left thumb and ring finger.
now you can flip over the right side plate assembly without fear of the bridge screws falling out.
lube with pinion gear (key #13) and right side bushing (key #26) with corrosion x.
slide the bridge assembly (key #3) into place, the rotated it 90 degrees counterclockwise from it's final position as seen here.
install the dog (key #15).
rotate the bridge clockwise (key #3) until it covers half of the bridge screw (key #16).
press down on the bridge plate (key #3) and install the dog spring (key #14) as shown.
with your right index finger, press the dog spring (key #14) into position.
rotate the bridge plate (key #3) clockwise to its final position. your left ring and index fingers have been covering the bridge screws (key #16 and 17) this entire time.
with a right hand assist, flip the right side plate assembly (key #1) over while holding the bridge assembly (key #3) in place.
cinch down the four bridge screws (key #'s 16 and 17).
let's check your work so far. turn the gear sleeve (key #98). make sure it clicks in the forward direction and does not go backwards.
work the eccentric lever (key #27) and make sure that the pinion gear (key #13) moves in and out.
install the star drag (key #10) and turn it down until the star clears the "shoulders" of the gear sleeve (key #98).
this is already way more work than the reel is worth, but we're going to install a kolekar handle grip. to start, we are going to drill out the back of the spindle of the handle grip.
remove the handle arm and toss the old grip.
drill out the hole just a little larger using a 3/16ths inch drill bit.
bolt on a 2/0 kolekar grip.
install the new handle assembly (key #24).
install the handle screw (key #23), lining up the ridges to install the handle lock screw (key #23A).
install the handle lock screw (key #23A).
now to assemble the reel. the spool (key #29L) is already in the left side plate (key #27) and frame assembly. install the right side plate (key #1) and screw in ONLY one of the right side plate screws. we're going in just a few threads, and that's all. it's staying loose. watch, you'll see why in a minute.
now wrap a rubber band around the reel at the 3 and 9 o'clock positions.
install the worm (key #42) and line guide assembly (key #'s 46, 47 and 48) as a unit.
note first the flat faces on the left side of the worm (key #42).
the worm (key #42) will fit properly when the left side is keyed into the worm gear (key #45).
now for the worm shield (key #50). note that it is asymmetric and that there are tabs on the ends.
install the shield with the "shallow side out."
match up the tabs of the worm shield (key #50) with the holes in the side rings (key #'s 2 and 28).
everything is all lined up, right? give the spool a spin just to make sure. if everything is lined up properly, the spool will spin easily.
install the remaining right side plate screws (key #'s 32 and 38) and you're ready to adjust the reel.
ok, your reel is all together and it looks great! the handle turns easily, the star drag puts plenty of pressure on the drag stack and the drag is smooth. now we need only adjust the spool tension and the leveler tension. let's start by backing off the tension on the right side worm bearing (key #43) until it's nice and loose.
now back the tension off of the left side spool bearing (key #40).
now spin the spool (key #29L) and it should spin freely.
tighten down the left side spool bearing (key #40) until you have zero load and zero freeplay. the spool should still spin freely.
finally, tighten down the right side worm bearing (key #43) until it also has zero load and zero freeplay.
and you're done!