
okuma makaira 50 II rebuild - 2/16/2010
by now, you all know the mantra - greased carbon fiber drag washers, grease on all the non-exposed metal surfaces, spool bearings open and oiled, non-spool bearings packed with grease and shielded, and large oversized off-set handles. a reel that delivers all of this will get an "A+." keep this in mind as we go through this next reel.
a box arrive from ontario yesterday.
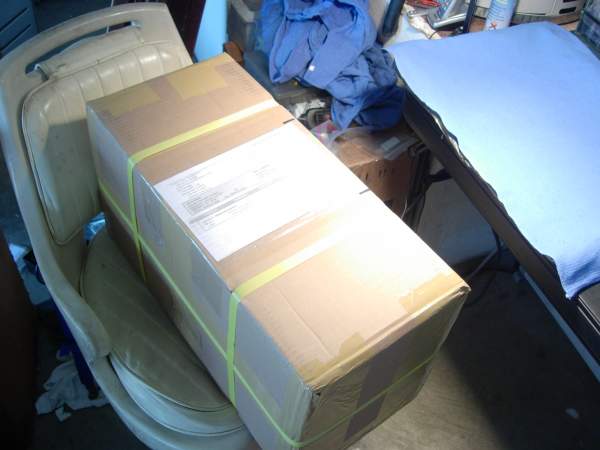
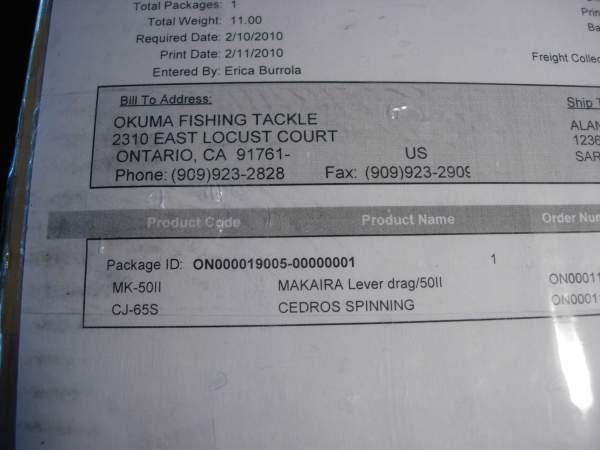
i'm going to crack open both of these reels, but the lever drag is first.
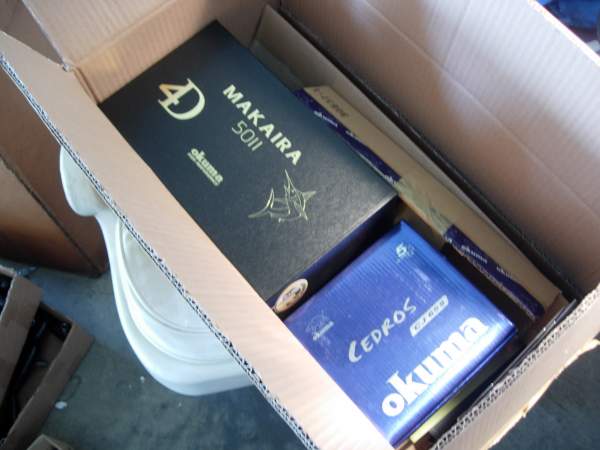
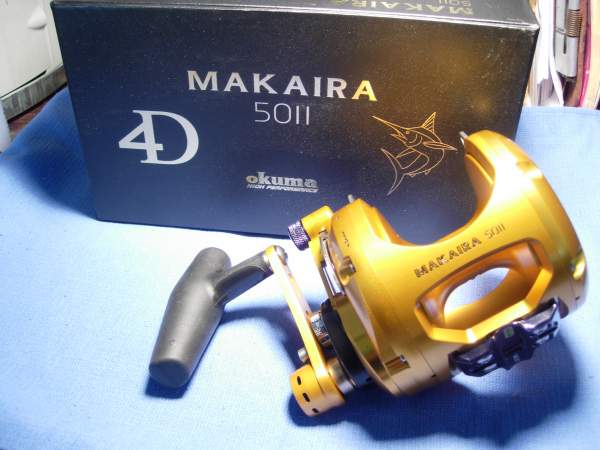
since i've never opened up one of these before, let's take a look at the schematics.
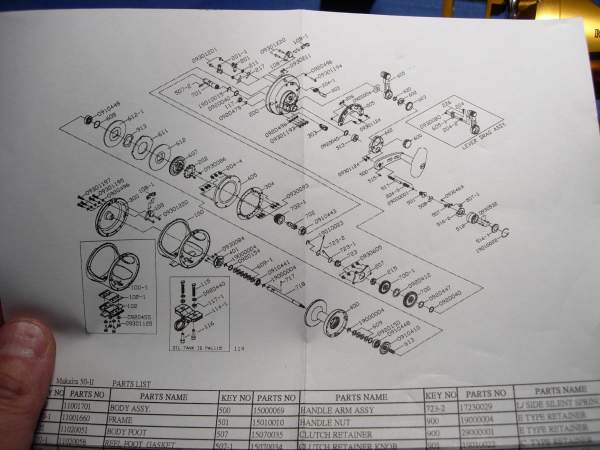
here's the double dog system.
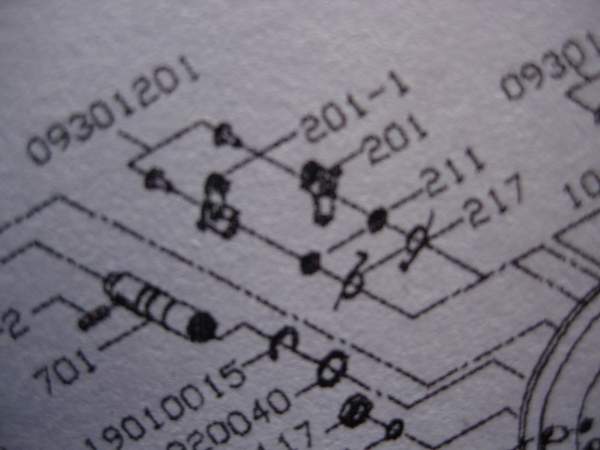
here's the new drag system.
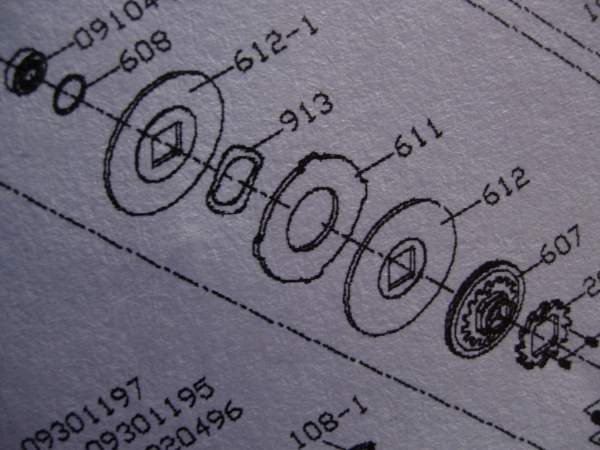
here's the gear cluster. this one looks familiar.
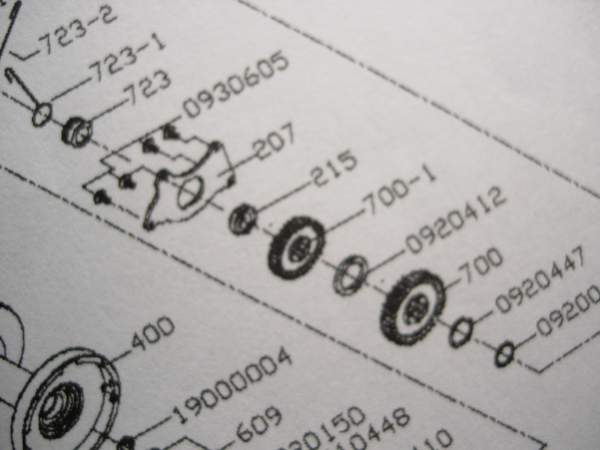
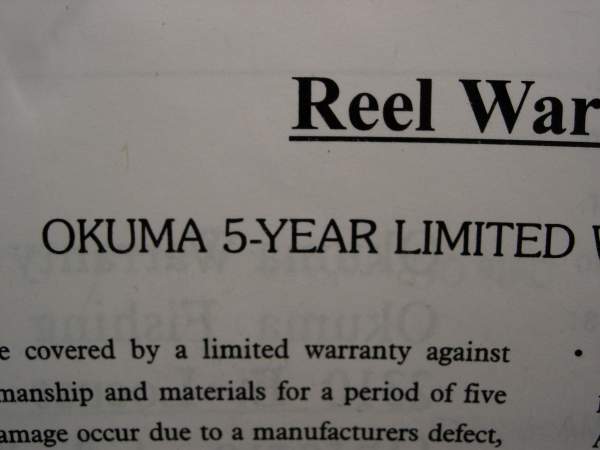
found some more paperwork in the box.
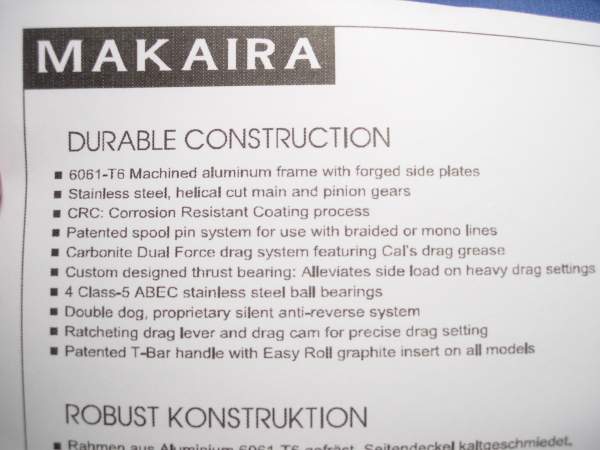
we've talked about a thrust bearing to take care of the side load at high drag settings. well, looks like okuma incorporated one.
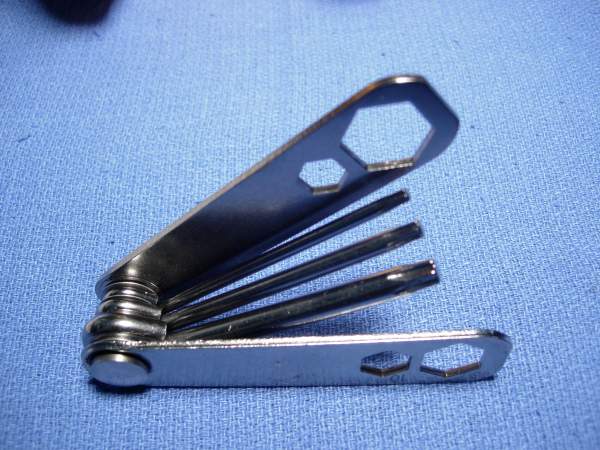
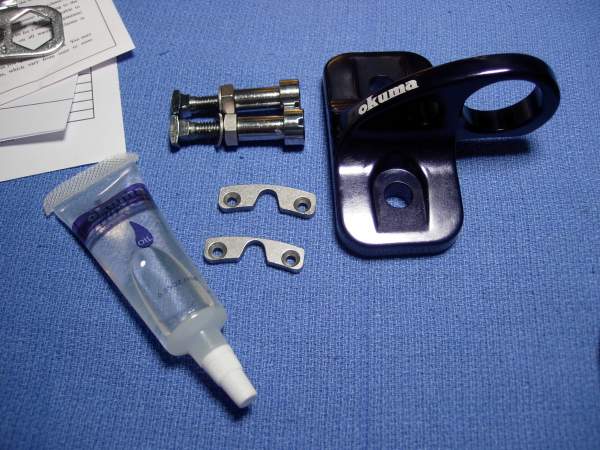
found a few more items in the box.
and here is our reel. 43 seconds of freespool straight out of the box! not bad.
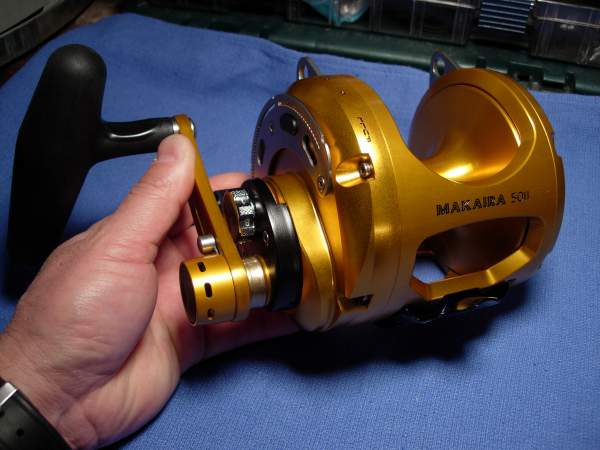
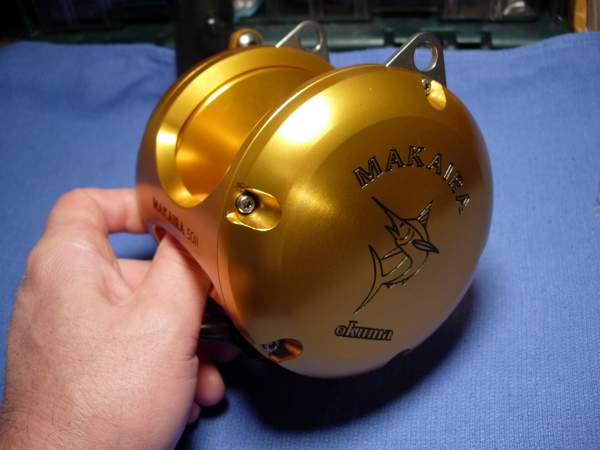
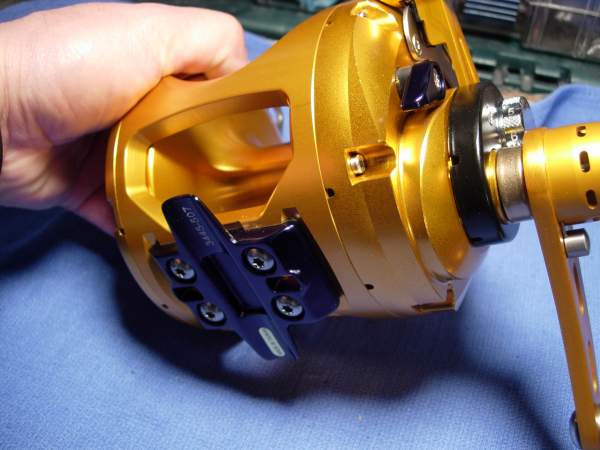
back out the left side plate screws.
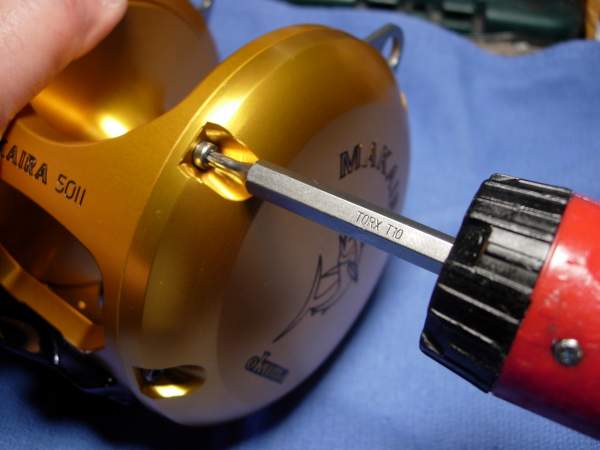
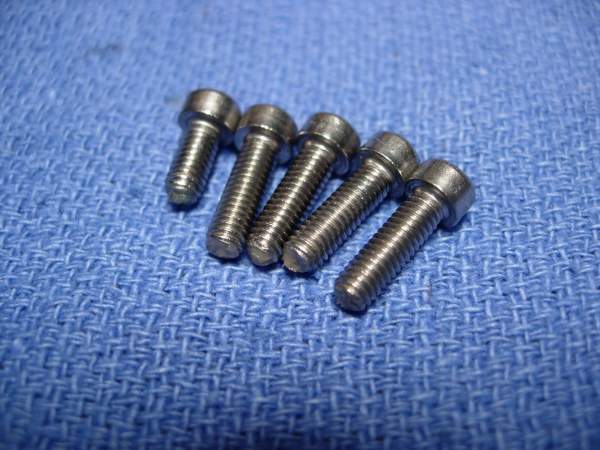
there are four long screws (key #930-1195) and one short screw (key #930-1197) at the 12 o'clock position.
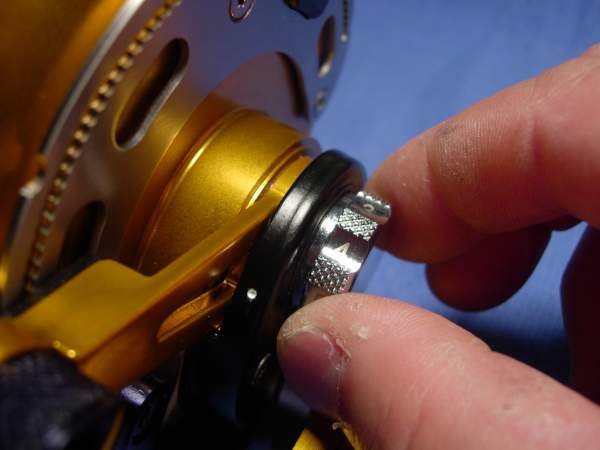
unscrew the drag knob assembly (key #600).
remove the left side plate assembly (key #300).
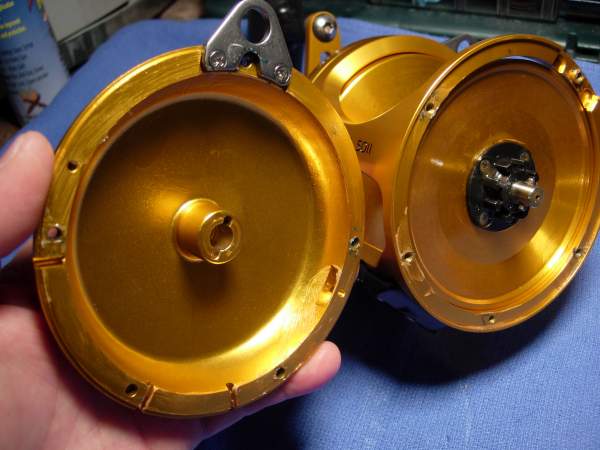
you will find a light coat of corrosion x HD through out the reel.
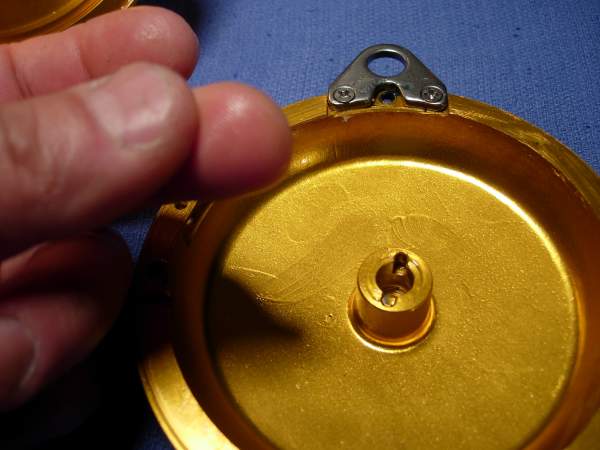
remove the spool assembly (key #400).
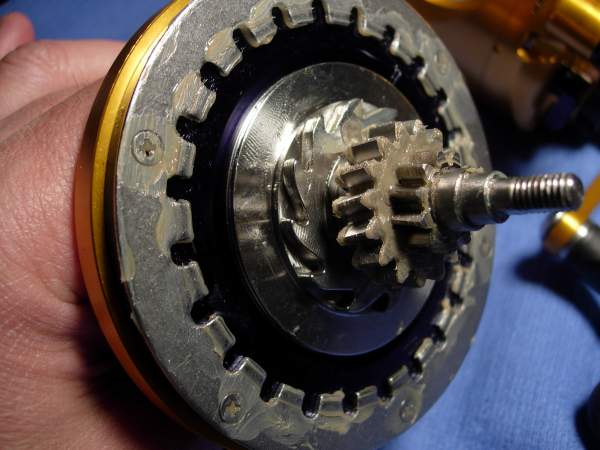
remove the right side plate screws.
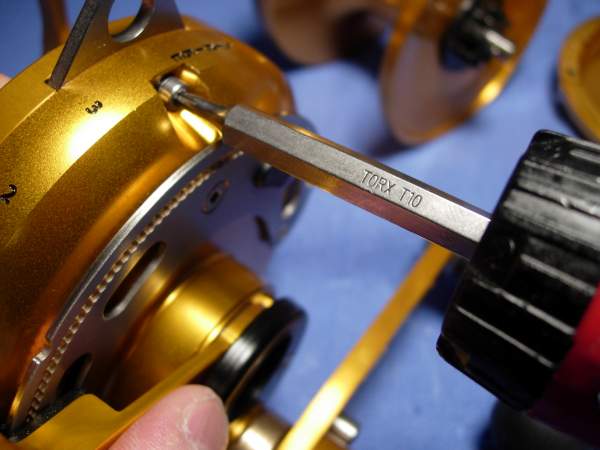
there are four long screws (key #930-1193) and one short screw (key #930-1194) at the 12 o'clock position.
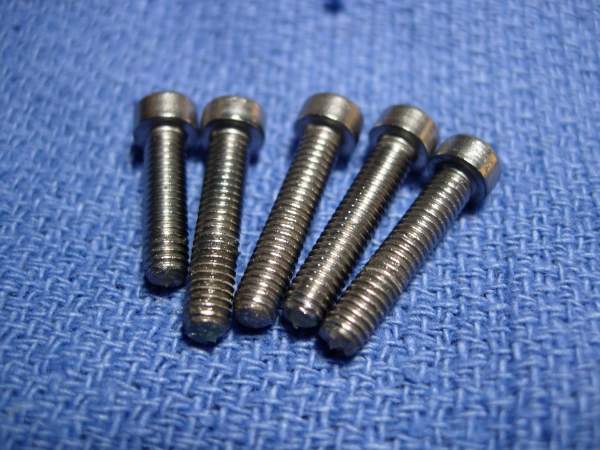
ok, it's in pieces. so far, so good.
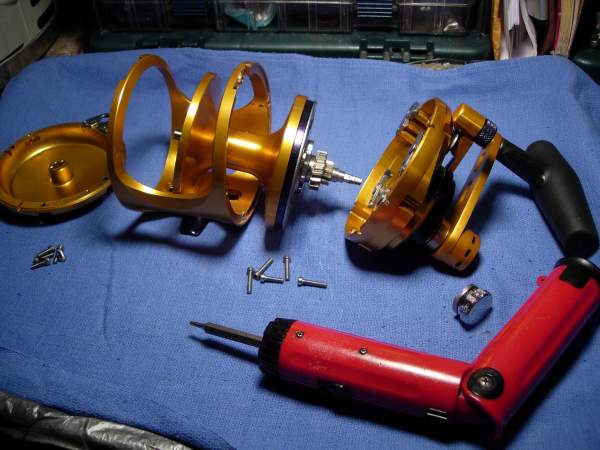
back out the hangar screws (key #930-1220).
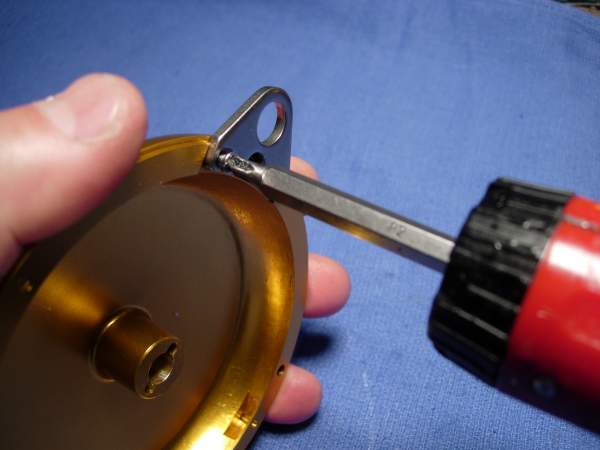
yuck, loctite! without grease, these screws and screw holes can corrode.
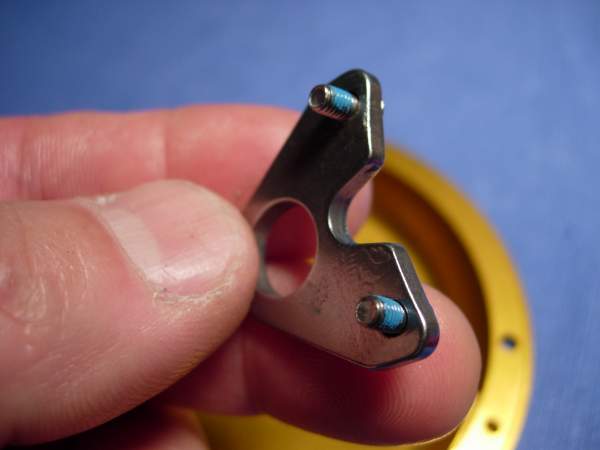
grease the hangar (key #108) and the screw holes and reinstall the hangar screws (key #930-1220).
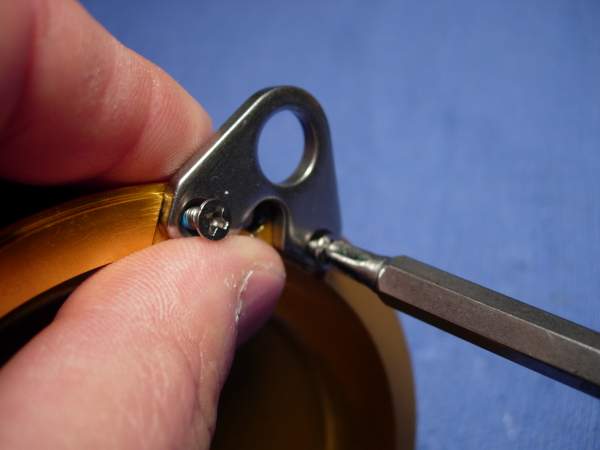
using a number 15 torx bit, remove the body foot screws (key #930-1125).
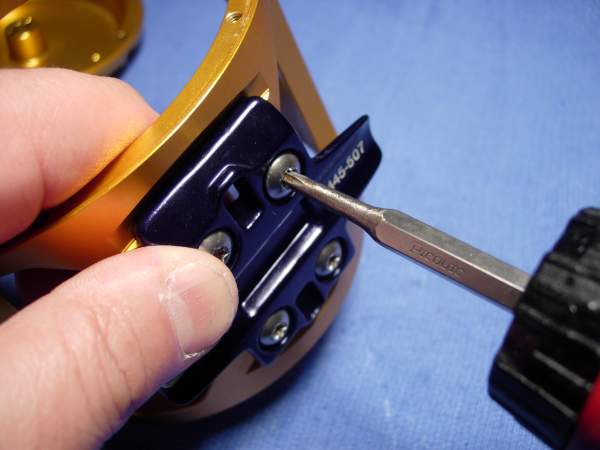
grease on the base of the frame. very good.

someone might have been in a hurry when he grease the body foot (key #102) and the reel foot gasket (key #102-1).
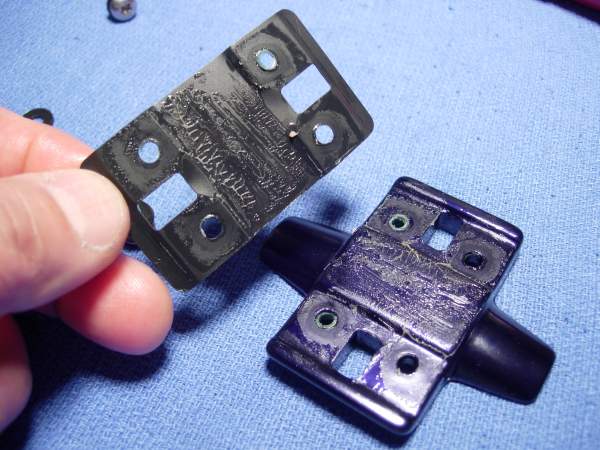
grease the screw holes. these screws will not back out if they are properly torqued. if is far better than having the screws lock up due to corrosion.
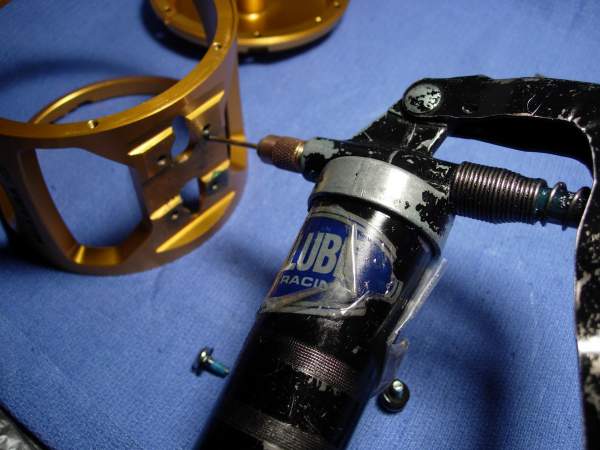
grease the body foot (key #102).
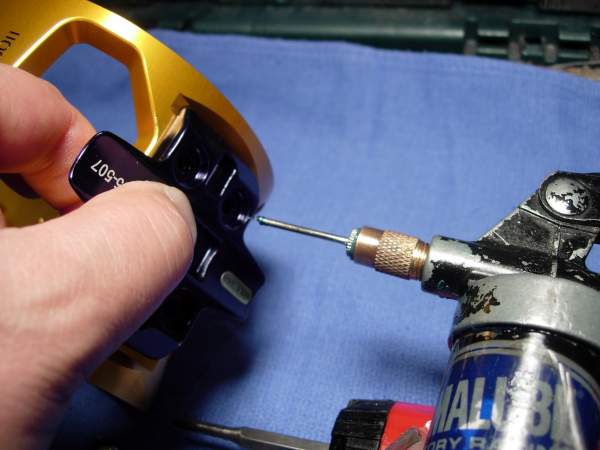
install the left side plate (key #300). remember that the short left side plate screw (key #930-1197) goes in at the 12 o'clock position.
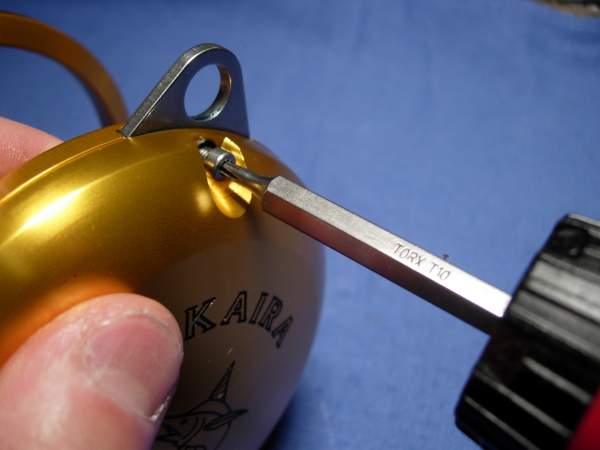
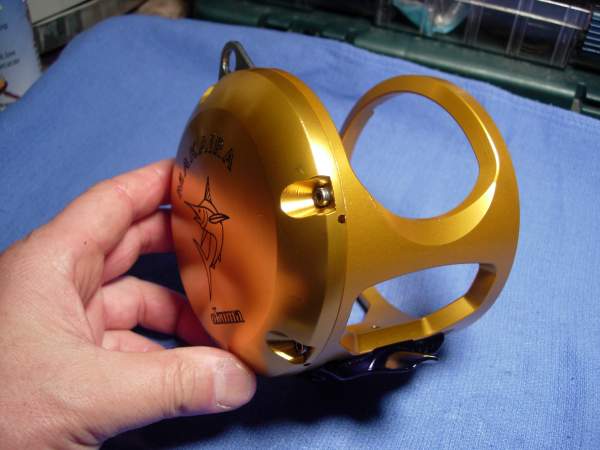
the frame and left side plate are done. let's set them aside for now.
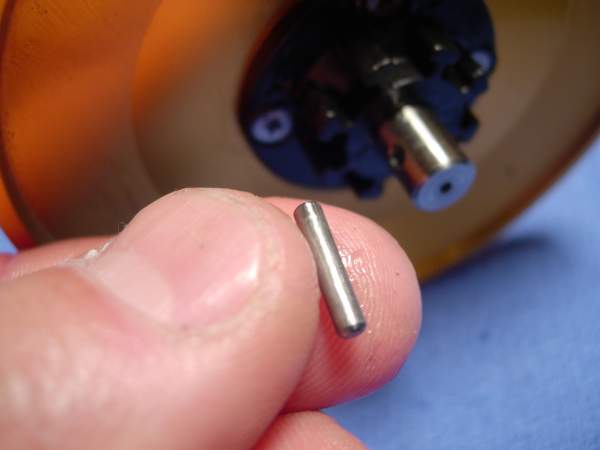
now for the spool. first, remove the main shaft pin (key #717) on the left side of the spool. these are always getting lost.
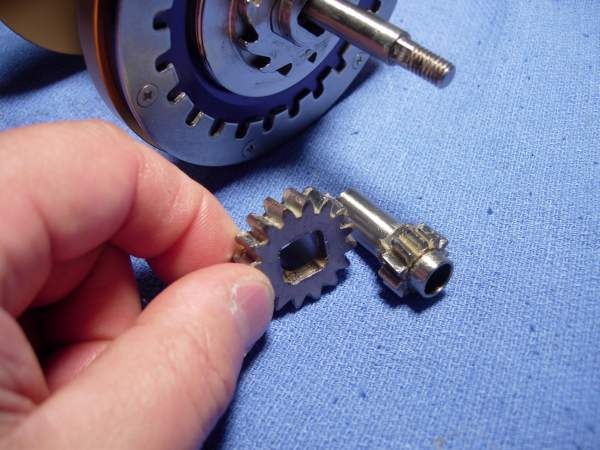
remove the high speed pinion gear (key #702) and the low speed pinion gear (key #702-1).
remove the click pawl screws (key #930-093).
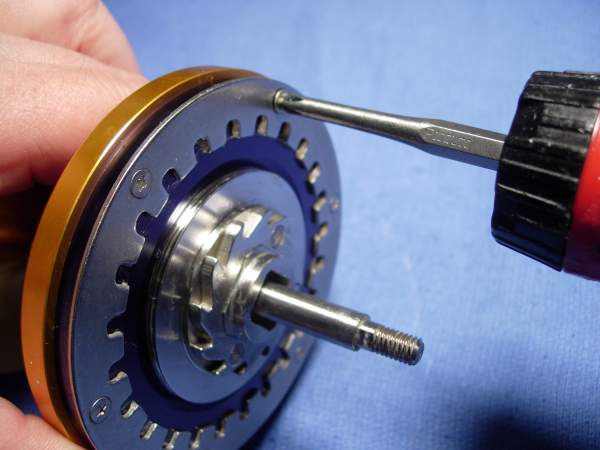
when the last screw is removed, the entire assembly pops up.
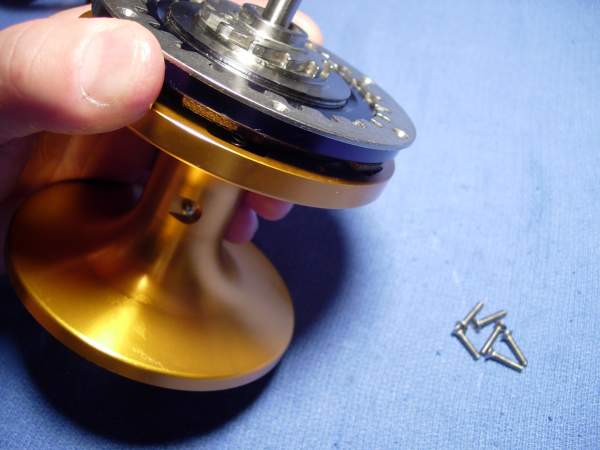
remove the click pawl (key #304).
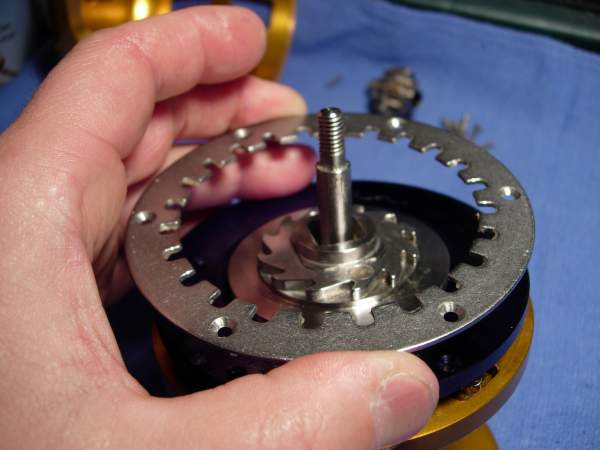
remove the waterproof cover (key #405).
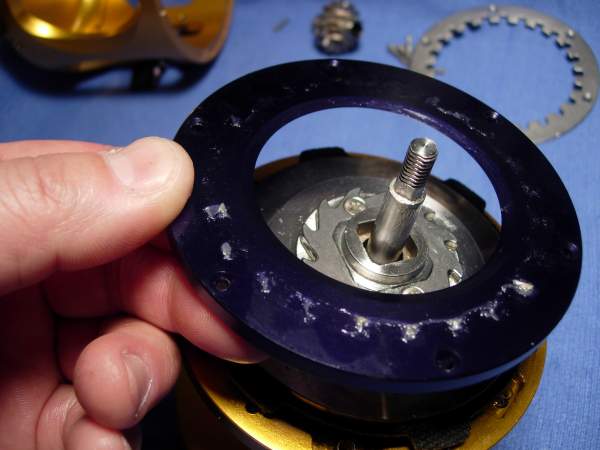
remove the drag washer assembly (key #'s 202, 607, 612, 611, 913, 612-1 and 608) as a unit.
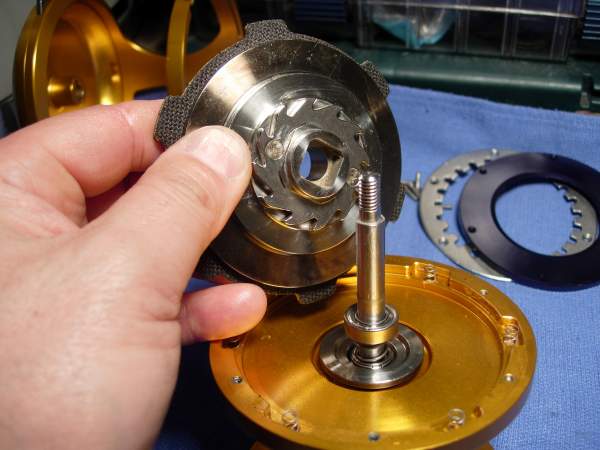
this is okuma's new free floating drag system.
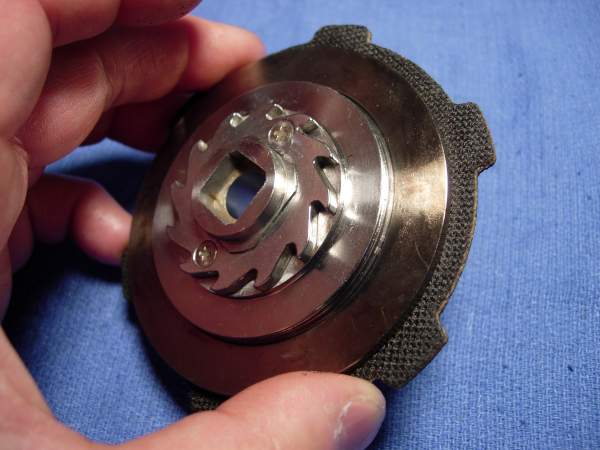
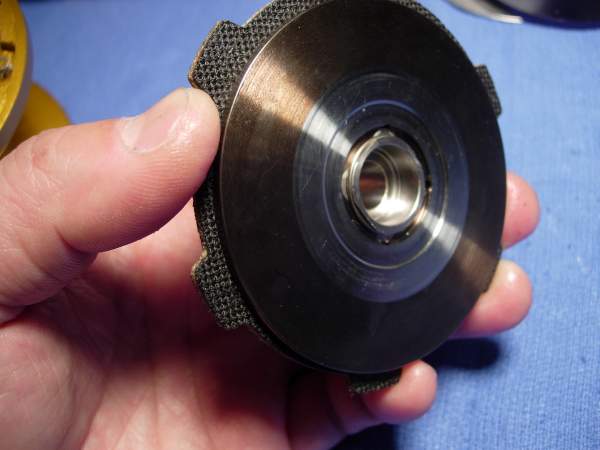
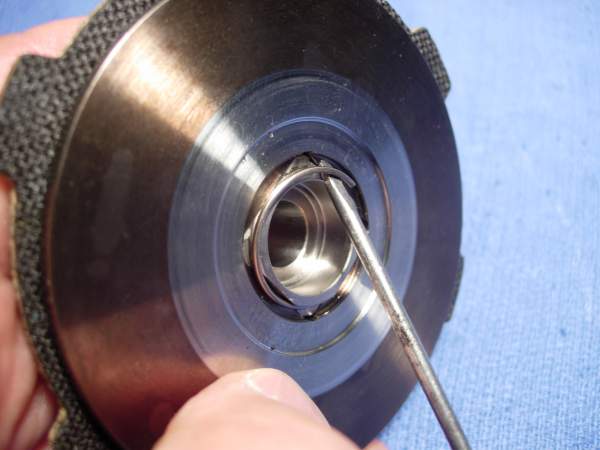
remove the drag washer retainer (key #608).
this is what the drag stack looks like when it's spread out.
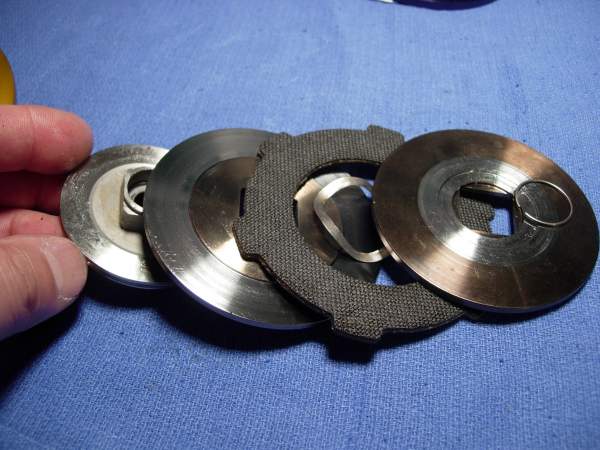
you can see in this photo of the drag washer (key #611) that the cal's grease is not spread as evenly as it could be.
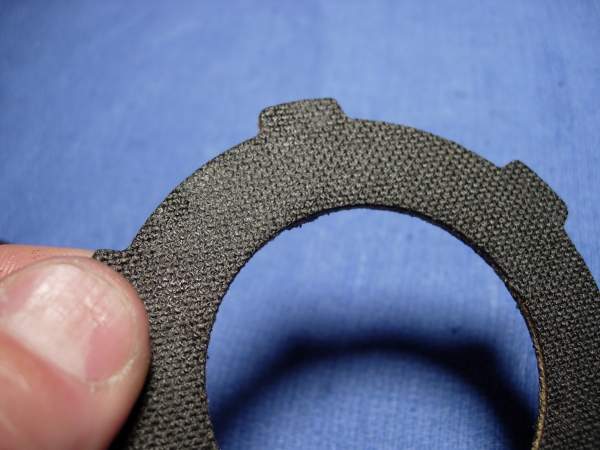
though it is unlikely to be a problem, i am still going to regrease it.
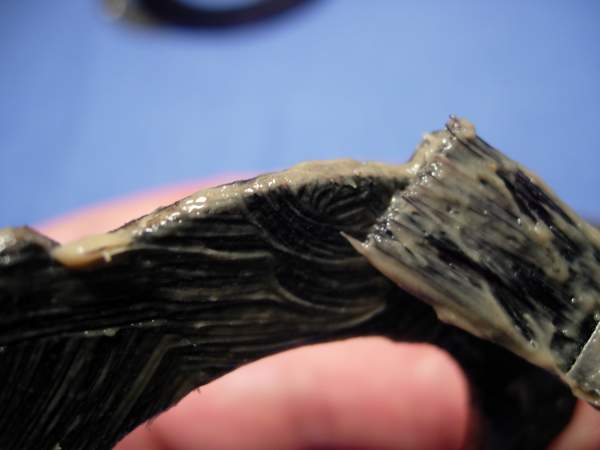
thoroughly clean off all of the excess grease.
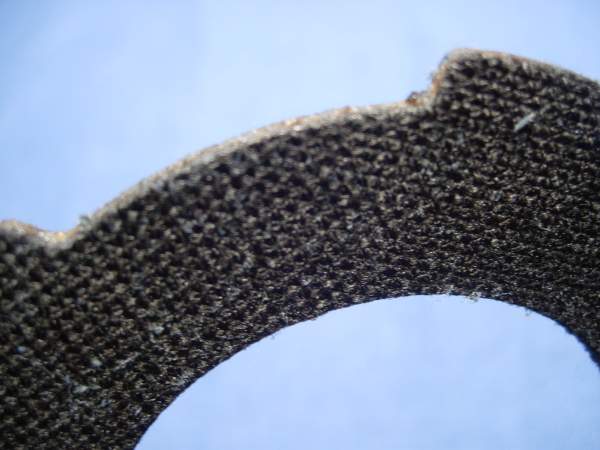
this is the outside of the key washer (key #612-1).
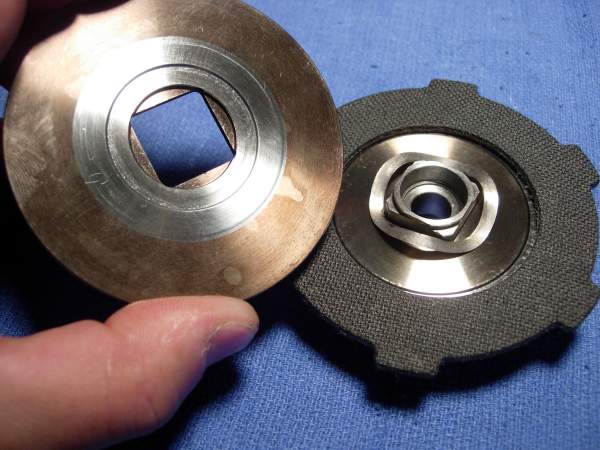
reinstall the drag washer retainer (key #608) and set the drag assembly aside.
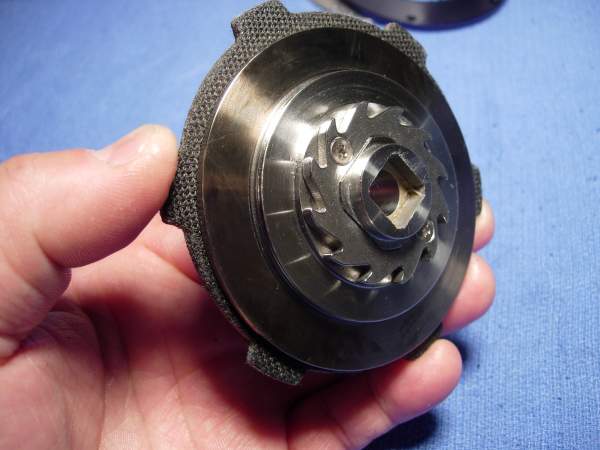
there are six compression springs (key #204-4) that are used to center the drag washer. pull them all out and find a safe place for them.
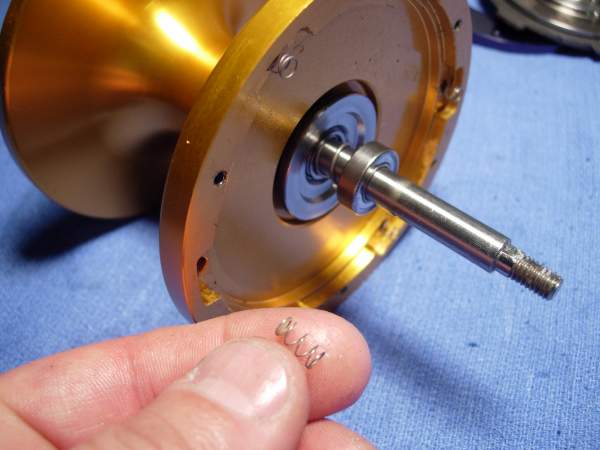
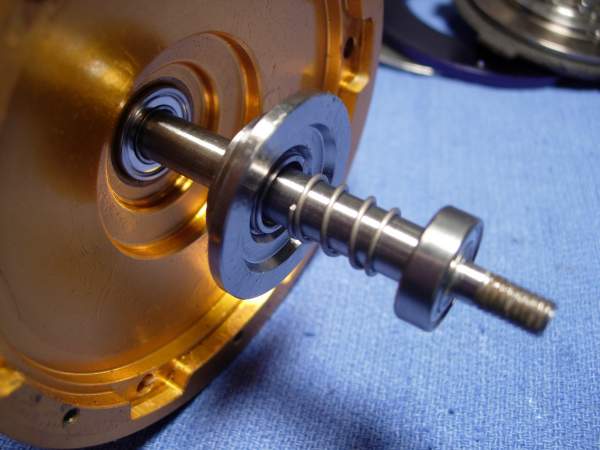
remove the key washer bearing (key #910-448), the compression spring (key #613) and the thrust bearing assembly (key #910-410).
the key washer bearing measures 8x16x5mm and has a stamp saying EZO SS688ZZMC3PSSRL JAPAN. these are the expensive japanese bearings, so let's take a look inside.
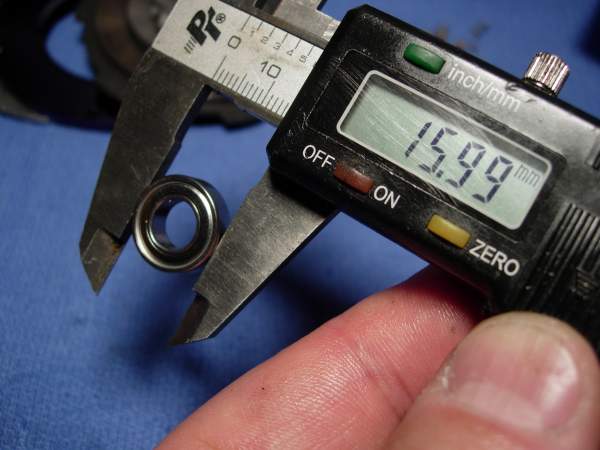
we've got grease smeared on one side.......
....... and NOTHING on the other!
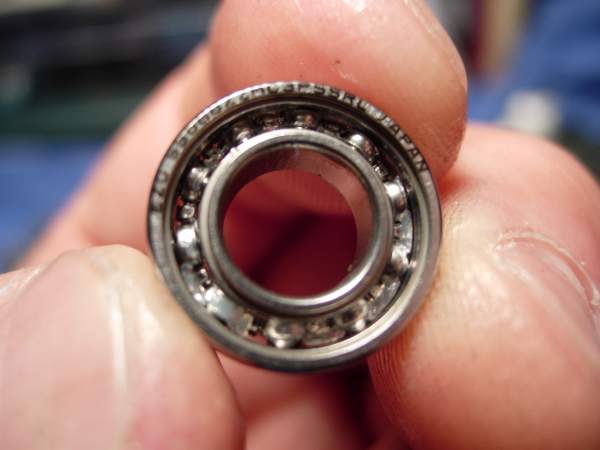
we'll come back to this bearing later. there are two more to look at. remove the ratchet gear screws (key #930-0084) and the ratchet gear (key #401).
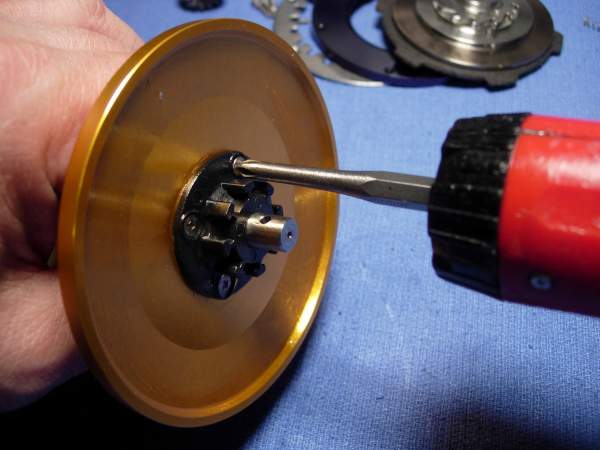
the bare spool now spins for 23 seconds. remember, the intact reel, straight out of the box, spun for 43 seconds. i think the heavy drag assembly gave it a little more inertia.
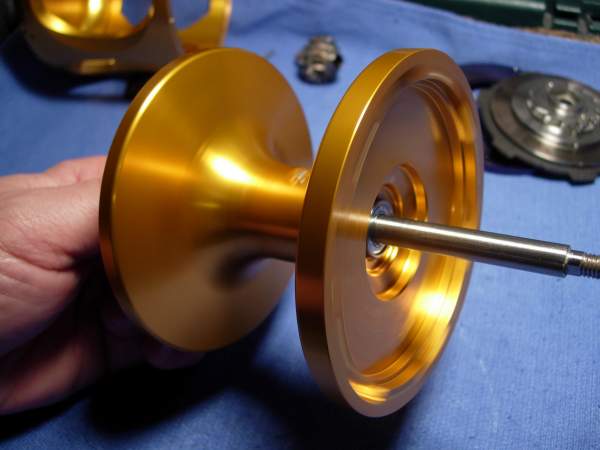
here's what the main shaft assembly (key #718) looks like outside of the spool.
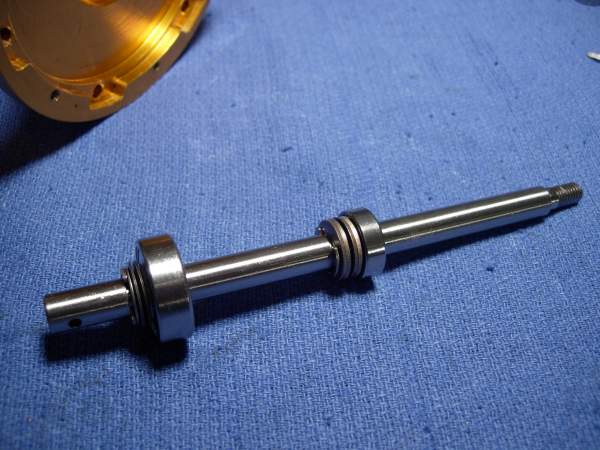
another inspection. here is the right spool bearing (key #910-441). it also measures 8x16x5 and matches the key washer bearing that we just cracked open. grease on one side, nothing on the other.
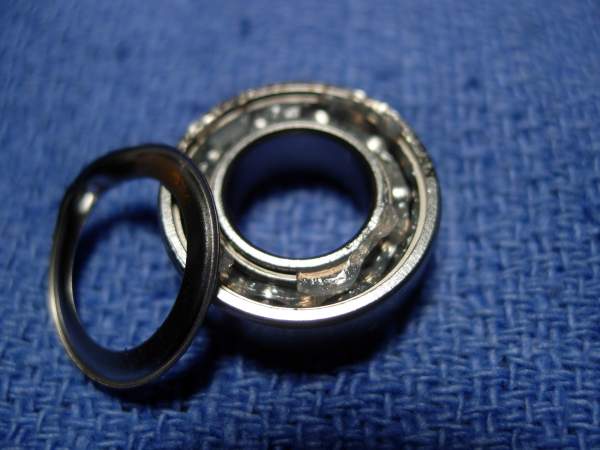
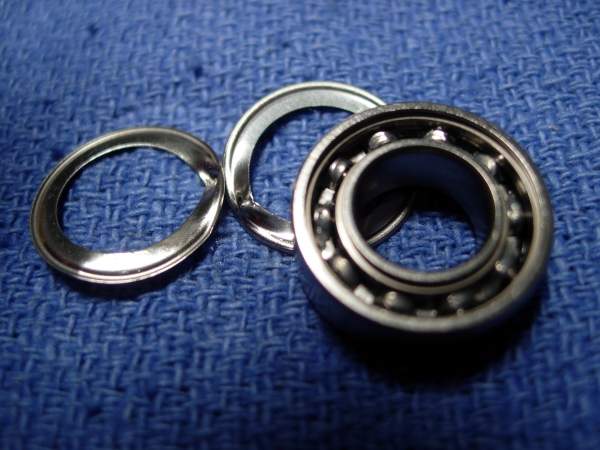
since this is a spool bearing, it will be cleaned with carb cleaner and compressed air, then lubed with xtreme reel +.
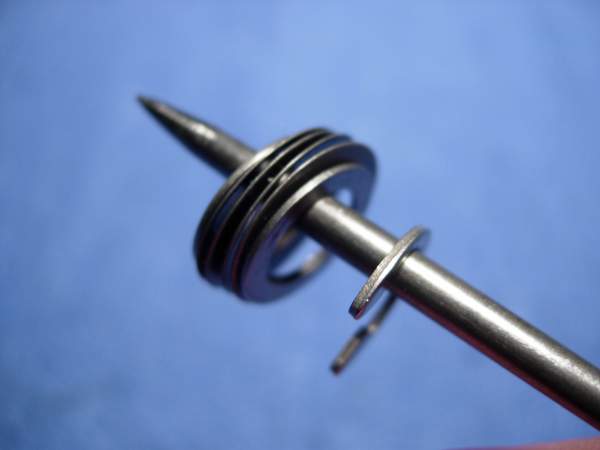
now for the left side of the main shaft. remove the e-type retainer (key #1900-0004), the thrust washer (key #920-154), the bellevilles (key #609-1), and the thrust washer (key #920-441). keep these in order!
let's inspect the left spool bearing (key #910-441). it measures 10x22x6mm and has a serial # of EZO SS 6900 RS JAPAN.
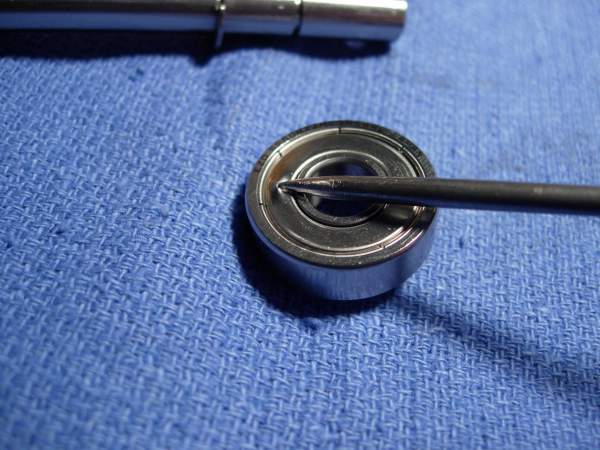
a poor coating of grease on one side.........
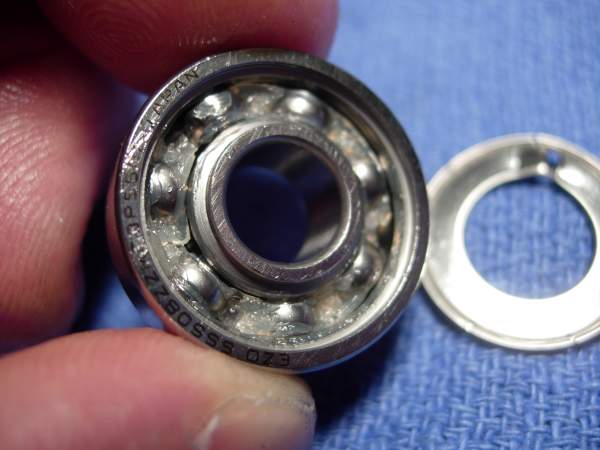
...... and a little more on the other.
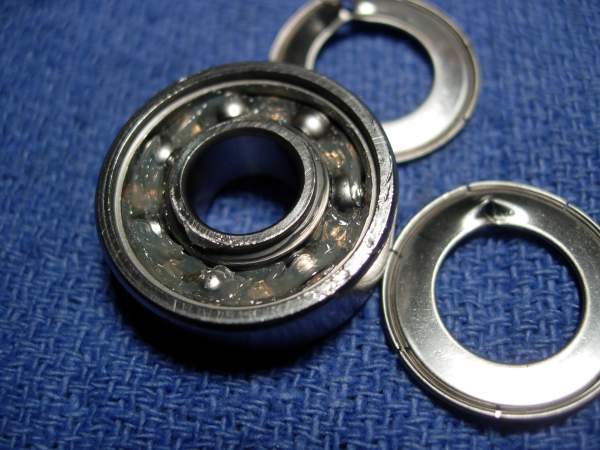
air gaps leave this bearing vulnerable to attack from salt water. this spool bearing will also be opened, cleaned and lubed with xtreme reel +. water will most certainly get in, but now water will also get out!!!!! with the shields in place, any amount of water that intrudes will be trapped and cause immediate bearing failure. these open bearings will eventually fail as well, but they should last longer than shielded bearings.
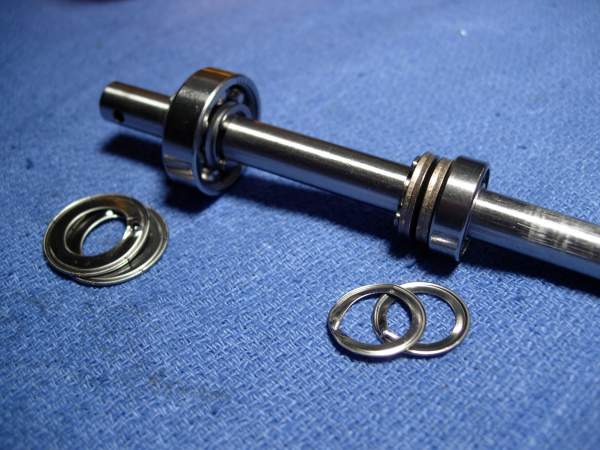
install the main spool assembly (key #718) and bearings. our bare spool just spun for 4 minutes and 10 seconds.
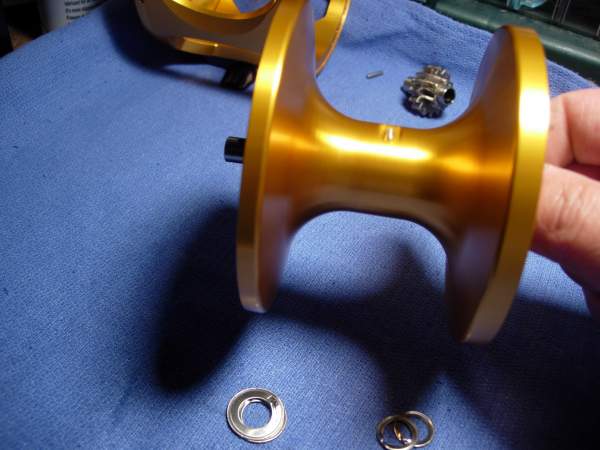
install the ratchet gear (key #401) and screws (key #930-084).
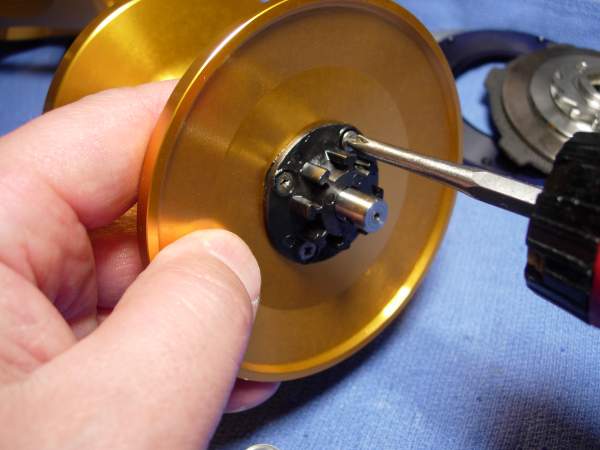
install the thrust bearing (key #910-410) and spring (key #613).
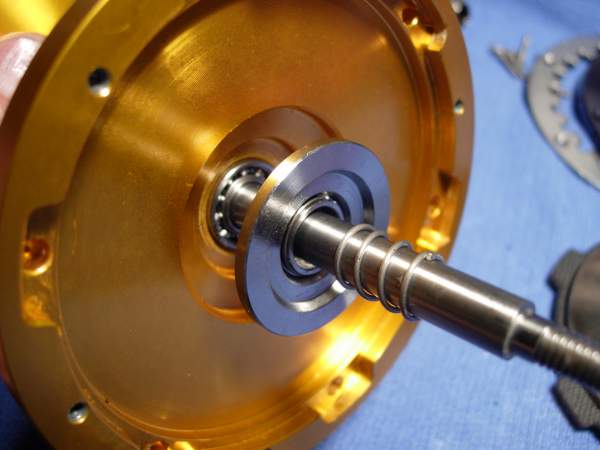
the key washer bearing (key #910-448) does not affect freespool. let's pack it with greased. it is unfortunately now open. if i had a bearing packer, i could push grease right past the shields. i'm going to have to look at that.
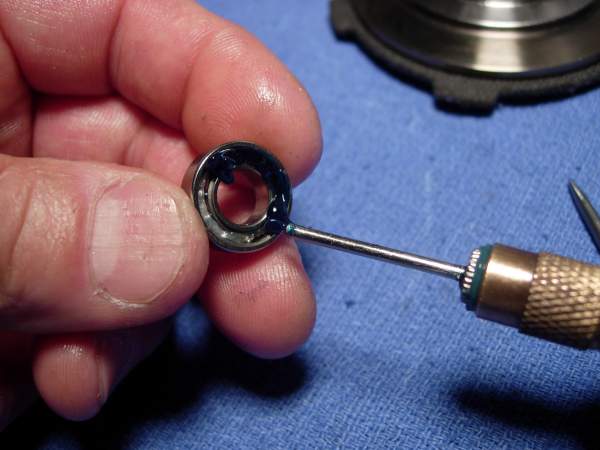
push the grease all the way through with your fingers and install the bearing. you've got to get the grease inside, not just on the surface.
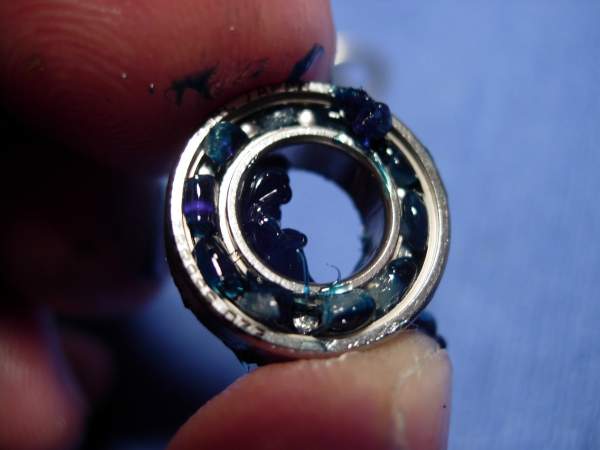
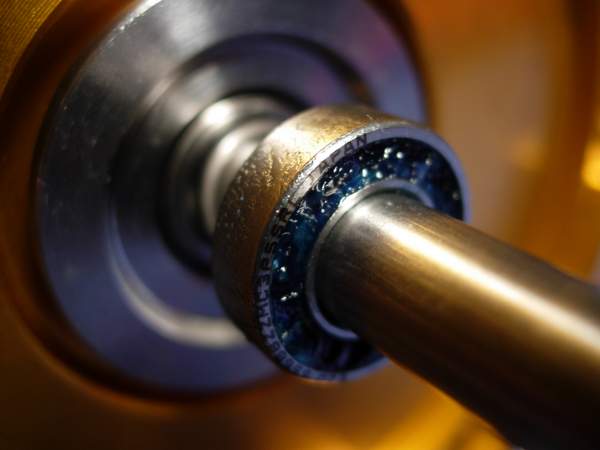
add a small bead of grease to all of holes in the right side of the spool (key #400).
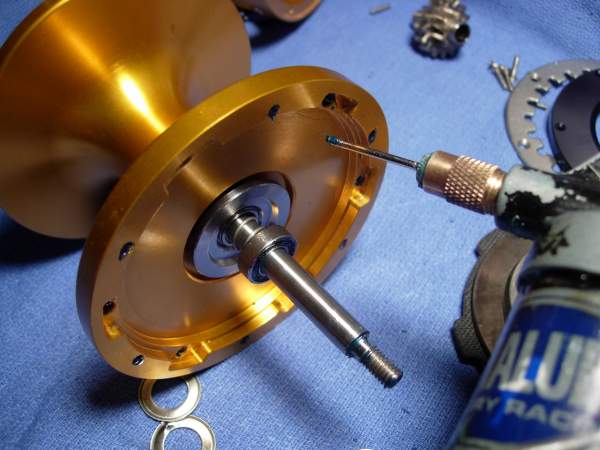
install the six drag washer springs (key #204-4).

install the drag washer assembly.
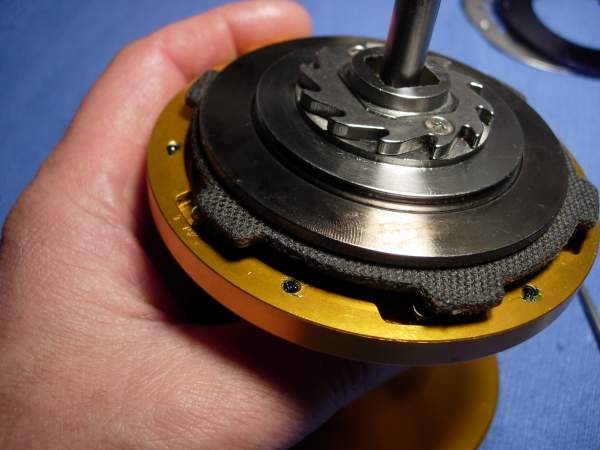
press the drag washer assembly down HARD over the six drag springs until they are properly seated. with a left hand assist, install the water proof cover (key #405).
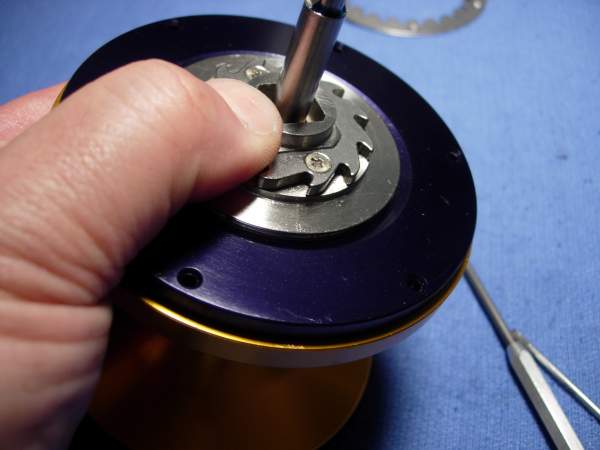
with a left hand assist, install the click pawl (key #304).
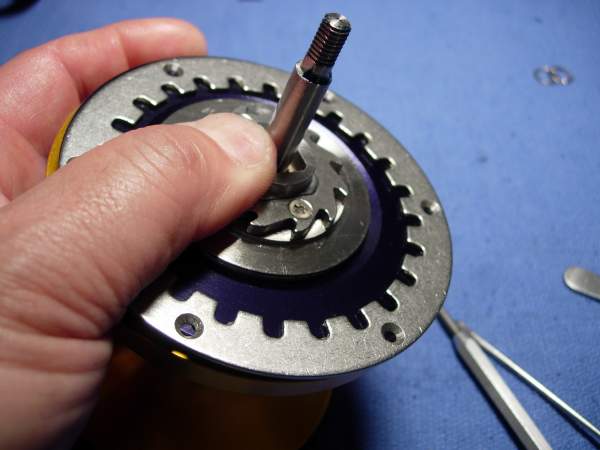
install the six click pawl screws (key #930-084).
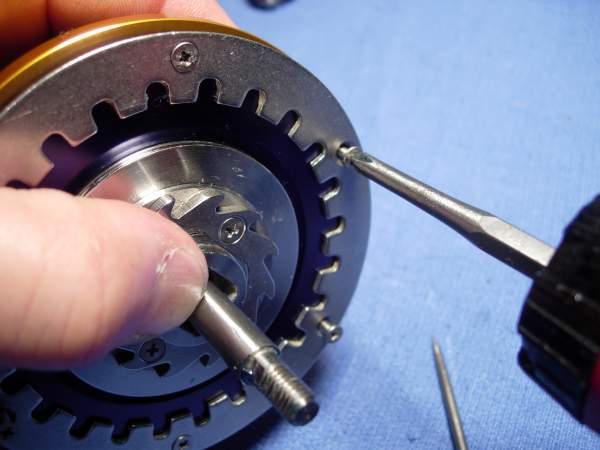
ok, the spool assembly is done. give it a spin!
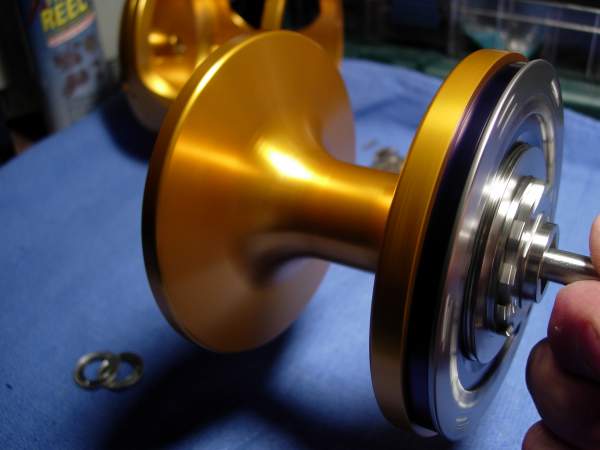
now, for the right main side plate bearing (key #910-443). this bearing is always the first to fail. it looks like someone smeared a little grease over it, probably in an attempt to decrease the failure rate. that is what accurate currently does. it doesn't work for accurate and it won't work here.
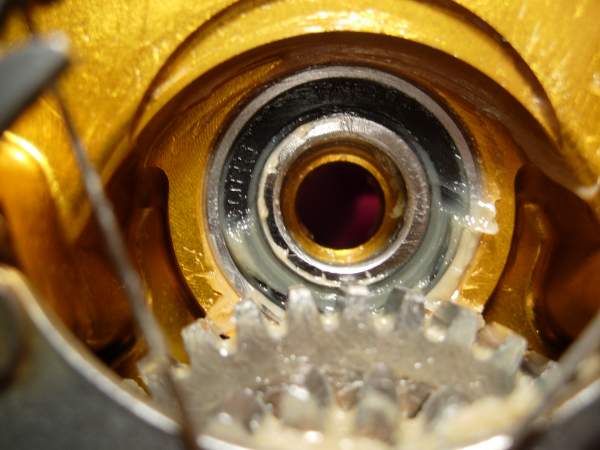
here is a close up view of the left side anti-reverse pawl (key #201). it's a novel design, and one that i hope will eventually be copied throughout the industry. once this pawl engages, it will not slip. it is, without a doubt, the most reliable anti-reverse system in the world. well done, gentlemen!

this photo shows the right side silent spring (key #723-1) and the left side silent spring (key #723-2). the design is very similar to the system use by avet. remove the pawl assemblies, starting with the pawl screws (key #930-1201). take careful note of the orientation of the pawls (key #'s 201 and 201-1) and the pawl springs (key #217). you will have to re-install them soon!
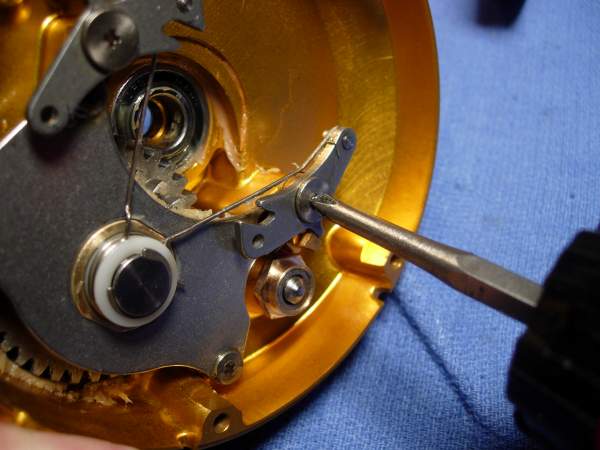
remove the left (key #723-2) and right (key #723-1) side silent springs. doing so will "enlarge" the circle at the base of these springs. they may have to be "tightened" later.
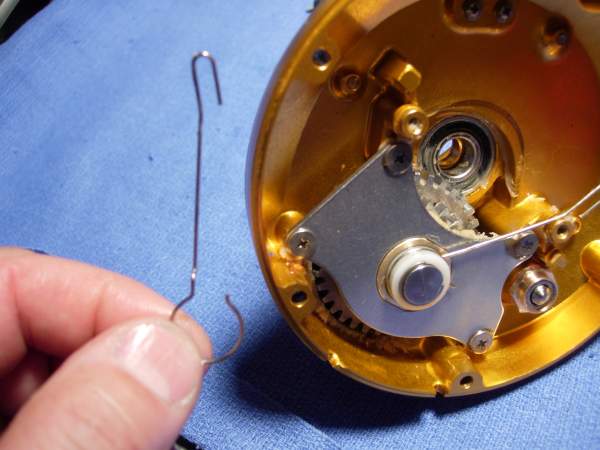
remove the c-clip (key #1901-0023) for the silent spring bushing.
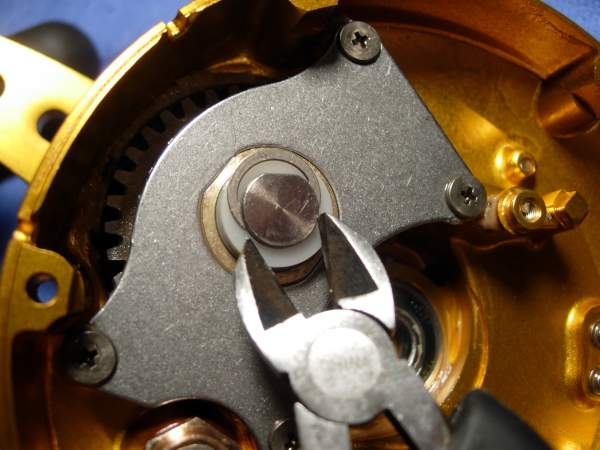
remove the silent spring bushing (key #723).
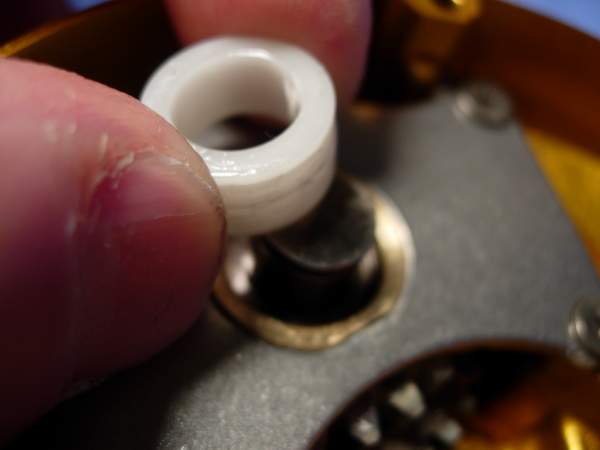
remove the four hold plate screws (key #930-605).
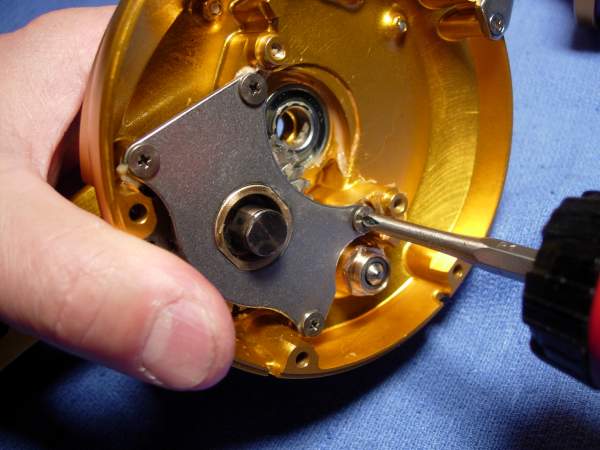
remove the hold plate (key #207).
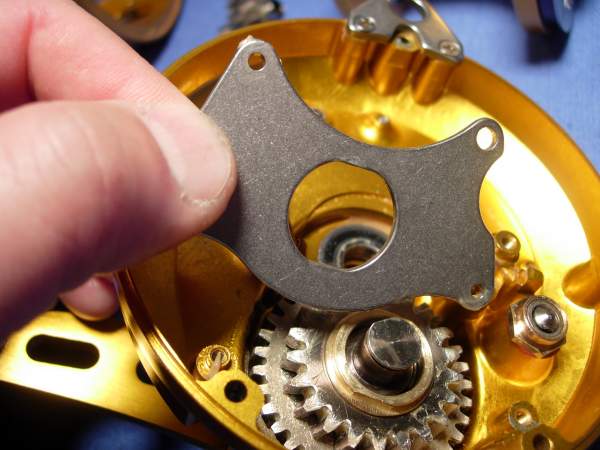
remove the hold plate bushing (key #215) and note its proper orientation.

remove the low speed drive gear (key #700-1) and note its proper orientation.
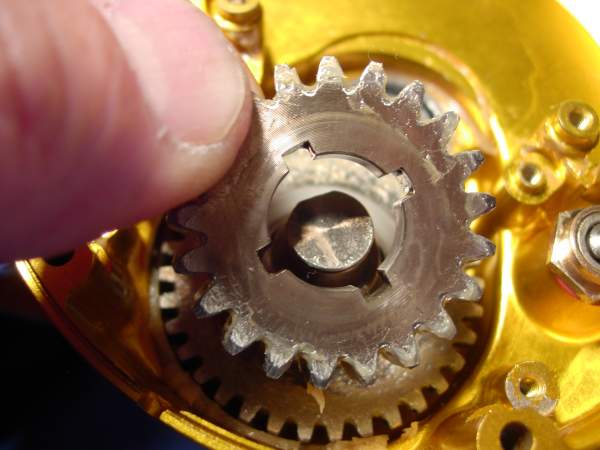
remove the drive gear washer (key #920-412).
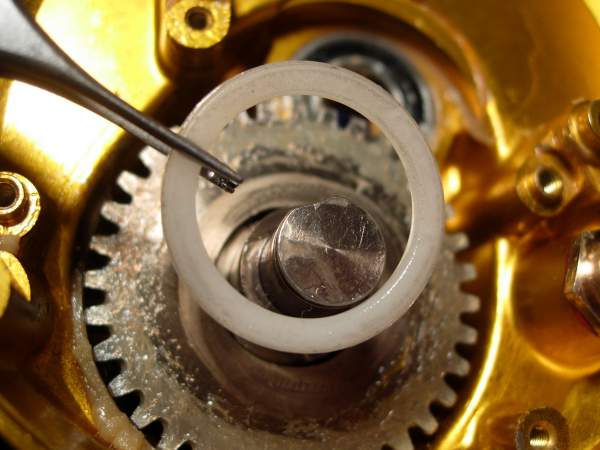
remove the high speed drive gear (key #700) and note its proper orientation.
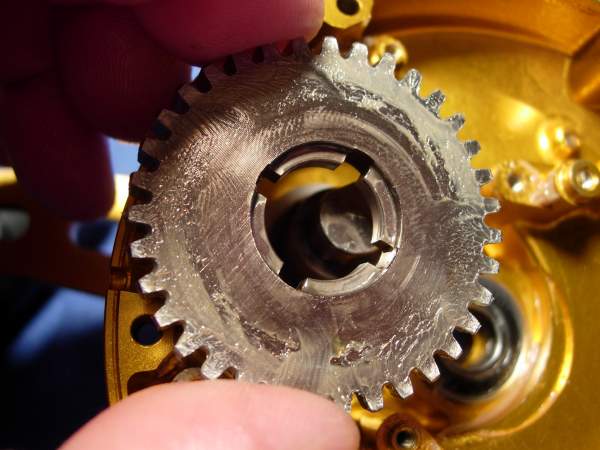
all that work just to take a look at the right main side plate bearing (key #910-443). let's see if our efforts were necessary.
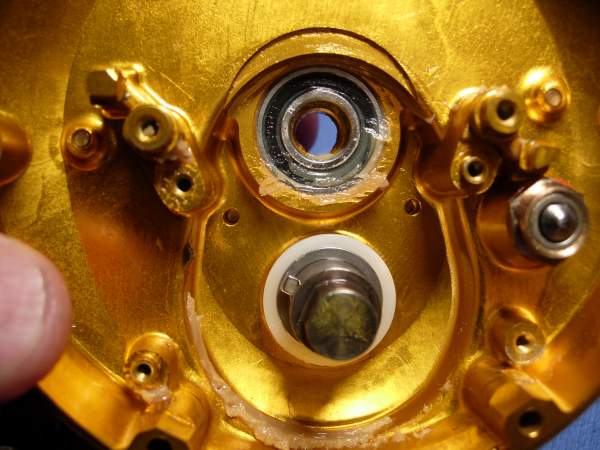
this bearing measures 10x22x6mm and is stamped EZO SS 6900 RS JAPAN. as i suspected. poorly greased on one side only.
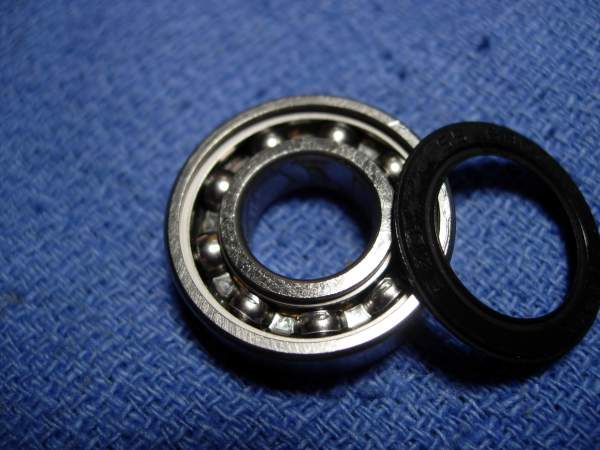
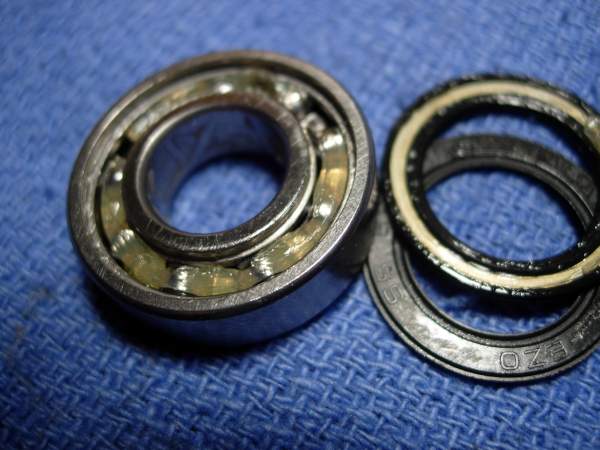
let's pack it with yamaha blue grease and get this reel back together.
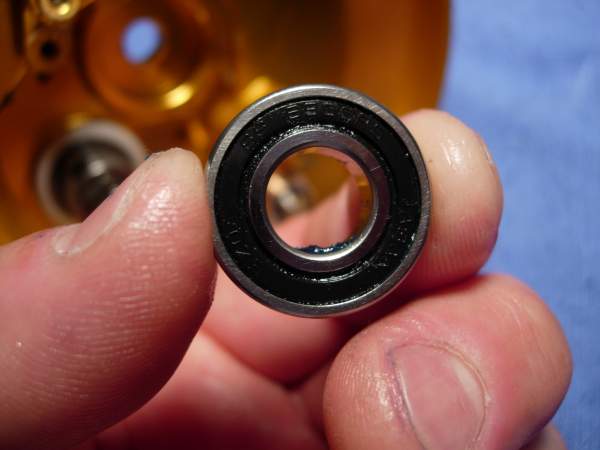
add a little grease to the bearing cup first, then push the bearing into place.
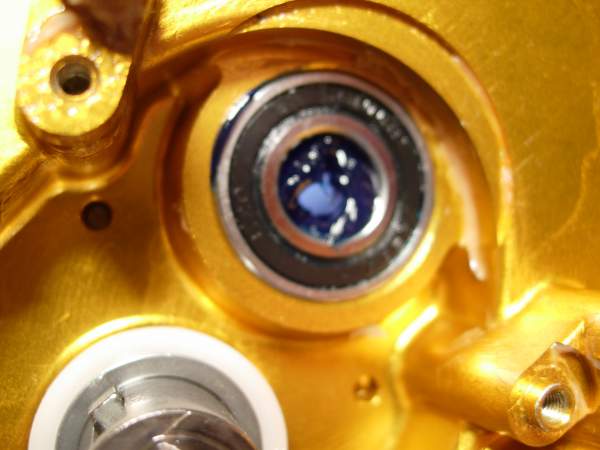
install the high speed drive gear (key #700).
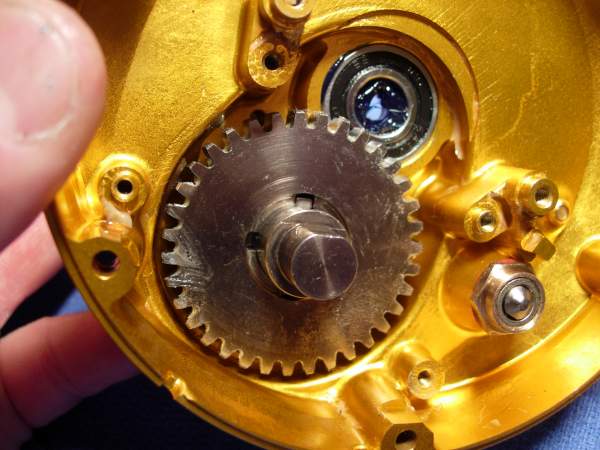
install the drive gear washer (key #920-412).
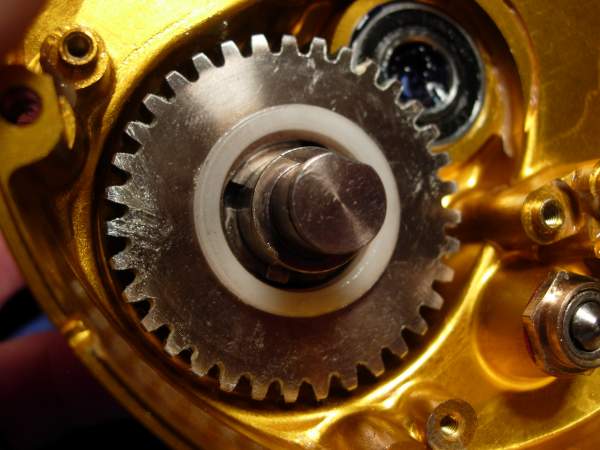
install the low speed drive gear (key #700-1).
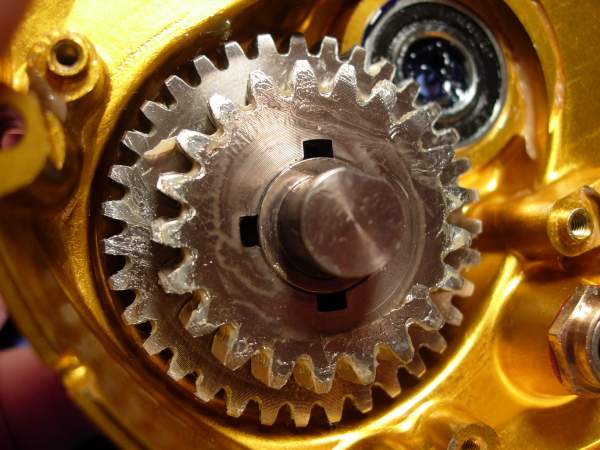
install the hold plate bushing (key #215).
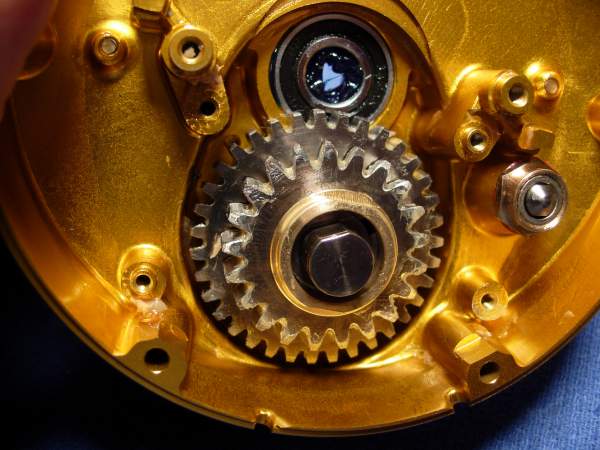
install the hold plate (key #207).
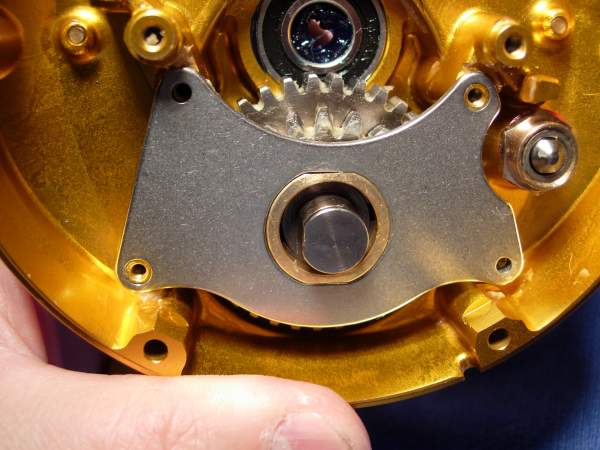
install the hold plate screws (key #930-605).
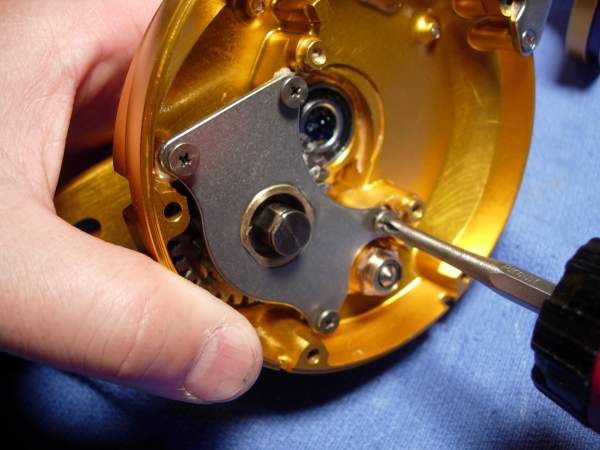
install the silent spring bushing (key #723).
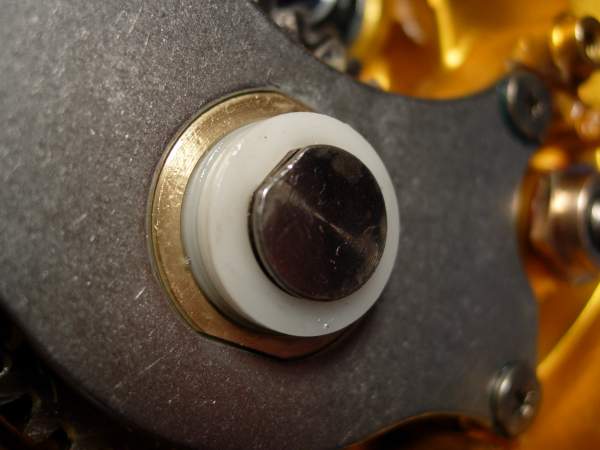
install the c-clip (key #1901-0023).
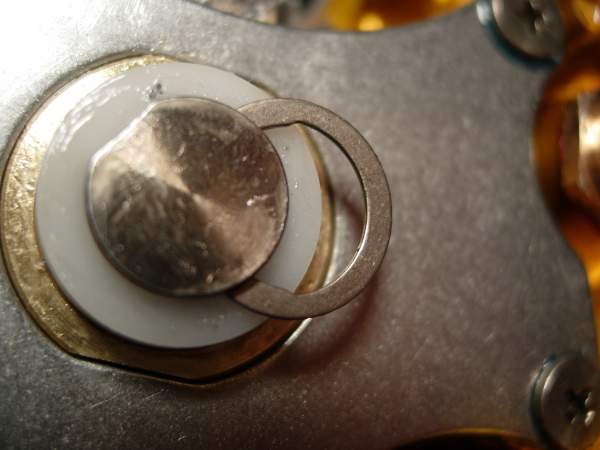
install the right (key #723-2), then the left (key #723-1), side silent spring. if they do not properly "grab" the silent spring bushing (key #723), they may have to be "tightened."
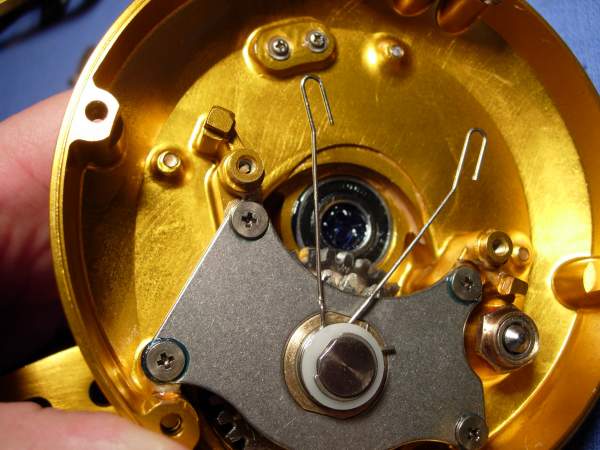
install both anti-reverse pawl bushings (key #211).
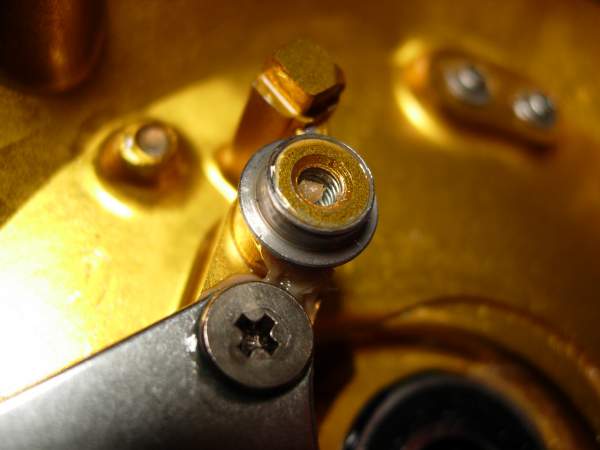
install both anti-reverse pawl springs (key #217).
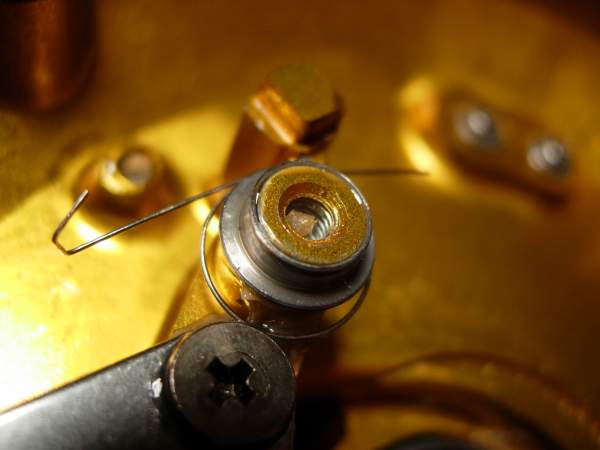
install both anti-reverse pawl assemblies (key #'s 201 and 201-1).
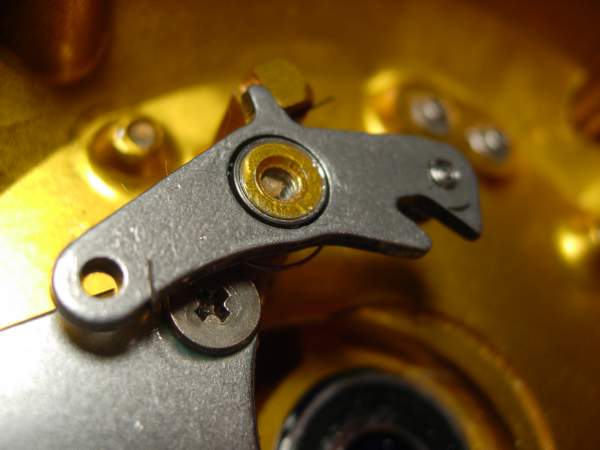
engage the silent springs (key #'s 723-1 and 723-2) with the pawls (key #'s 201 and 201-1), then install the pawl screws (key #930-1201).
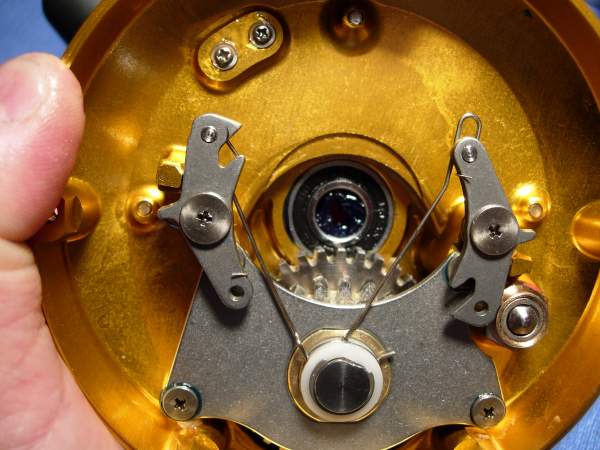
make sure the silent springs work properly.
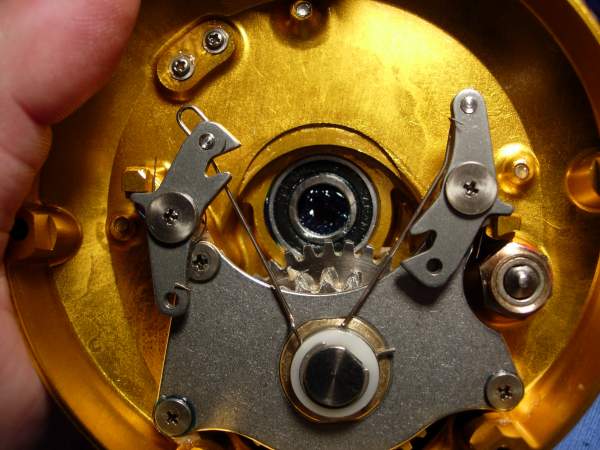
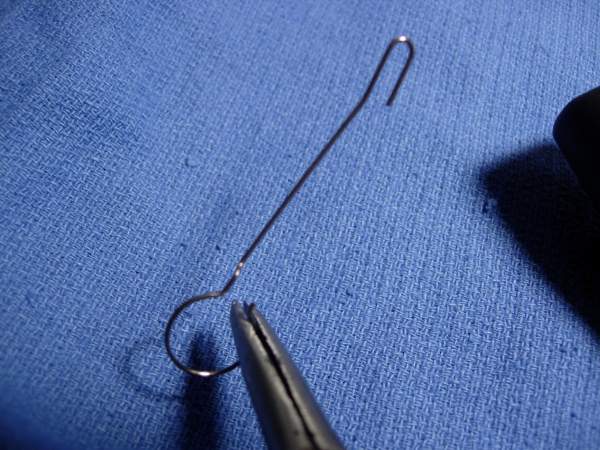
it the silent springs do not work properly, remove them and tighten the loop.
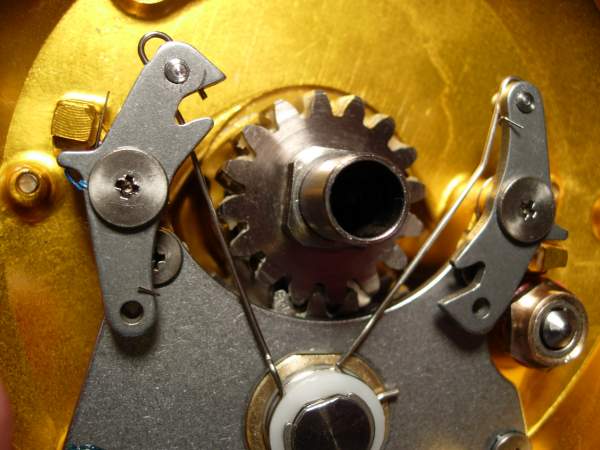
install the high speed (key #702) and low speed (key #702-1) pinion gears as a unit.
install the spool assembly (key #400) as a unit.
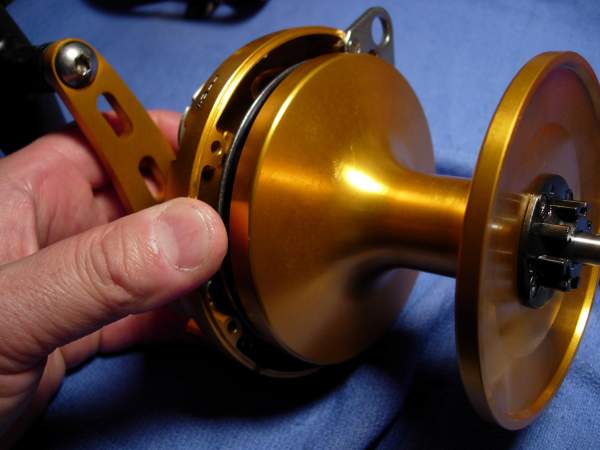
install the main shaft pin (key #717) and align it vertically. almost forgot about that one, huh!
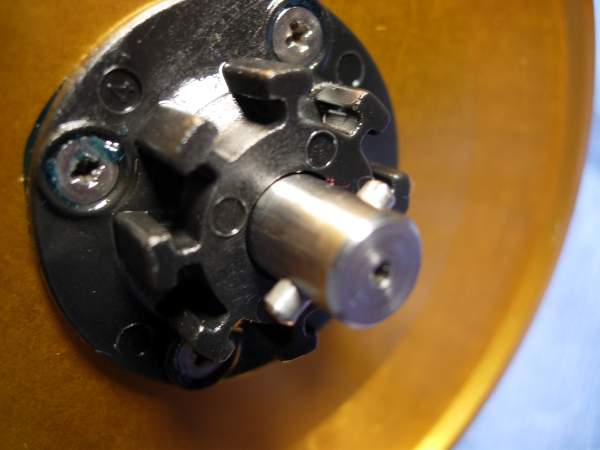
install the right side plate and spool as a unit into the frame.
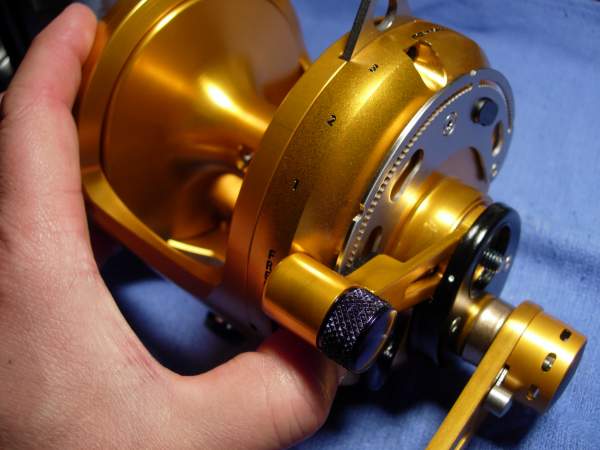
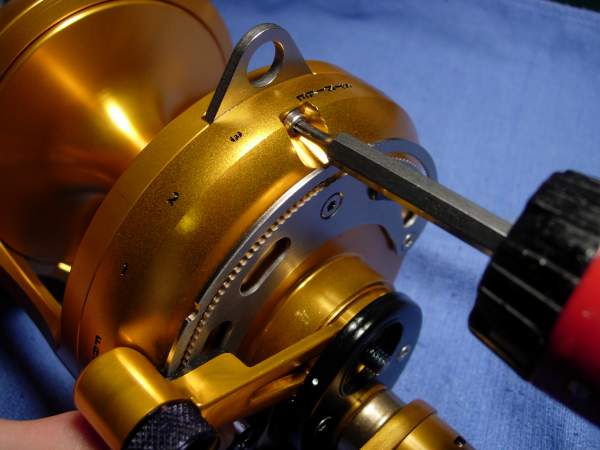
install the right side plate screws (key #'s 930-1194 and 930-1193), remember that the short side plate screw (key #930-1194) goes at the 12 o'clock postion.
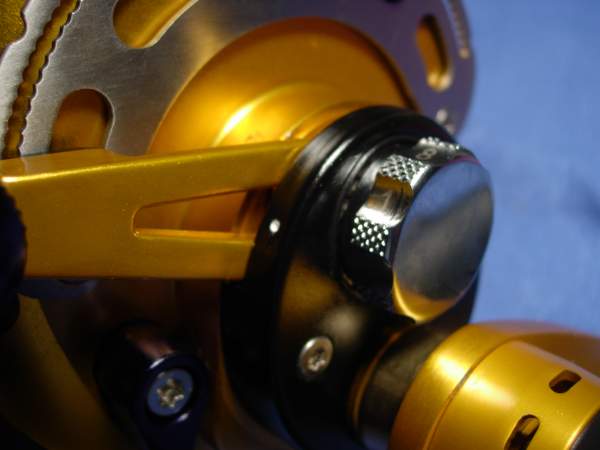
with the drag lever (key #605) in the "free" position, install the drag knob assembly (key #600). it only screws in one way.
now give the spool a spin. simply holding the reel in my left hand and spinning the spool with my right, i was able to get the spool to spin for 2 minutes and 55 seconds. that should be compared to the 45 second freespool time when i pulled this reel straight out of the box. this freespool time would most certainly be longer if the spool was loaded with line.
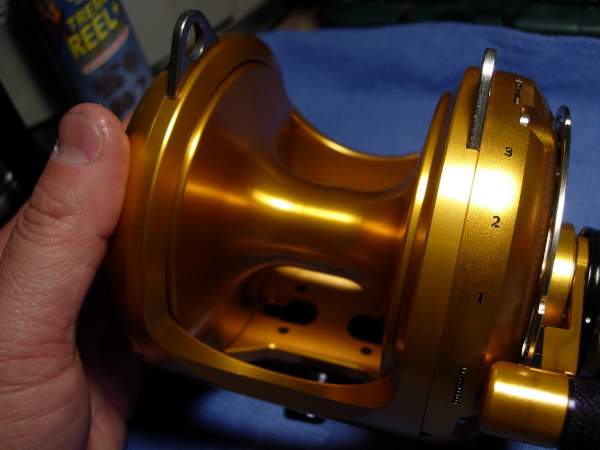
done!
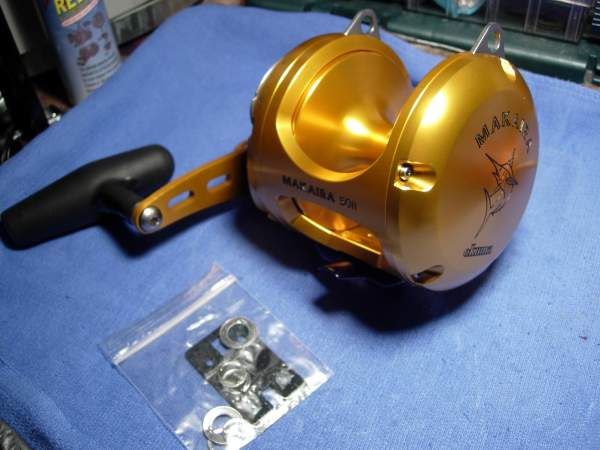
ok, now for a few comments. for years now, i have been looking for the same thing in a fishing reel .........
greased carbon fiber drag washers - look, everyone, anyone, who has been following the evolution of fishing reels in the last 10 years, has seen the steady march of companies that have been changing over to greased carbon fiber drag washers. they last forever. it makes me, and should make you, question the judgement of a company or an individual that does NOT use this system. look, guys, the carbon fiber washers are NOT that much more expensive. and it takes an extra 30 seconds to properly grease it. notice that i said "properly." you need to cover the front, the back AND the sides.
grease on all of the non-exposed metal surfaces and screws - i don't care if you use type I, II III, or X anodizing. if there is a single internal patch of metal that is not coated with grease, it will corrode through. i know that companies are concerned with the possibility of screws backing out, but it is my opinion that loctite is not the answer. corrosion anywhere is bad and the only way to avoid corrosion is grease. so then we need to make sure that these greased screws do not back out. that means you have to torque them down to a certain standard. that also means coarse thread screws.
non-spool bearings - these are the bearings that do not affect freespool, but they do affect the ease with which you crank the handle when it is not under a load. so who really cares about that? no one! these bearings need to be packed with grease through and through, then they need to be properly shielded or sealed. such a bearing will last forever. it is salt water intrusion that causes a bearing to fail. if there are air gaps in a shielded bearing, water will find its way in. the shields will trap the water and the bearing will fail. i see it a thousand times a year. why else would boca bearings be making so much money?
spool bearings - this one depends. if you need freespool, the bearings have to lubed with something, anything, that's light. the xtreme reel + gives the best freespool time. standard corrosion x or reel x will work fine, as well as metaloil, quantum hot sauce, rocket fuel or anything. these bearings have to be open. water can easily intrude, and if you have a shielded bearing these shields will hold the water and the bearing will fail immediately. without shields, at least the water can get out. the bottom line is that spool bearings will not last forever unless have a shielded bearing that is packed with grease. you'll have zero freespool, but that will be ok for trolling.
an over-sized offset handle - if you've never tried one of these, you're in for a treat. tiburon's patent covers offsets from 10 to 25 degrees. the 9 degree offset is used by avet, accurate and pete kolekar and they are street legal. this information has been available for years, so a handle with a zero degree offset will get dinged with minus points. one more thing. the grip has to have a large enough diameter. somewhere between 1 and 1/8th inch at the very least, but 1 and 1/4 inch is the diameter is best.
so in evaluating these reels, it's pretty much a given that they will initially perform as advertised. i have no problem with that. the issue is longevity. a reel that delivers on all of the aforementioned points will receive an A+. the grade will decrease for each feature that is found missing or lacking, from A+ to A to A- to B+ to B to B-. you see the pattern. so here goes......
accurate - the accurate ATD 50 is $1400. i know, i paid full retail for one. it has greased carbon fiber drag washers and grease in the screw holes and all the non-exposed metal surfaces. the spool bearings are shielded and oiled (ding), the non spool bearings are shielded, oil inside and smeared with grease on the outside (ding), and the handle grip has a zero degree offset (ding). final grade is a B+.
avet - the larger reels have a handle grip with a 9 degree offset, but there are plenty of dry surfaces inside the reel (ding), the non-spool bearings are sealed and poorly greased or dry (ding), the spool bearings are open on the inside but sealed on the outside and can still retain water (ding), and the drags are dry (ding, ding, ding, ding !!!!!!!). final grade is a B.
okuma - you just saw the makira 50 two speed. it has a large offset handle grip from tiburon, it has corrosion x HD on all the non-exposed metal surfaces, grease on all but a few of the screws and a greased carbon fiber drag washer. the spool bearings are shielded and inadequately greased (ding) and the non-spool bearing are the same (ding). final grade is an A-.
penn - the v series internationals have gone through a series of design changes and the final product is very nice, and it has a greased carbon fiber drag waher. unfortunately, the spool bearings are shielded and oiled (ding), the side plate bearings are shielded and half greased (ding), there are plenty of dry spots in the reel to corrode (ding) and the handle grip does not have an offset (ding). final grade is a B.
shimano - currently, it is my opinion that the tiagra is the most reliable of the large two speed lever drags coming straight out of the box, but there is still room for improvement. it has an oddly shaped handle that will qualify as offset, so we're good there. the spool bearings are open and greased, but the freespool is adequate enough. you won't get 4 minutes of freespool, but not everyone in the world need 4 minutes of freespool. the working surface of the carbon fiber drag washer is greased, but the BACK IS NOT!!! this allows for salt corrosion to build up underneath the drag washer and the uneven surface that is created will cause the drags to stick (ding). there are plenty of dry spots in the reel to accumulate corrosion (ding). the side plate bearings are open and greased. they last longer than side plate bearings that are shielded and oiled, but they still do not have the longevity that i believe is needed. these bearings are good, but they will still fail (ding). final grade is a B+.
the other reels, daiwa, alutecnos, everol, and finnor, i do not have enough experience with, but i doubt that we would find an "A" or an "A+" in this group.
a few of you know that i am also a teacher. classroom dynamics never cease to amaze me. you have the smart kids, you have the slow kids, you have the bullies, and you have the ones that think they can slide by on looks alone. then you have the ones that are quiet, the ones that are constantly getting picked on, but have some real potential. with hard work and a little recognition, these kids can really shine. that's what i think about okuma and what they have done with their makira. their attention to detail is what i find most impressive. it is the level of quality that i would expect from an accurate costing more than twice as much. for the slackers in the class, the ones that think that "toyota" quality is good enough, i am more than happy to give out mediocre grades.
i believe that okuma would benefit if they would pay more attention to their bearings. if they do, i would be happy to finally give out an "A+!!!" alan
by now, you all know the mantra - greased carbon fiber drag washers, grease on all the non-exposed metal surfaces, spool bearings open and oiled, non-spool bearings packed with grease and shielded, and large oversized off-set handles. a reel that delivers all of this will get an "A+." keep this in mind as we go through this next reel.
a box arrive from ontario yesterday.
i'm going to crack open both of these reels, but the lever drag is first.
since i've never opened up one of these before, let's take a look at the schematics.
here's the double dog system.
here's the new drag system.
here's the gear cluster. this one looks familiar.
found some more paperwork in the box.
we've talked about a thrust bearing to take care of the side load at high drag settings. well, looks like okuma incorporated one.
found a few more items in the box.
and here is our reel. 43 seconds of freespool straight out of the box! not bad.
back out the left side plate screws.
there are four long screws (key #930-1195) and one short screw (key #930-1197) at the 12 o'clock position.
unscrew the drag knob assembly (key #600).
remove the left side plate assembly (key #300).
you will find a light coat of corrosion x HD through out the reel.
remove the spool assembly (key #400).
remove the right side plate screws.
there are four long screws (key #930-1193) and one short screw (key #930-1194) at the 12 o'clock position.
ok, it's in pieces. so far, so good.
back out the hangar screws (key #930-1220).
yuck, loctite! without grease, these screws and screw holes can corrode.
grease the hangar (key #108) and the screw holes and reinstall the hangar screws (key #930-1220).
using a number 15 torx bit, remove the body foot screws (key #930-1125).
grease on the base of the frame. very good.
someone might have been in a hurry when he grease the body foot (key #102) and the reel foot gasket (key #102-1).
grease the screw holes. these screws will not back out if they are properly torqued. if is far better than having the screws lock up due to corrosion.
grease the body foot (key #102).
install the left side plate (key #300). remember that the short left side plate screw (key #930-1197) goes in at the 12 o'clock position.
the frame and left side plate are done. let's set them aside for now.
now for the spool. first, remove the main shaft pin (key #717) on the left side of the spool. these are always getting lost.
remove the high speed pinion gear (key #702) and the low speed pinion gear (key #702-1).
remove the click pawl screws (key #930-093).
when the last screw is removed, the entire assembly pops up.
remove the click pawl (key #304).
remove the waterproof cover (key #405).
remove the drag washer assembly (key #'s 202, 607, 612, 611, 913, 612-1 and 608) as a unit.
this is okuma's new free floating drag system.
remove the drag washer retainer (key #608).
this is what the drag stack looks like when it's spread out.
you can see in this photo of the drag washer (key #611) that the cal's grease is not spread as evenly as it could be.
though it is unlikely to be a problem, i am still going to regrease it.
thoroughly clean off all of the excess grease.
this is the outside of the key washer (key #612-1).
reinstall the drag washer retainer (key #608) and set the drag assembly aside.
there are six compression springs (key #204-4) that are used to center the drag washer. pull them all out and find a safe place for them.
remove the key washer bearing (key #910-448), the compression spring (key #613) and the thrust bearing assembly (key #910-410).
the key washer bearing measures 8x16x5mm and has a stamp saying EZO SS688ZZMC3PSSRL JAPAN. these are the expensive japanese bearings, so let's take a look inside.
we've got grease smeared on one side.......
....... and NOTHING on the other!
we'll come back to this bearing later. there are two more to look at. remove the ratchet gear screws (key #930-0084) and the ratchet gear (key #401).
the bare spool now spins for 23 seconds. remember, the intact reel, straight out of the box, spun for 43 seconds. i think the heavy drag assembly gave it a little more inertia.
here's what the main shaft assembly (key #718) looks like outside of the spool.
another inspection. here is the right spool bearing (key #910-441). it also measures 8x16x5 and matches the key washer bearing that we just cracked open. grease on one side, nothing on the other.
since this is a spool bearing, it will be cleaned with carb cleaner and compressed air, then lubed with xtreme reel +.
now for the left side of the main shaft. remove the e-type retainer (key #1900-0004), the thrust washer (key #920-154), the bellevilles (key #609-1), and the thrust washer (key #920-441). keep these in order!
let's inspect the left spool bearing (key #910-441). it measures 10x22x6mm and has a serial # of EZO SS 6900 RS JAPAN.
a poor coating of grease on one side.........
...... and a little more on the other.
air gaps leave this bearing vulnerable to attack from salt water. this spool bearing will also be opened, cleaned and lubed with xtreme reel +. water will most certainly get in, but now water will also get out!!!!! with the shields in place, any amount of water that intrudes will be trapped and cause immediate bearing failure. these open bearings will eventually fail as well, but they should last longer than shielded bearings.
install the main spool assembly (key #718) and bearings. our bare spool just spun for 4 minutes and 10 seconds.
install the ratchet gear (key #401) and screws (key #930-084).
install the thrust bearing (key #910-410) and spring (key #613).
the key washer bearing (key #910-448) does not affect freespool. let's pack it with greased. it is unfortunately now open. if i had a bearing packer, i could push grease right past the shields. i'm going to have to look at that.
push the grease all the way through with your fingers and install the bearing. you've got to get the grease inside, not just on the surface.
add a small bead of grease to all of holes in the right side of the spool (key #400).
install the six drag washer springs (key #204-4).
install the drag washer assembly.
press the drag washer assembly down HARD over the six drag springs until they are properly seated. with a left hand assist, install the water proof cover (key #405).
with a left hand assist, install the click pawl (key #304).
install the six click pawl screws (key #930-084).
ok, the spool assembly is done. give it a spin!
now, for the right main side plate bearing (key #910-443). this bearing is always the first to fail. it looks like someone smeared a little grease over it, probably in an attempt to decrease the failure rate. that is what accurate currently does. it doesn't work for accurate and it won't work here.
here is a close up view of the left side anti-reverse pawl (key #201). it's a novel design, and one that i hope will eventually be copied throughout the industry. once this pawl engages, it will not slip. it is, without a doubt, the most reliable anti-reverse system in the world. well done, gentlemen!
this photo shows the right side silent spring (key #723-1) and the left side silent spring (key #723-2). the design is very similar to the system use by avet. remove the pawl assemblies, starting with the pawl screws (key #930-1201). take careful note of the orientation of the pawls (key #'s 201 and 201-1) and the pawl springs (key #217). you will have to re-install them soon!
remove the left (key #723-2) and right (key #723-1) side silent springs. doing so will "enlarge" the circle at the base of these springs. they may have to be "tightened" later.
remove the c-clip (key #1901-0023) for the silent spring bushing.
remove the silent spring bushing (key #723).
remove the four hold plate screws (key #930-605).
remove the hold plate (key #207).
remove the hold plate bushing (key #215) and note its proper orientation.
remove the low speed drive gear (key #700-1) and note its proper orientation.
remove the drive gear washer (key #920-412).
remove the high speed drive gear (key #700) and note its proper orientation.
all that work just to take a look at the right main side plate bearing (key #910-443). let's see if our efforts were necessary.
this bearing measures 10x22x6mm and is stamped EZO SS 6900 RS JAPAN. as i suspected. poorly greased on one side only.
let's pack it with yamaha blue grease and get this reel back together.
add a little grease to the bearing cup first, then push the bearing into place.
install the high speed drive gear (key #700).
install the drive gear washer (key #920-412).
install the low speed drive gear (key #700-1).
install the hold plate bushing (key #215).
install the hold plate (key #207).
install the hold plate screws (key #930-605).
install the silent spring bushing (key #723).
install the c-clip (key #1901-0023).
install the right (key #723-2), then the left (key #723-1), side silent spring. if they do not properly "grab" the silent spring bushing (key #723), they may have to be "tightened."
install both anti-reverse pawl bushings (key #211).
install both anti-reverse pawl springs (key #217).
install both anti-reverse pawl assemblies (key #'s 201 and 201-1).
engage the silent springs (key #'s 723-1 and 723-2) with the pawls (key #'s 201 and 201-1), then install the pawl screws (key #930-1201).
make sure the silent springs work properly.
it the silent springs do not work properly, remove them and tighten the loop.
install the high speed (key #702) and low speed (key #702-1) pinion gears as a unit.
install the spool assembly (key #400) as a unit.
install the main shaft pin (key #717) and align it vertically. almost forgot about that one, huh!
install the right side plate and spool as a unit into the frame.
install the right side plate screws (key #'s 930-1194 and 930-1193), remember that the short side plate screw (key #930-1194) goes at the 12 o'clock postion.
with the drag lever (key #605) in the "free" position, install the drag knob assembly (key #600). it only screws in one way.
now give the spool a spin. simply holding the reel in my left hand and spinning the spool with my right, i was able to get the spool to spin for 2 minutes and 55 seconds. that should be compared to the 45 second freespool time when i pulled this reel straight out of the box. this freespool time would most certainly be longer if the spool was loaded with line.
done!
ok, now for a few comments. for years now, i have been looking for the same thing in a fishing reel .........
greased carbon fiber drag washers - look, everyone, anyone, who has been following the evolution of fishing reels in the last 10 years, has seen the steady march of companies that have been changing over to greased carbon fiber drag washers. they last forever. it makes me, and should make you, question the judgement of a company or an individual that does NOT use this system. look, guys, the carbon fiber washers are NOT that much more expensive. and it takes an extra 30 seconds to properly grease it. notice that i said "properly." you need to cover the front, the back AND the sides.
grease on all of the non-exposed metal surfaces and screws - i don't care if you use type I, II III, or X anodizing. if there is a single internal patch of metal that is not coated with grease, it will corrode through. i know that companies are concerned with the possibility of screws backing out, but it is my opinion that loctite is not the answer. corrosion anywhere is bad and the only way to avoid corrosion is grease. so then we need to make sure that these greased screws do not back out. that means you have to torque them down to a certain standard. that also means coarse thread screws.
non-spool bearings - these are the bearings that do not affect freespool, but they do affect the ease with which you crank the handle when it is not under a load. so who really cares about that? no one! these bearings need to be packed with grease through and through, then they need to be properly shielded or sealed. such a bearing will last forever. it is salt water intrusion that causes a bearing to fail. if there are air gaps in a shielded bearing, water will find its way in. the shields will trap the water and the bearing will fail. i see it a thousand times a year. why else would boca bearings be making so much money?
spool bearings - this one depends. if you need freespool, the bearings have to lubed with something, anything, that's light. the xtreme reel + gives the best freespool time. standard corrosion x or reel x will work fine, as well as metaloil, quantum hot sauce, rocket fuel or anything. these bearings have to be open. water can easily intrude, and if you have a shielded bearing these shields will hold the water and the bearing will fail immediately. without shields, at least the water can get out. the bottom line is that spool bearings will not last forever unless have a shielded bearing that is packed with grease. you'll have zero freespool, but that will be ok for trolling.
an over-sized offset handle - if you've never tried one of these, you're in for a treat. tiburon's patent covers offsets from 10 to 25 degrees. the 9 degree offset is used by avet, accurate and pete kolekar and they are street legal. this information has been available for years, so a handle with a zero degree offset will get dinged with minus points. one more thing. the grip has to have a large enough diameter. somewhere between 1 and 1/8th inch at the very least, but 1 and 1/4 inch is the diameter is best.
so in evaluating these reels, it's pretty much a given that they will initially perform as advertised. i have no problem with that. the issue is longevity. a reel that delivers on all of the aforementioned points will receive an A+. the grade will decrease for each feature that is found missing or lacking, from A+ to A to A- to B+ to B to B-. you see the pattern. so here goes......
accurate - the accurate ATD 50 is $1400. i know, i paid full retail for one. it has greased carbon fiber drag washers and grease in the screw holes and all the non-exposed metal surfaces. the spool bearings are shielded and oiled (ding), the non spool bearings are shielded, oil inside and smeared with grease on the outside (ding), and the handle grip has a zero degree offset (ding). final grade is a B+.
avet - the larger reels have a handle grip with a 9 degree offset, but there are plenty of dry surfaces inside the reel (ding), the non-spool bearings are sealed and poorly greased or dry (ding), the spool bearings are open on the inside but sealed on the outside and can still retain water (ding), and the drags are dry (ding, ding, ding, ding !!!!!!!). final grade is a B.
okuma - you just saw the makira 50 two speed. it has a large offset handle grip from tiburon, it has corrosion x HD on all the non-exposed metal surfaces, grease on all but a few of the screws and a greased carbon fiber drag washer. the spool bearings are shielded and inadequately greased (ding) and the non-spool bearing are the same (ding). final grade is an A-.
penn - the v series internationals have gone through a series of design changes and the final product is very nice, and it has a greased carbon fiber drag waher. unfortunately, the spool bearings are shielded and oiled (ding), the side plate bearings are shielded and half greased (ding), there are plenty of dry spots in the reel to corrode (ding) and the handle grip does not have an offset (ding). final grade is a B.
shimano - currently, it is my opinion that the tiagra is the most reliable of the large two speed lever drags coming straight out of the box, but there is still room for improvement. it has an oddly shaped handle that will qualify as offset, so we're good there. the spool bearings are open and greased, but the freespool is adequate enough. you won't get 4 minutes of freespool, but not everyone in the world need 4 minutes of freespool. the working surface of the carbon fiber drag washer is greased, but the BACK IS NOT!!! this allows for salt corrosion to build up underneath the drag washer and the uneven surface that is created will cause the drags to stick (ding). there are plenty of dry spots in the reel to accumulate corrosion (ding). the side plate bearings are open and greased. they last longer than side plate bearings that are shielded and oiled, but they still do not have the longevity that i believe is needed. these bearings are good, but they will still fail (ding). final grade is a B+.
the other reels, daiwa, alutecnos, everol, and finnor, i do not have enough experience with, but i doubt that we would find an "A" or an "A+" in this group.
a few of you know that i am also a teacher. classroom dynamics never cease to amaze me. you have the smart kids, you have the slow kids, you have the bullies, and you have the ones that think they can slide by on looks alone. then you have the ones that are quiet, the ones that are constantly getting picked on, but have some real potential. with hard work and a little recognition, these kids can really shine. that's what i think about okuma and what they have done with their makira. their attention to detail is what i find most impressive. it is the level of quality that i would expect from an accurate costing more than twice as much. for the slackers in the class, the ones that think that "toyota" quality is good enough, i am more than happy to give out mediocre grades.
i believe that okuma would benefit if they would pay more attention to their bearings. if they do, i would be happy to finally give out an "A+!!!" alan