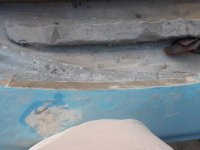
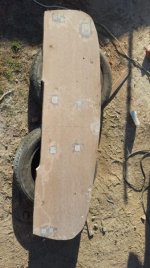
Forgot to mention that I also closed all the old holes on the boat and cut out the steering column to allow for the new centre console. The holes at the back of the transom and the old rod holder holes were filled with fibre glass paste and them covered with body filler that will be sanded down when I get around to respraying. This picture is of the steering column patch that I did. It will also be filled with body filler and sanded down to shape to keep the curvature of the boat. It is curved already. I achieved this buy putting in a piece of plexy glass and bending it to the shape I needed and glassed over it.
You are using an out of date browser. It may not display this or other websites correctly.
You should upgrade or use an alternative browser.
You should upgrade or use an alternative browser.
15ft Fishing boat facelift
- Thread starter robbo246
- Start date
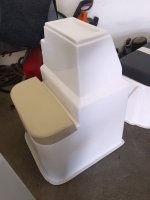
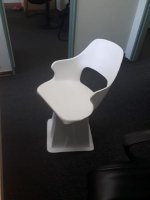
Well doing this I though about building my own center console but have seen other boats were guys have done this and the don’t look so good, so I found a place on gumtree that does them and ordered one all the way from the Eastern Cape. My one is like the one in picture except the vinyl is black mine has a back rest and plexy glass wind screen.
Attachments
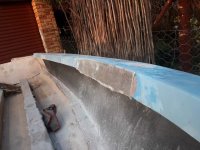
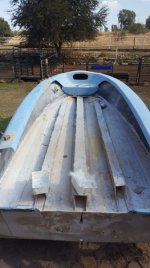
While the epoxy on the transom was curing I finished clearing out the last of the remaining deck to get ready for the new deck fitting. The new deck will be done with 9mm marine ply. This should happen time allowing in the next week or two. I must still buy the wood, but my two suppliers are only open during the week and I struggle to get around to them. This is the boat with the deck completely removed.
Attachments
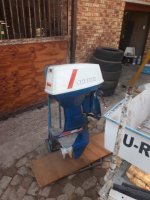
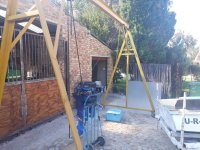
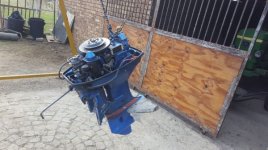
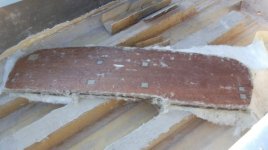
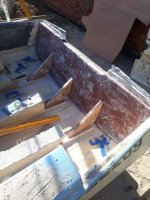
Once the epoxy and transom were completely cured I was able to start prepping the transom. I did a lot of research and decided my best way forward was to do cut outs where any penetration to the transom would occur and fill with resin before drilling. This would then mean that if water should one day try get in again it is met with fiber glass rather then wood. This transom should now last forever. The cut outs where done for the following – Motor Bolt, Eye bolts for securing to trailer, 2 drain plug for lower and upper deck, 2 cut out for splash well drains. Before cutting I secured the transom in place and hung the “new†motor a DT65 Suzuki from our A frame and marked where the holes would be when it was finally mounted. For information purposes a shot shaft transom is 40cm and a long shaft 50cm. The Suzuki is a short shaft. I also marked the new eye bolts holes and the drains for the deck and splash well. I then did a square shape around each marked hole and cut with a jig saw. You first drill a pilot hole with a 10mm drill bit in four corners to allow the blade in then you can start cutting.
Attachments
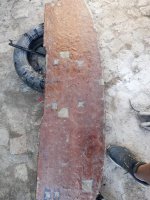
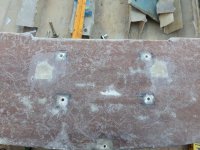
Once cut out the holes are filled with fiber glass resin. So, to make fiber glass resin you literally just cut up fiber glass with a scissors into small blocks and pull them apart into a loose fiber state. You them mix them into resin until you have the consistency that you want. You then fill your holes
Attachments
Once everything was dry I temporarily mounted the transom in and drilled through the holes for the future bolts. I also measured my upright supports and cut them from the same 12mm Marine Ply wood. I also laminated 2 pieces together with 2-part epoxy for extra support. The original transom only had 2 uprights, so I added a 3rd to make it stronger.
Attachments
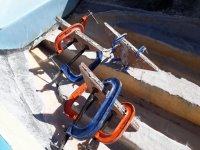
This weekend I will remove the transom again and join these directly to the transom board with long screws through the back and cover with glass directly onto the transom. I will then finally mount the transom to the old fibre glass back board. I will do this using peanut butter fiber glass resin. I will give the recipe next week.
Attachments
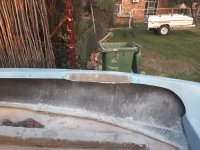
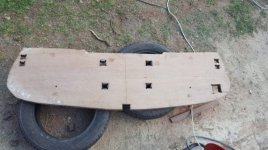
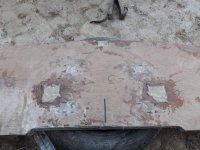
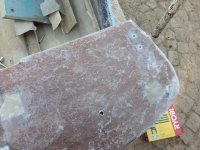
The two holes at the top are for the eye bolts. The big hole in the middle is how I’ve temporally mounted the transom. I will also use these to clamp it in during final mounting. At the end these two will be filled up and closed as they will not be needed then
Attachments
Hi There Robbo246, here i thought i was the only one that got taken for a ride by the "Centurion guys" same thing happened with me, spent 13k on a service and COF, got to Loskop and couldn't do a single thing as the outboard would cut out as soon as we hit plane, and also the heat sensor would scream? so needless to say the rest of the weekend was spent fishing from the shore.
I had taken the boat straight back to the Centurion guys on the Sunday, was later quoted another R12K to replace a number of parts... can't recall what exactly? i then refused and said I paid for a service and that is what I expect. so they called 2 weeks later saying they had sorted the outboard so when I had arrived they had the boat on their test tank, ran the outboard and accelerated showing they had resolved the overheating issue..
I was still suspect though so THANKFULLY I took the boat straight to Mobile marine services around the corner from these chaps, and I am so grateful I did!! Craig and his technicians had done a thorough report on my outboard only to find that there were bits of the old impeller stuck in the cooling jacket of the head, hens the overheating etc. AND.. to top it all off, these Centurion guys had removed my heat sensor before calling me to claim they had sorted the outboard out! they are absolute sharks and will ring you for your last R5....